

Table of Contents
- 1. Classic Home Theater With a Dedicated Projector Wall
- 2. Small Basement Entertainment Room Ideas That Feel Spacious
- 3. Basement Projector Screen Ideas: Retractable, Fixed, and Ultra-Short-Throw
- 4. Projector Versus TV for a Basement: Which Fits Your Room?
- 5. Multi-Use Entertainment Zones: Gaming, Sports, and Family Movie Nights
- 6. Lighting, Acoustics, and Comfort for Your Entertainment Basement
- 7. Budget Tiers and Phased Upgrades for a Basement Projector Setup
- Conclusion: Planning Your Entertainment Basement With a Projector Screen
- Frequently Asked Questions
Last Updated: October 6, 2026
1. Classic Home Theater With a Dedicated Projector Wall
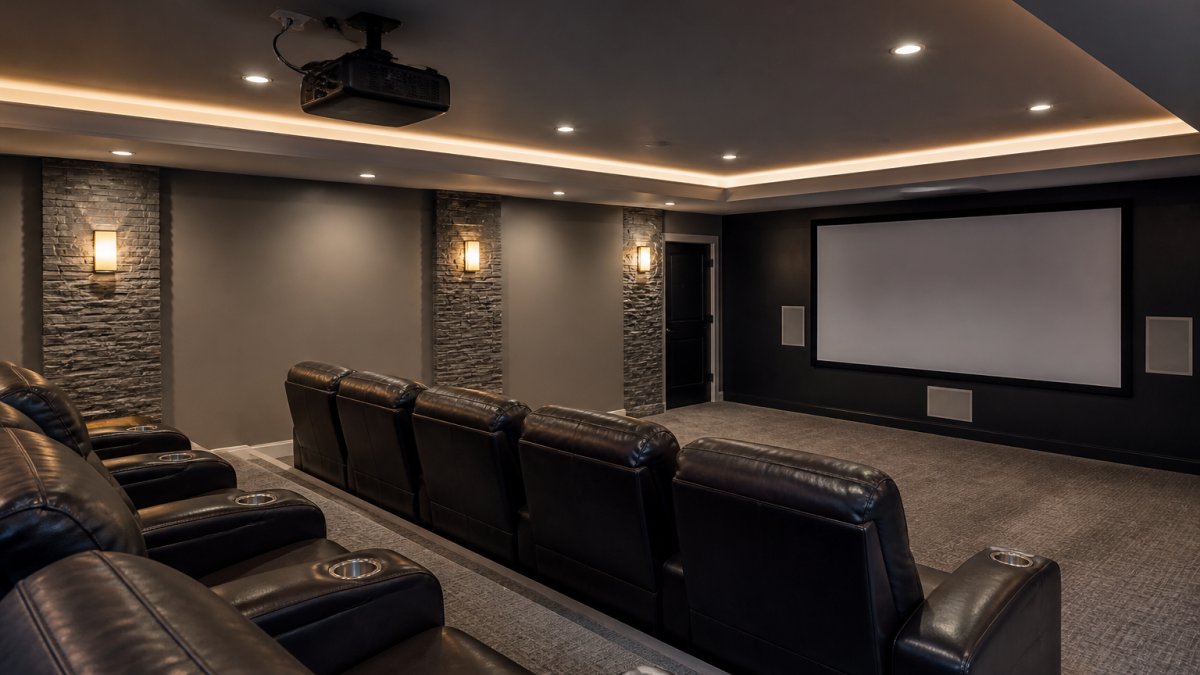
A classic home theater is the gold standard for an entertainment basement, and it starts with one smart choice: a dedicated projector wall. This setup turns a blank basement wall into a cinema screen. Berry Basements has finished lower levels since 2017.
The idea is simple. Pick one wall, keep it dark, and build everything around it. Seating faces the screen. Speakers flank it. Lights stay off it.
Screen Size and Viewing Distance for a Theater Room
Get the screen size right and the room works. Get it wrong and you’ll strain your eyes or waste wall space.
A common approach is to sit roughly 1.5 times the screen width away. So a 100-inch screen pairs well with about 12 feet of viewing distance. For a 120-inch screen, plan for 14 to 15 feet.
A few rules that hold up in practice:
- Measure from screen to the front row first, not the back
- Keep the bottom of the screen about 24 to 36 inches off the floor
- Leave at least 18 inches behind the front row for foot traffic
- Match screen height to your ceiling, not just your wall width
Most basements have 8 to 9 foot ceilings. That’s plenty for a 100 to 120-inch screen. Go bigger only if the room is deep enough to back the seating up.
If you’re unsure, tape the screen outline on the wall with painter’s tape. Live with it for a week. You’ll know fast if it feels too big or too small.
2. Small Basement Entertainment Room Ideas That Feel Spacious
A small basement can still feel like a real entertainment room. The trick is to stop treating square footage as the limit and start treating layout as the tool. Small basement entertainment room ideas work best when every piece of furniture earns its spot.
Start with these moves:
- Choose a retractable screen so the wall does double duty
- Use a sectional instead of two couches
- Mount speakers in the ceiling to free up floor space
- Pick light wall colors to bounce ambient light
The goal is simple. One room, many uses. Movie night on Friday. Game day on Sunday. A quiet corner the rest of the week.
Space Optimization Tricks: Retractable Screens and Multi-Use Furniture
A retractable screen is the single best upgrade for a small basement. Roll it up and the wall becomes a normal living space again. No black rectangle staring at you during the day.
Pair it with furniture that does more than one job:
- An ottoman with storage for blankets and remotes
- A sofa bed for guest overflow
- A console that hides the projector and cables
- Floating shelves instead of a bulky media cabinet
Mount the projector on the back wall, not the ceiling, in a small room. It keeps the sightline clear and cuts down on the “big box overhead” feel that makes tight spaces feel tighter.
One more thing. Cable management matters more in a small room. Cluttered wires make a space feel cramped. Run cables through the wall or behind baseboards.
3. Basement Projector Screen Ideas: Retractable, Fixed, and Ultra-Short-Throw
Basement projector screen ideas come down to three real choices: retractable, fixed, and ultra-short-throw. Each one fits a different room and a different budget. Pick the one that matches how you actually use the space.
| Screen Type | Best For | Wall Impact | Setup Complexity |
|---|---|---|---|
| Fixed frame | Dedicated theater rooms | Permanent | Moderate |
| Retractable | Multi-use rooms | Disappears when up | Moderate |
| Ultra-short-throw | Small or bright rooms | Sits on a console | Low |
A fixed screen gives the best picture because the surface stays perfectly flat. A retractable screen trades a little quality for flexibility. An ultra-short-throw projector sits inches from the wall, so no one walks through the beam.
Throw Distance, Ceiling Height, and Projector Placement Constraints
Throw distance is the gap between the projector lens and the screen. Every projector lists a range, and staying inside it keeps the image sharp and correctly sized.
Watch these constraints before you commit:
- Ceiling height: A ceiling mount needs clearance above head height
- Throw ratio: A short-throw unit needs less depth than a standard one
- Beam path: Nothing should cross in front of the lens
- Ventilation: Projectors need airflow, so don’t box them in
An ultra-short-throw projector solves most of these problems at once. It sits on a console right under the screen. No ceiling mount, no long throw, no beam to duck under.
Skipping a moisture check before you install a projector is a costly mistake. Basement humidity can fog a lens and shorten the life of the electronics. Fix water issues first, then build the theater.
4. Projector Versus TV for a Basement: Which Fits Your Room?
Projector versus TV for a basement is really a question about size, light, and mood. A projector wins on screen size and cinema feel. A TV wins on brightness and simple setup.
Here’s the honest breakdown:
Go with a projector if:
- You want a screen over 85 inches
- You can control the room’s ambient light
- Movie nights are the main event
- You like the cinema feel
Go with a TV if:
- The room gets a lot of daylight
- You watch casual TV throughout the day
- You want zero setup fuss
- The wall is small
The Consumer Technology Association display guidance notes that screen size and room lighting drive most viewing decisions. That matches what we see on site. Light control is the deciding factor.
For most dedicated entertainment basements, a projector is the better pick. You get a huge picture for less than a big TV. But if the room stays bright, a wall-mounted TV is the safer call.
5. Multi-Use Entertainment Zones: Gaming, Sports, and Family Movie Nights
One basement can serve three crowds if you plan the zones. Gaming, sports, and family movie nights each need slightly different setups. The good news is they can share one screen and one sound system.
Think in zones:
- Gaming corner: Low latency matters, so wire the console directly
- Sports zone: Wide seating with clear sightlines to the screen
- Movie zone: Recliners arranged for the best viewing distance
A large screen handles all three. A high-definition projection keeps games sharp and text readable. For sports, a bigger screen beats a sharper small one every time.
The best multi-use basements share one large screen and one surround sound system. Adding a second screen usually splits the room and wastes the budget.
Add comfortable seating that works for a two-hour movie and a four-hour game day. Recliners with cup holders are the crowd favorite for a reason.
6. Lighting, Acoustics, and Comfort for Your Entertainment Basement
Lighting, sound, and comfort decide whether an entertainment basement gets used or ignored. A great picture on a hard, echoey, glaring room still feels wrong. Fix these three and the room comes alive.
Lighting control:
- Use dimmers on every light
- Add ambient light behind the screen for eye comfort
- Keep can lights off the screen surface
- Blackout shades for daytime movie watching
Acoustics:
- Add soft surfaces: rugs, curtains, upholstered seating
- Use acoustic treatment on the first reflection points
- Seal gaps around doors to cut sound transfer
- Consider soundproofing if the room sits under bedrooms
Comfort:
- Recliners with good lumbar support
- A small side table between seats
- A throw blanket basket for cooler months
- Temperature control, since basements run cool
The U.S. Department of Energy guidance on basement moisture points out that managing dampness protects both comfort and equipment. That matters here. Moisture and electronics don’t mix, and neither do moisture and upholstery.
7. Budget Tiers and Phased Upgrades for a Basement Projector Setup
You don’t have to build the whole theater at once. Phasing the project keeps the budget manageable and lets you spread the cost. A finished basement with a home theater is a big investment, and doing it in stages is a smart way to get there.
Here’s how we’d phase it:
| Phase | What to Do | Why It Comes First |
|---|---|---|
| 1 | Waterproofing and moisture control | Protects everything you add later |
| 2 | Electrical, lighting, and outlets | Cheaper before drywall goes up |
| 3 | Walls, ceiling, and flooring | Sets the room’s look and sound |
| 4 | Screen, projector, and audio | The fun part, once the shell is ready |
| 5 | Seating and finishes | Comfort and style last |
Phase 1 is non-negotiable. Skip waterproofing and every upgrade above it is at risk. This is where a licensed contractor earns their keep.
A common mistake is buying the projector first. It’s the most exciting purchase, so it feels like the right place to start. But the room has to be ready to receive it. Get the shell right, then buy the gear.
Wire for more than you need today. Run extra conduit and outlets during phase 2. Adding a second screen or a gaming setup later is easy if the wiring is already there.
For current pricing on a finished basement package, request a quote. Costs depend on room size, moisture work, and finish level.
Conclusion: Planning Your Entertainment Basement With a Projector Screen
Turning a lower level into a real entertainment basement takes planning, not luck. The best rooms start with moisture control, then layer in lighting, sound, and a screen that fits the space. Get those basics right and the rest falls into place.
Berry Basements has finished basements in the area since 2017, and we handle the hard parts: waterproofing, structural work, and the HVAC and plumbing that trip up most DIY projects. We work with you on the layout so the room matches how your family actually lives.
Ready to plan your space? Get a free estimate from Berry Basements and turn that unused lower level into the room everyone gathers in.
Frequently Asked Questions
Is a projector better for a basement than a TV?
For most basements, a projector wins on screen size and cinematic feel, especially if you can control ambient light. A 100-inch or larger image costs far less than a comparable TV. A TV still makes sense if your basement has bright, uncontrolled light or if you want a simpler setup with no throw distance planning. Many homeowners combine both: a projector for movie nights and a wall-mounted TV for everyday viewing.
How do I set up a projector screen in a basement with low ceilings?
Low ceilings are common in basements, so ultra-short-throw projectors are often the best fit. They sit inches from the wall and eliminate the long throw distance a standard projector needs. For a fixed screen, mount it so the bottom edge sits at or slightly above seated eye level. Measure ceiling height minus screen height before ordering, and keep at least 12 to 18 inches of clearance above the screen for mounting hardware.
What lighting works best in a basement home theater?
Layered lighting gives you the most flexibility. Use dimmable recessed lights on separate zones, add LED strip lighting behind the screen for bias lighting, and install blackout shades if any windows exist. For projector use, you want near-total darkness on the screen wall but enough ambient light to move around safely. Smart dimmers let you switch between movie mode, game mode, and cleanup mode with one tap.
Can a small basement entertainment room still fit a projector screen?
Yes. A small basement can work well with a retractable screen that rolls up when not in use, or with a short-throw projector that needs only a few feet of distance. Choose a screen size based on viewing distance: roughly 1.5 to 2.5 times the screen height for comfortable viewing. Multi-use furniture, wall-mounted speakers, and built-in cabinetry keep floor space open and make the room feel larger.
A note on the numbers: This article avoids specific prices and statistics on purpose. Basement costs and projector specs vary too much by room, and we’d rather give you a real number after a walkthrough than a guess that doesn’t hold up.