

Table of Contents
- Assess Your Basement’s Moisture Problem
- How to Waterproof a Damp Basement Before Finishing
- Control Condensation and Humidity in Your Basement
- Best Basement Flooring for Moisture Environments
- Understanding Basement Moisture Mitigation Costs
- The Dangers of Finishing a Damp Basement Without Preparation
- Your Post-Finish Maintenance Schedule
- Conclusion
Last Updated: August 25, 2026
Assess Your Basement’s Moisture Problem
The first step to finishing a basement with moisture issues isn’t picking out paint colors or choosing flooring, it’s understanding exactly what you’re dealing with. Many homeowners rush into renovation without properly diagnosing their moisture problem, only to discover mold, structural damage, or failed finishes months later. At Berry Basements, we prioritize a collaborative process, working closely with clients to ensure every professional renovation reflects their unique vision and enhances family enjoyment and home value. The good news: with the right assessment, you can determine whether your basement is ready to finish or needs waterproofing first.
Moisture in basements manifests in multiple ways, and identifying the source is critical. Is water actively seeping through cracks? Are you seeing efflorescence, that white, chalky residue on concrete? Is the air simply humid with no visible water? Each source requires a different solution, and getting this wrong means your finished basement won’t last.
Identify moisture sources
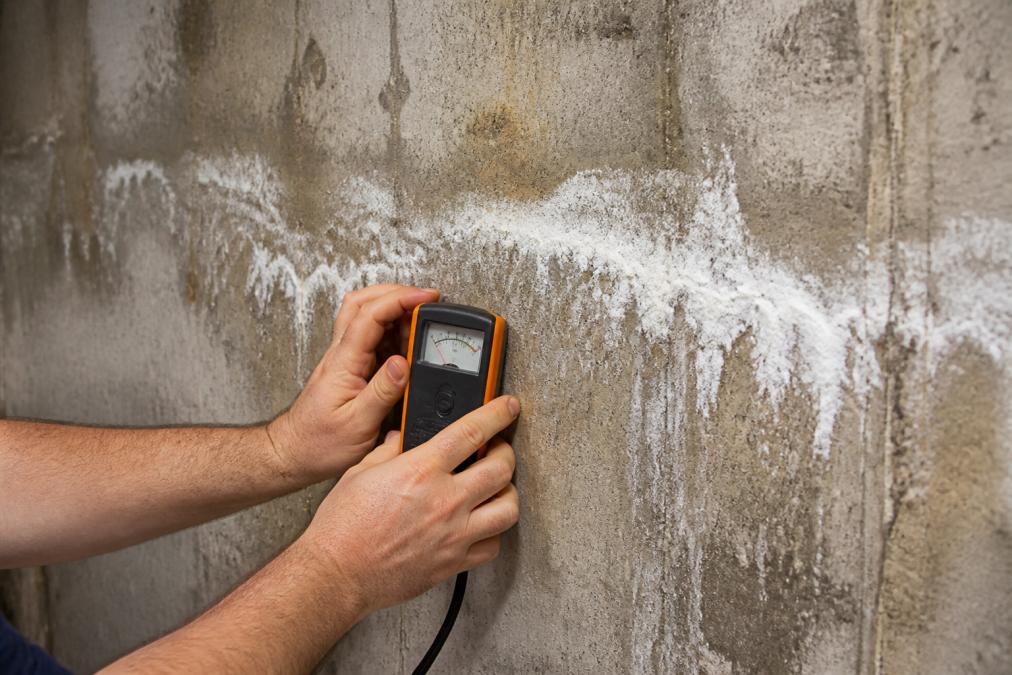
Start by examining your basement walls and floor carefully. Look for active water seepage, especially after heavy rain. Check corners, the foundation-wall joint, and any cracks in the concrete. Efflorescence indicates that water is moving through the concrete and depositing mineral salts on the surface, a sign of hydrostatic pressure pushing moisture from outside.
Next, inspect the exterior. Walk around your home and check your gutters, downspouts, and grading. Gutters that are clogged or have gaps allow water to cascade down your foundation walls instead of being directed away. Downspouts should extend at least 4-6 feet away from the foundation. If your yard slopes toward the house rather than away from it, water naturally gravitates toward your basement. Poor grading is one of the most common, and easiest to fix, moisture problems.
Inside, look at your basement’s relative humidity. On a humid summer day, does the air feel damp? Do you notice musty odors? These are signs of condensation and elevated moisture levels, even without visible water intrusion.
Test moisture levels with a meter
Don’t guess about moisture levels, measure them. A moisture meter is an inexpensive tool that gives you concrete data. You can rent or purchase one for under $50. Press the meter against your concrete walls and floor in multiple locations. Concrete that’s been properly waterproofed and dried typically reads below 3% moisture content (peer-reviewed research). Anything above 5% suggests ongoing moisture infiltration or condensation issues.
Test several spots: the floor, lower walls, and areas near the foundation-wall joint where water pressure is typically highest. Record your readings. If you’re planning to hire a professional like Berry Basements, bring these measurements with you, they’ll help contractors understand the scope of the problem and recommend the right waterproofing approach.
How to Waterproof a Damp Basement Before Finishing
Once you’ve identified your moisture sources, you need to address them before finishing. This is non-negotiable. Finishing a wet basement without waterproofing is like painting over rust, the problem will return, and your investment will be destroyed. The goal is to stop water from entering and to manage any moisture that does get in.
Exterior water management and grading
The most effective waterproofing happens outside. Water that never reaches your foundation wall doesn’t need to be managed inside. Start with your grading. Soil should slope away from your house at a rate of at least 1 inch per foot for the first 6-10 feet (fema.gov). If your yard is flat or slopes toward your foundation, regrading is essential. This is a significant project, but it’s often cheaper than installing interior drainage systems.
Next, address your gutters and downspouts. Clean gutters quarterly and inspect them for gaps or separation. Downspout extensions should carry water at least 4-6 feet away from your foundation, further if possible (the CDC). Some homeowners use underground downspout extensions (splash blocks or buried drain lines) to move water even farther away. This simple step eliminates one of the most common sources of basement moisture.
If you have a basement with a crawl space foundation, ensure proper ventilation and drainage in that space as well. Moisture from a crawl space migrates upward into your basement walls through capillary action, the tendency of moisture to move through porous materials against gravity.
Interior drainage systems and sump pumps
If exterior grading and gutter work aren’t enough, you’ll need interior drainage. An interior drainage system (often called a "French drain" or "perimeter drain") runs along the inside of your basement’s perimeter. It collects water that seeps through the foundation wall and directs it to a sump pump, which then pumps it away from your home.
The system works like this: contractors cut a trench along the basement perimeter, install a drainage pipe with a gravel bed, and connect it to a sump pit. When water accumulates in the pit, the sump pump activates and expels it away from your foundation. This approach is effective for managing hydrostatic pressure and ongoing seepage.
A sump pump is essential if you have an interior drainage system. Submersible pumps sit inside the sump pit and are more compact, while pedestal pumps sit above the pit and are easier to access for maintenance. Either way, ensure your pump has a backup power source (battery backup) in case of power outages during heavy rain. Also install a check valve to prevent water from flowing backward into your basement.
Vapor barriers and moisture barriers
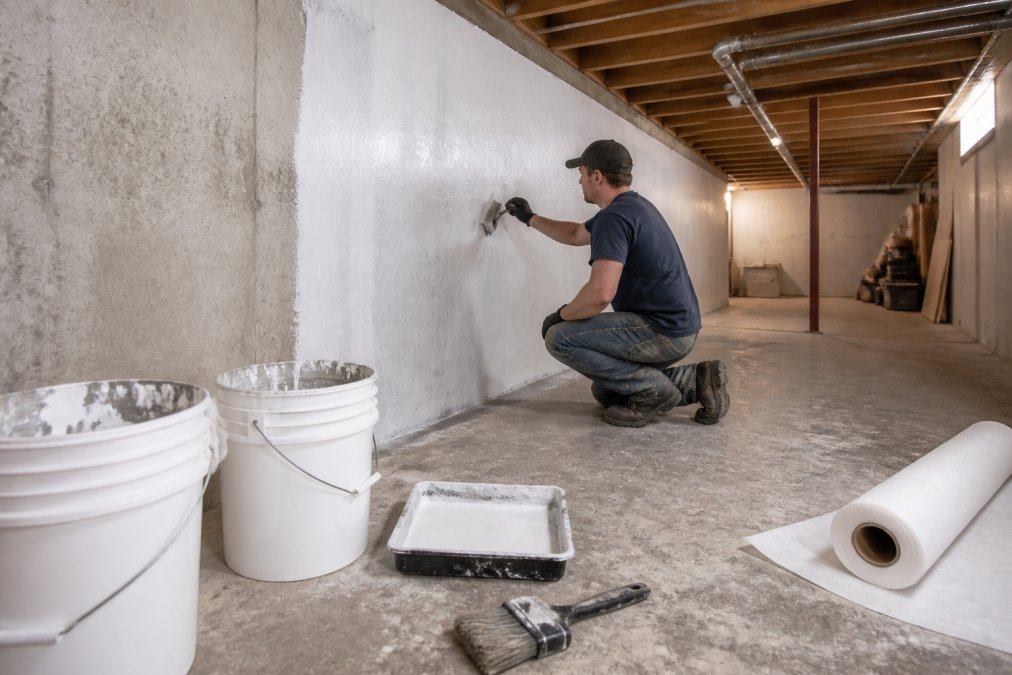
After addressing active water intrusion, you need to manage moisture vapor. A vapor barrier (also called a vapor retarder) is a plastic or foil layer that slows moisture vapor movement through walls and floors. This is different from a waterproofing membrane, which stops liquid water.
The confusion between vapor barriers and waterproofing membranes trips up many homeowners. A waterproofing membrane is a thick, flexible layer applied to exterior foundations or interior basement walls to block liquid water and hydrostatic pressure. A vapor barrier is a thin plastic sheet installed under flooring or behind drywall to reduce moisture vapor transmission.
For basement finishing, you’ll typically use both. First, apply a waterproofing membrane to any areas with active moisture or high hydrostatic pressure. Then, install a vapor barrier under your flooring (typically 6-mil polyethylene sheeting) and behind your walls before installing drywall. This two-layer approach, waterproofing for liquid water, vapor barrier for vapor, is the industry standard.
Control Condensation and Humidity in Your Basement
Even after waterproofing, basements often struggle with condensation and high relative humidity. This happens because basements are cooler than the air above, and cool surfaces attract moisture from humid air. In summer, when warm, humid outdoor air meets cool basement walls and pipes, condensation forms.
The solution is dehumidification and ventilation. A dehumidifier removes moisture from the air and is essential in basements, especially during humid months. Size your dehumidifier to your basement’s square footage, undersized units won’t keep up with moisture production. Run it continuously during humid seasons and monitor the moisture level. Your goal is to keep relative humidity below 55%, ideally between 30-50%.
Ventilation also helps. If your basement will have windows, open them on cool, dry days to exchange humid indoor air for drier outdoor air. If you’re finishing your basement with a bedroom or living space, ensure your HVAC system includes basement return air ducts. This allows your home’s air conditioning system to dehumidify the basement along with the rest of your house.
Air sealing is another critical step. Seal cracks around rim joists, band boards, and penetrations (where pipes and electrical lines enter the basement). These gaps allow moist air from the soil to infiltrate your basement. Caulk and weatherstripping are inexpensive tools that significantly reduce moisture infiltration.
Best Basement Flooring for Moisture Environments
Choosing the right flooring is critical when moisture is a concern. Not all flooring materials handle moisture equally. Wood and standard drywall are poor choices for damp basements because they absorb moisture, swell, and eventually fail.
Concrete is your baseline. If your basement is properly waterproofed and dehumidified, you can polish, stain, or seal concrete for a finished look. Epoxy and polyurethane coatings are moisture-resistant and durable. They create a sealed surface that resists water and vapor.
Luxury vinyl plank (LVP) and vinyl tile are excellent moisture-resistant options. They’re waterproof, affordable, and available in styles that mimic wood or stone. Install them over a moisture barrier for maximum protection. Ceramic and porcelain tile are also moisture-resistant, though they’re colder underfoot and require proper substrate preparation.
Avoid standard hardwood and laminate unless your basement is completely dry and dehumidified. These materials are susceptible to swelling and warping from moisture. If you want a wood aesthetic, engineered hardwood (which has a plywood base) is more stable than solid wood, but it still requires excellent moisture control.
When installing any flooring, always use a moisture barrier underneath, typically 6-mil polyethylene sheeting. This prevents moisture vapor from rising through the floor and damaging the finished surface from below. This step is often skipped but is absolutely critical in moisture-prone basements.
Understanding Basement Moisture Mitigation Costs
The cost of addressing basement moisture varies widely depending on the source and severity. Simple fixes like regrading, gutter repair, and downspout extensions might cost a few hundred dollars. Interior drainage systems with sump pumps typically range from several thousand dollars, depending on your basement’s perimeter and complexity.
Professional waterproofing, applying membranes, sealing cracks, and installing interior drainage, is a significant investment. The cost depends on your basement’s size, the extent of moisture damage, and whether you need exterior work like foundation excavation and waterproofing. Get multiple quotes from licensed contractors like Berry Basements, who can assess your specific situation and provide accurate estimates.
Budget for moisture mitigation before you budget for finishing. A $5,000 waterproofing investment protects a $50,000 renovation. Skipping waterproofing to save money upfront often results in much larger costs down the road when moisture damages your finished basement.
The Dangers of Finishing a Damp Basement Without Preparation
Finishing a basement with unaddressed moisture is genuinely risky. Here’s what happens: you install drywall, flooring, and insulation over a damp foundation. The damp concrete and surrounding soil continue to release moisture vapor into your new walls. Your drywall absorbs this moisture, becomes soft, and fails. Mold grows in the damp insulation and drywall cavity. Your flooring buckles or delaminates. Within 1-3 years, your finished basement is compromised.
Beyond the financial loss, mold in your basement poses health risks. Mold spores spread throughout your home’s air system and can trigger respiratory issues, allergies, and asthma. Mold remediation is expensive and disruptive, far more so than addressing moisture before finishing.
Structural damage is another risk. Persistent moisture weakens concrete, promotes rust in steel reinforcement, and can eventually compromise your foundation’s integrity. This affects your entire home’s value and safety.
The psychological impact matters too. Homeowners who finish damp basements often spend years anxious about moisture, dealing with recurring problems, and regretting their investment. This is entirely preventable with proper upfront assessment and waterproofing.
Your Post-Finish Maintenance Schedule
After finishing your basement, moisture management doesn’t stop. Establish a maintenance routine to keep your newly finished space dry and healthy.
Monthly: Check your sump pump by pouring water into the pit to ensure it activates and drains properly. Listen for unusual noises that might indicate pump failure.
Quarterly: Clean your gutters and downspouts, especially in fall when leaves accumulate. Inspect gutters for separation or gaps.
Seasonally: Before humid summer months, run a dehumidifier test. Before heavy rain seasons, inspect your basement for signs of seepage or condensation. After heavy rain, check your basement for any new moisture issues.
Annually: Have a professional inspect your waterproofing system, sump pump, and drainage. Test your moisture levels with a meter. Check basement walls for new cracks or signs of efflorescence.
Every 2-3 years: Reapply sealant or coating to concrete floors if you’ve chosen that finish. Inspect vinyl flooring seams for water infiltration. Check insulation for any signs of moisture damage.
This maintenance schedule prevents small issues from becoming major problems. A $100 annual inspection is far cheaper than a $10,000 mold remediation or a failed renovation.
Finishing a basement with moisture issues is achievable, but it requires a methodical approach. The key is addressing moisture before you add finishes, not after. Start with a thorough assessment using a moisture meter, identify the source (exterior grading, interior seepage, or condensation), and implement the right waterproofing and dehumidification strategy. Then choose moisture-resistant materials and establish a maintenance routine.
Berry Basements specializes in exactly this work: assessing moisture problems, implementing comprehensive waterproofing solutions, and finishing basements that last. Our licensed contractors have managed complex moisture issues on projects across the region since 2017. We handle everything from exterior grading and interior drainage to vapor barriers, dehumidification, and the final finishes, ensuring your basement renovation is built on a dry, stable foundation. Get a free estimate to discuss your basement’s moisture situation and explore finishing options that work for your home.
Frequently Asked Questions
Q: Can you finish a basement that has had water leaks?
A: Yes, but only after you address the moisture source and implement proper waterproofing. Water leaks indicate active moisture infiltration through hydrostatic pressure, seepage, or condensation. You must install interior drainage systems, vapor barriers, and ensure exterior grading directs water away from the foundation. Once these systems are in place and moisture testing shows acceptable levels, finishing can proceed safely. Skipping waterproofing risks mold, structural damage, and material failure.
Q: What are the signs of moisture issues in a basement?
A: Common indicators include efflorescence (white mineral deposits on concrete), visible seepage or standing water, musty odors, mold or mildew growth, peeling paint, rust stains on metal, and damp walls or floors. You may also notice condensation on pipes or windows, especially in summer. Relative humidity above 60% signals moisture problems. Use a moisture meter to test concrete and framing, readings above 16% indicate conditions too wet for finishing. These signs point to capillary action, poor drainage, or inadequate vapor control.
Q: How much does it cost to fix moisture in a basement?
A: Basement moisture mitigation costs vary significantly based on the severity and scope of work. Simple solutions like improved grading and gutter maintenance may cost a few hundred dollars. More comprehensive approaches, interior drainage systems, sump pump installation, vapor barriers, and waterproofing membranes, typically range higher. Professional assessment is essential to determine your specific needs. Contact Berry Basements for a free estimate tailored to your basement's moisture profile and finishing goals.
Q: What should I use to absorb moisture in my basement?
A: Dehumidifiers are the most practical tool for managing relative humidity after waterproofing measures are in place. They work best alongside vapor barriers and proper ventilation to prevent condensation. Avoid relying on passive moisture absorbers alone, they address symptoms, not the root cause. Combine dehumidification with exterior water management (gutters, downspout extensions, grading), interior drainage systems, and vapor barriers. Once moisture sources are controlled and finishing materials are installed, a dehumidifier maintains the environment and protects your investment long-term.
This article was written using GrandRanker