

Table of Contents
- Start With a Modern Basement Layout Design That Works for a Crowd
- Plan Moisture Control and HVAC Before Anything Else
- Finished Basement Lighting Ideas That Set the Mood
- Basement Wet Bar Design Trends for Easy Hosting
- A Basement Home Theater Setup Guide for Movie Nights
- Budget-Tier vs. Luxury-Tier Planning and Accessibility
- Conclusion
- Frequently Asked Questions
Last Updated: September 30, 2026
Start With a Modern Basement Layout Design That Works for a Crowd
A basement built for entertaining succeeds or fails on its layout long before anyone picks a paint color. Learning how to design a basement for entertaining starts with one question: how will people move through the room when it’s full?
Most homeowners plan furniture first and traffic flow last. That’s backwards. At Berry Basements, we’ve finished lower levels since 2017, and the projects that host best put zoning first.
A finished basement shares the structural footprint of the home above it, so your layout is bounded by load-bearing posts, stair placement, and mechanical equipment.
Zoning the Space: Entertainment, Seating, and Service Areas
Basements rarely have enough square footage for one giant open room, so zoning does the work. A common approach is three zones: entertainment, seating, and service.
- Entertainment zone: the screen, the game table, or the music setup. Put it against a solid wall.
- Seating zone: conversation seating that faces the entertainment but doesn’t block the path to it.
- Service area: the wet bar, mini fridge, and counter where drinks get made and food gets set down.
Place the service area on the opposite side of the room from the stairs. Guests naturally drift toward the entry point, so putting the bar there creates a permanent traffic jam.
Plan Moisture Control and HVAC Before Anything Else
Moisture control comes before design decisions. A damp basement ruins furniture, flooring, and electronics no matter how good the room looks.
Finishing walls over an unresolved moisture problem traps water behind drywall. The fix then means tearing out the new room to find the leak. Test first, frame second.
Finished Basement Lighting Ideas That Set the Mood
Finished basement lighting ideas should solve one problem first: basements get almost no natural light, so every layer must be deliberate.
Layering Ambient, Task, and Accent Light
- Ambient light: recessed fixtures or a few large fixtures that lift the whole room out of shadow. This is your base.
- Task light: pendants over the bar, under-cabinet strips on the counter, a reading lamp near seating.
- Accent light: LED strips behind the screen, wall washers on an accent wall, or shelf lighting on display shelving.
Put every layer on dimmer switches. A room that hosts movie nights and birthday parties needs to shift from bright to low without swapping bulbs. Warm bulbs in the 2700K to 3000K range read as cozy; cooler temperatures read as clinical.
Basement Wet Bar Design Trends for Easy Hosting
Basement wet bar design trends point toward compact, hardworking bars rather than sprawling ones. A wet bar is a small counter area with a sink and running water, and it earns its keep by keeping guests out of the upstairs kitchen. What separates a bar that hosts well from one that just looks good is the plumbing and clearance planning done before the cabinets arrive.
The Plumbing Reality Behind a Wet Bar
A wet bar needs three things a dry bar does not: a drain, a supply line, and a vented path for the drain to reach the main stack. Below grade, that usually means a sewage ejector pump or an up-flush macerating pump, because the basement floor sits below the main sewer line. A licensed plumber sizes the pump to the fixture load, typically a bar sink plus a beverage fridge drain, and sets the basin into a break in the slab.
Sizing the Bar for a Crowd
The counter itself follows a few dimensions that most homeowners get wrong on the first pass:
- Bar height: 42 inches for a standing bar, 36 inches for a seated bar with stools. Pick one and stay consistent, mixing heights in a small basement looks accidental.
- Counter depth: 24 inches minimum for a working bar with a sink; 18 inches is enough for a pure display ledge.
- Clearance behind stools: 32 to 36 inches from the counter edge to the nearest wall or furniture so guests can pull stools out without hitting anything.
- Aisle in front of the bar: 42 inches minimum if the bar is a pass-through serving station; 36 inches if it’s against a wall.
What’s Actually Trending
Trends have moved toward darker cabinetry, stone or quartz counters, and a backsplash that doubles as an accent wall behind the bar. Under-bar lighting and a lit shelf make the setup look intentional. Two shifts worth noting:
- Beverage-specific refrigeration. A dedicated beverage fridge, often a 24-inch undercounter unit, has replaced the second full-size refrigerator in most plans. It holds cans, bottles, and mixers at the right temperature without stealing floor space.
- Ice that doesn’t come from a tray. A built-in ice maker or a clear-ice machine is the upgrade guests notice most, because it removes the mid-party run upstairs for ice.
The single upgrade that changes how a basement bar functions is a second small refrigerator dedicated to beverages. It removes the reason guests climb the stairs mid-party.
Do not frame the bar wall until the plumber has confirmed the drain route and pump location. Moving a drain after drywall means cutting the slab again, and that means redoing the floor.
Put the bar on a dedicated 20-amp circuit with GFCI protection. A beverage fridge, ice maker, and under-cabinet lighting on one shared circuit will trip the breaker the first time someone runs all three.
A Basement Home Theater Setup Guide for Movie Nights
A basement home theater setup guide starts with one decision: projector screen or large television. Both work; the right answer depends on room size, seating distance, and light control.
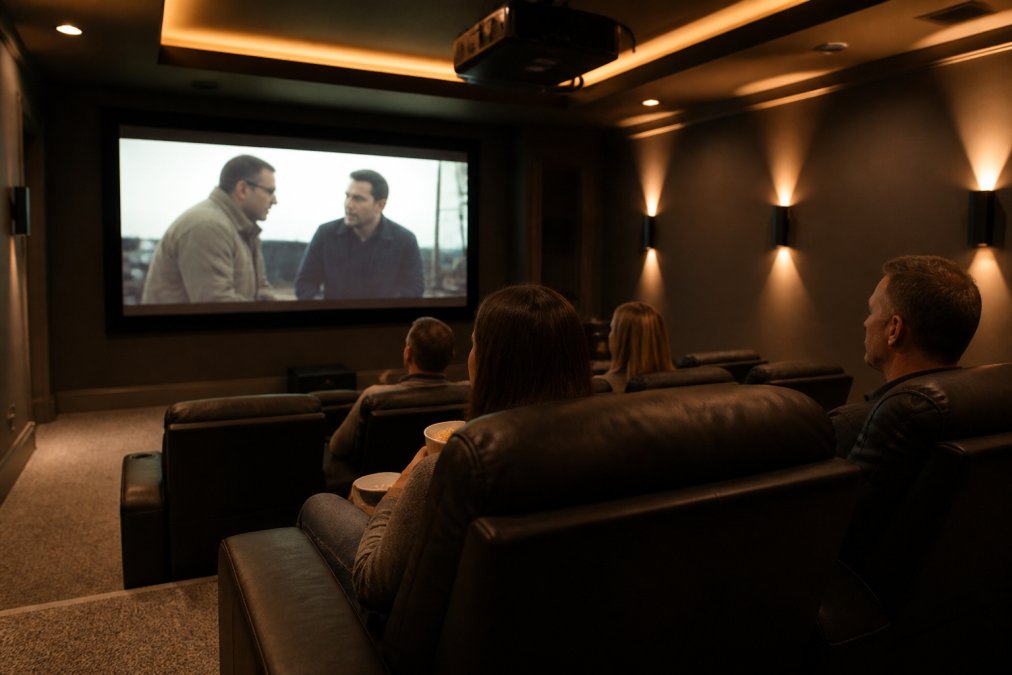
Screen Size, Seating Distance, and Throw Distance
Screen size is set by how far the farthest seat sits from the wall. A common rule of thumb is a viewing distance of roughly 1.5 to 2.5 times the screen’s diagonal for a projector, and 1.2 to 1.5 times for a 4K television. With 10 feet from back wall to screen wall, that puts you in the 65- to 85-inch range for a TV, or a 100- to 120-inch projector screen if the room can go dark.
Seating Geometry That Actually Works
Tiered or angled rows let everyone see the screen without craning. The mechanics:
- Row spacing: 5 to 6 feet from the back of one row to the back of the next when recliners are fully extended. Recliners need roughly 3 feet of clearance behind them to recline without hitting the row behind.
- Row rise: a 6- to 12-inch platform step per row gives the second row a clear sightline over the first. A 7-inch rise is the most common residential choice.
- Screen height: the bottom of the screen should sit roughly at eye level for the middle row. That usually means 28 to 36 inches off the finished floor.
- Seat angle: keep the farthest seats within about 30 degrees off the screen’s centerline. Beyond that, the image distorts and the side seats feel like penalty seats.
Soundproofing and Acoustics That Keep the Party Downstairs
Soundproofing keeps basement noise from traveling up through the floor and out of the house. Acoustics keep the sound inside the room clean.
Run speaker wire and conduit for a future projector during framing, even if you’re installing a television today. Adding it later means opening finished walls.
Do not mount a projector against a ceiling joist without checking the joist direction first. A projector mounted across the joists needs a different bracket than one mounted parallel to them, and the wrong bracket puts the lens off-center.
Budget-Tier vs. Luxury-Tier Planning and Accessibility
Budget and luxury versions of the same basement differ in scope, not fundamentals. Moisture control, HVAC, and electrical layout are non-negotiable at every tier; what changes is finishes, fixtures, and custom millwork.
| Tier | Where the Money Goes | What You Get |
|---|---|---|
| Budget | Moisture fixes, basic HVAC, standard finishes | Functional entertainment room, dry bar, recessed lighting |
| Mid-range | Wet bar plumbing, layered lighting, better flooring | Self-serve bar, dimmable zones, upgraded seating |
| Luxury | Home theater, full wet bar, custom cabinetry, soundproofing | Dedicated theater, acoustic treatment, built-in display shelving |
Ask your contractor to run conduit for future wiring during the framing stage, even if you’re not installing a projector yet. Adding it later means opening finished walls.
Conclusion
The hardest part of designing a basement for entertaining isn’t picking finishes. It’s sequencing the work so moisture, HVAC, and electrical layout are solved before the fun decisions begin, and so the room still works when twenty people are in it.
Frequently Asked Questions
How do I design a functional layout for a basement entertainment area?
Start by dividing the floor plan into clear zones: a seating area, a service area for the bar, and a media or game zone. Keep walkways at least 36 inches wide so guests can move without squeezing past furniture. Place the wet bar near plumbing walls to reduce renovation cost, and aim seating at the screen or focal point. Zoning a basement for entertaining keeps traffic flowing and prevents the space from feeling cramped when you host a crowd.
What lighting solutions work best for basement entertainment spaces?
Layer three types of light: ambient overhead fixtures on dimmer switches, task lighting over the bar and game tables, and accent lighting along shelves or accent walls. Use warm bulbs around 2700K to 3000K for a cozy feel, and avoid a single bright ceiling fixture. Dimmers let you shift from bright party lighting to low movie-night glow without changing bulbs. Recessed cans paired with LED strip accents cover most basement entertaining needs.
How do I incorporate a wet bar into a basement renovation?
Locate the bar against a wall with existing plumbing or run new lines during the framing stage to avoid tearing out finished walls later. Include a small sink, a beverage fridge, and closed storage for glassware. Add a backsplash and under-cabinet lighting to make it a focal point. Confirm local code requirements for venting and electrical outlets with your contractor before ordering cabinets, since wet bar design trends favor compact, multipurpose setups.
What are the essential features for a basement home theater?
A basement home theater needs a projector screen or large display sized to the seating distance, blackout window treatments, and soundproofing in the ceiling and walls to control noise. In-ceiling or wall speakers with a receiver give clean surround sound. Add riser seating if ceiling height allows, and keep HVAC vents away from the screen to prevent glare and dust. Planning electrical and speaker wiring before drywall saves money and mess.