

Table of Contents
- Basement Home Theater Design: Planning Your Timeline
- Room Layout and Dimensions for Optimal Viewing
- Home Theater Soundproofing Requirements and Acoustic Treatment
- Basement Theater Electrical Planning and Power Management
- Audio-Visual Equipment Selection and Installation
- Basement Renovation Cost Per Square Foot and Budgeting
- HVAC Ventilation and Moisture Management
- Lighting Design and Smart Home Integration
- Frequently Asked Questions
Last Updated: September 29, 2026
Basement Home Theater Design: Planning Your Timeline
Planning a basement home theater design requires understanding the full scope of work before breaking ground. At Berry Basements, we help homeowners navigate the timeline from concept through installation, ensuring every phase aligns with budget, needs, and structural realities.
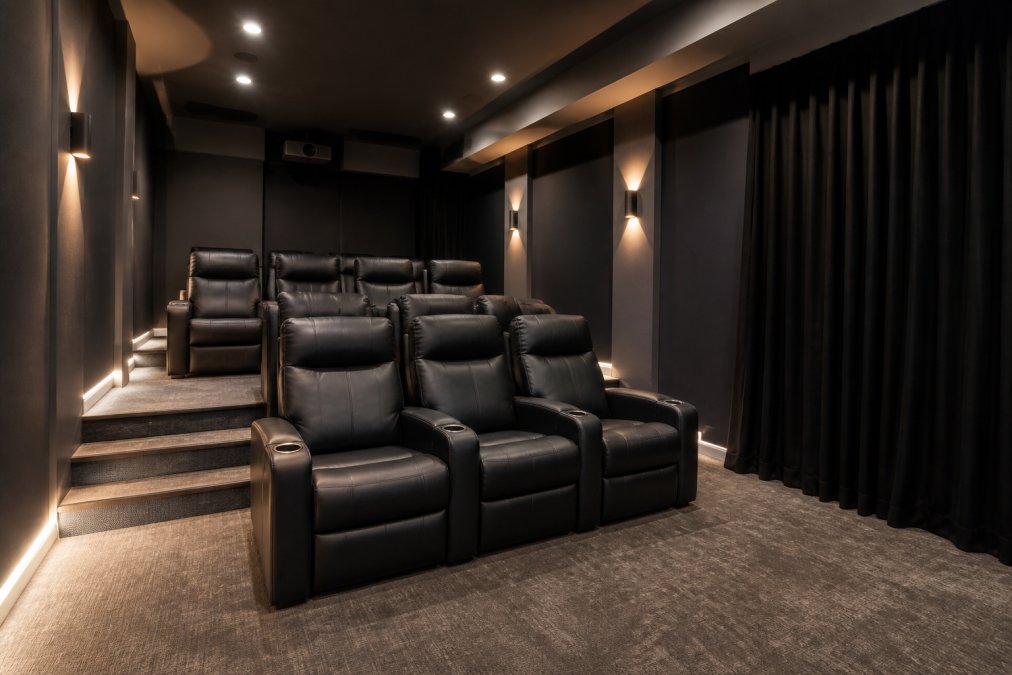
Most homeowners underestimate the lead time for acoustic treatment, electrical upgrades, and moisture management. These foundational decisions determine whether your space will perform as intended.
This guide covers the critical phases of basement home theater design and the timeline to expect, helping you avoid costly delays and mistakes.
Room Layout and Dimensions for Optimal Viewing
The first decision in basement home theater design is determining how your space will be configured. Room dimensions directly impact viewing angles, seating arrangements, and acoustic performance.
Most home theaters work best with a length-to-width ratio between 1.5:1 and 2:1. A 20-foot-deep room with a 12-foot width falls into this range and accommodates tiered seating for two to three rows. If your basement is smaller, you’ll need to prioritize fewer seats positioned at the optimal viewing distance, typically 1.5 to 2.5 times the screen width away from the display.
The ceiling height matters significantly. Standard basement ceilings of 8 feet are workable but tight when you account for acoustic panels, lighting fixtures, and HVAC returns. Dropping the ceiling to accommodate in-wall speakers and acoustic treatment typically requires 9 to 10 feet of clearance to avoid a cramped feel.
American Society of Interior Designers guidelines on home theater room proportions recommend measuring your space carefully before committing to equipment purchases.
Home Theater Soundproofing Requirements and Acoustic Treatment
Soundproofing prevents noise from escaping the room; acoustic treatment controls how sound behaves inside it.
Acoustic Panels and Bass Traps
Acoustic panels absorb mid and high-frequency sound, reducing echo and reflections that muddy dialogue and music. Bass traps target low frequencies that build up in room corners and along walls. A typical basement home theater uses panels on the first reflection points (the walls nearest the seating area where sound bounces back toward listeners) and bass traps in corners where bass energy accumulates.
Surround Sound Calibration and Subwoofer Placement
Surround sound systems position speakers around the room for directional effects. Left, center, and right speakers handle the front soundstage; surround speakers add environmental effects. Dolby Atmos adds height channels for overhead effects.
Basement Theater Electrical Planning and Power Management
Electrical infrastructure is the overlooked foundation of a home theater project. Insufficient power capacity, shared circuits, and poor grounding cause hum, interference, and equipment failures.
Load Calculation and Circuit Sizing
Before running new circuits, calculate your actual electrical load. List each piece of equipment with its rated wattage (found on the device’s rear panel or in the manual). A typical configuration might include:
- Projector: 300-500 watts
- AV receiver: 400-800 watts
- Amplifier (if separate): 500-1,500 watts
- Media player, streaming device: 50-100 watts combined
- Lighting, motorized screen, motorized shades: 200-400 watts
Dedicated Circuits and Panel Access
A dedicated circuit runs directly from your electrical panel to your equipment, preventing voltage sag and noise.
Grounding and Bonding
Proper grounding prevents electrical noise from coupling into audio and video signals. All equipment should connect to a common ground point with the shortest, most direct path.
Power Conditioning and Surge Protection
Power conditioning equipment filters AC power, reducing hum and interference that degrades audio and video quality.
Conduit and Future-Proofing
Run empty conduit during framing from your equipment rack to the electrical panel and future equipment areas. This costs $0.50-$1.50 per foot but saves thousands later.
Audio-Visual Equipment Selection and Installation
Selecting projector, display, receiver, and speakers involves trade-offs between performance, budget, and room constraints.
Projector Throw Distance and Display Options
Throw distance determines screen size. Short-throw projectors work in shallow rooms; standard-throw projectors require more depth but offer better image quality.
Basement Renovation Cost Per Square Foot and Budgeting
Basement home theater design costs vary based on scope, finishes, and complexity. Moisture barriers, structural framing, electrical upgrades, and custom cabinetry all affect final cost.
HVAC Ventilation and Moisture Management
HVAC design must balance cooling and dehumidification with acoustic performance, decisions that must be made during planning, not after construction.
Dedicated HVAC Zoning and Ductwork Design
A dedicated HVAC zone allows independent temperature control. A damper prevents unnecessary airflow when the theater is not in use.
Dehumidification Capacity and Sizing
Without proper dehumidification, humidity exceeds 60 percent, causing condensation, mold growth, and acoustic material degradation.
Sealed vs. Ventilated Basement Strategy
A sealed basement uses insulation, vapor barriers, and dehumidification to create a controlled environment. This approach works well in basements with moisture problems or high outdoor humidity. Sealed basements require active dehumidification but may accumulate indoor air pollutants without ventilation.
Insulation and Moisture Barriers
A 6-mil polyethylene moisture barrier on the basement floor prevents groundwater from wicking into walls. It should extend 12-18 inches up walls and be sealed at seams.
Foundation Grading and Drainage
Proper grading around your home’s foundation and functional downspouts direct water away from the basement. The ground should slope away from the foundation at a rate of at least 1 inch per foot for the first 6 feet. If your basement has had moisture problems in the past, addressing these exterior issues before renovating ensures your new space won’t be compromised by water intrusion.
Lighting Design and Smart Home Integration
Lighting in a home theater serves two purposes: it creates ambiance for viewing and provides functional illumination for setup and maintenance. Most basements lack natural light, giving you complete control over the lighting environment.
Frequently Asked Questions
How long does it take to build a basement home theater?
A complete basement home theater renovation typically spans 8 to 16 weeks, depending on scope and complexity. Initial planning and design take 2 to 4 weeks. Structural work, HVAC modifications, and electrical upgrades account for 4 to 8 weeks. Acoustic treatment, equipment installation, and finishing touches require another 2 to 4 weeks. Projects involving waterproofing or significant moisture remediation may extend the timeline. Coordinating with multiple trades and securing permits can add additional time.
What are the essential steps in basement home theater design?
Start with room assessment: measure dimensions, check ceiling height, and evaluate existing moisture conditions. Next, plan the layout considering viewing angles and seating ergonomics. Design acoustic treatment by identifying where acoustic panels and bass traps will go. Plan electrical infrastructure, including dedicated circuits for AV equipment and power conditioning. Select and position audio-visual equipment based on room size and throw distance requirements. Address HVAC ventilation to manage temperature and humidity. Install lighting with smart automation controls. Finally, manage cable routing and complete finishing details like blackout curtains and ambient lighting.
How much should I budget for a basement home theater in 2026?
Basement renovation costs vary significantly based on scope and finishes. Basement renovation costs vary significantly based on scope and finishes. Costs depend on whether you’re addressing moisture issues, upgrading HVAC systems, running dedicated electrical circuits, and selecting equipment quality. For a detailed estimate tailored to your specific project, contact a licensed contractor who can assess your space and provide transparent pricing based on your unique requirements and timeline.
Do I need a permit for a basement home theater renovation?
Yes, most basement renovations require permits, particularly when involving structural changes, HVAC modifications, electrical work, or plumbing. Permit requirements vary by local jurisdiction. Any work that affects building systems, like adding dedicated circuits, upgrading ventilation, or installing new insulation, typically requires inspection and approval. Permits ensure work meets building codes and safety standards. A licensed contractor can handle permit applications and coordinate inspections, ensuring your project complies with all local regulations and protects your home’s resale value.
How do I soundproof a basement home theater effectively?
Effective soundproofing combines multiple strategies. Install acoustic panels on walls to absorb sound reflections and improve clarity. Place bass traps in corners to control low-frequency rumble. Use mass-loaded vinyl or acoustic underlayment beneath flooring to reduce sound transmission. Seal air gaps around doors, windows, and penetrations. Consider double-wall construction or resilient channels for maximum isolation. Proper surround sound calibration and strategic subwoofer placement also minimize unwanted noise. A professional can assess your space and recommend the right acoustic treatment combination for your room size and equipment.
What’s the difference between a projector and a large-format display for a basement theater?
Projectors offer a true cinematic experience with larger screen sizes and immersive viewing angles, ideal for dedicated home theaters. They require careful throw distance planning and blackout curtains to perform well. Large-format displays (65 inches and up) provide excellent brightness and contrast, work well in rooms with ambient light, and require less space planning. Projectors suit larger basements with proper screen placement; displays work better in compact spaces or rooms where you can’t control light perfectly. Your room dimensions, viewing distance, and available light control determine which option suits your space best.
What are the latest home theater design trends for 2026?
Current trends emphasize smart home integration with voice-controlled lighting and equipment. 4K laser projection and Dolby Atmos surround sound systems are increasingly standard. Aesthetic design now balances technology with home décor, hidden cable management, ambient LED bias lighting, and custom cabinetry are popular. Flexible seating arrangements accommodate multiple viewing distances. Moisture-resistant materials and improved HVAC integration address basement-specific challenges. Universal design principles ensure accessibility for all family members. Media room conversions now prioritize both entertainment quality and year-round comfort through better insulation and climate control.
What moisture and insulation considerations are specific to basements?
Basements require moisture barriers and vapor seals to prevent humidity and water damage. Install proper insulation with an R-value suited to your climate, typically R-13 to R-21 for basement walls. Ensure adequate drainage around the foundation and consider a sump pump if moisture history suggests risk. Ventilation through HVAC systems helps manage humidity year-round. Use moisture-resistant drywall and flooring materials. Address any existing wet basement issues before starting entertainment renovation. A moisture assessment during initial planning prevents costly damage and ensures your finished space remains dry and comfortable for years.