

Table of Contents
- What Light Wells Cost and Why They Matter
- Basement Window Well Cost: Breaking Down the Components
- Light Well Excavation Cost: Site Conditions and Access
- Basement Window Well Drainage: Protecting Your Investment
- Basement Window Well Permit Requirements and Building Code
- Factors That Drive Light Well Costs Higher
- Getting an Accurate Estimate for Your Project
- Conclusion
- Frequently Asked Questions
Last Updated: October 19, 2026
What Light Wells Cost and Why They Matter
Adding light wells to basement foundations transforms dark, underutilized spaces into functional living areas. A light well is an excavated area outside a basement window that lets natural light and air reach below-ground rooms; without one, basement windows sit flush against soil and deliver almost no daylight.
The cost of adding light wells to basement foundations varies widely based on site conditions, well size, and local labor rates. At Berry Basements, we help Grand Rapids-area families understand what drives these costs so they can budget accurately.
This guide breaks down installation, excavation, materials, drainage, permits, and labor, and shows how to get a realistic estimate.
Basement Window Well Cost: Breaking Down the Components
Understanding the basement window well cost means knowing what you’re paying for: a series of connected work items that add up to your total investment.
Excavation and Foundation Work
Excavation is often the largest cost driver. Your contractor removes soil around the foundation to create the well opening; depth depends on your basement floor level and desired dimensions.
Stone or older concrete foundations may require specialized cutting equipment; modern poured concrete is easier. Mistakes here compromise your foundation’s integrity.
Soil removal also depends on grading and drainage. Clay is compact and stable; sandy or loose soil requires additional bracing or shoring.
Materials and Well Installation
Once the opening exists, you need the well structure itself. Most installations use precast concrete or custom-built wells in concrete, stone, or composite. Precast is faster and more predictable in cost; custom offers flexibility but takes longer and costs more.
The well needs a solid base, properly sloped sides, and gravel for drainage around the perimeter, plus a drain tile at the bottom to direct water away from your foundation.
Labor and Professional Installation
Labor costs depend on complexity and local rates. A straightforward installation on poured concrete with good access costs less than one on stone with tight access or poor soil.
Professional installers handle foundation cutting, well assembly, grading, and backfill. Poor installation leads to water intrusion, settling, and costly repairs.
Light Well Excavation Cost: Site Conditions and Access
Soil conditions matter enormously. Clay is stable and predictable; sandy or loose soil requires bracing, adding time and cost.
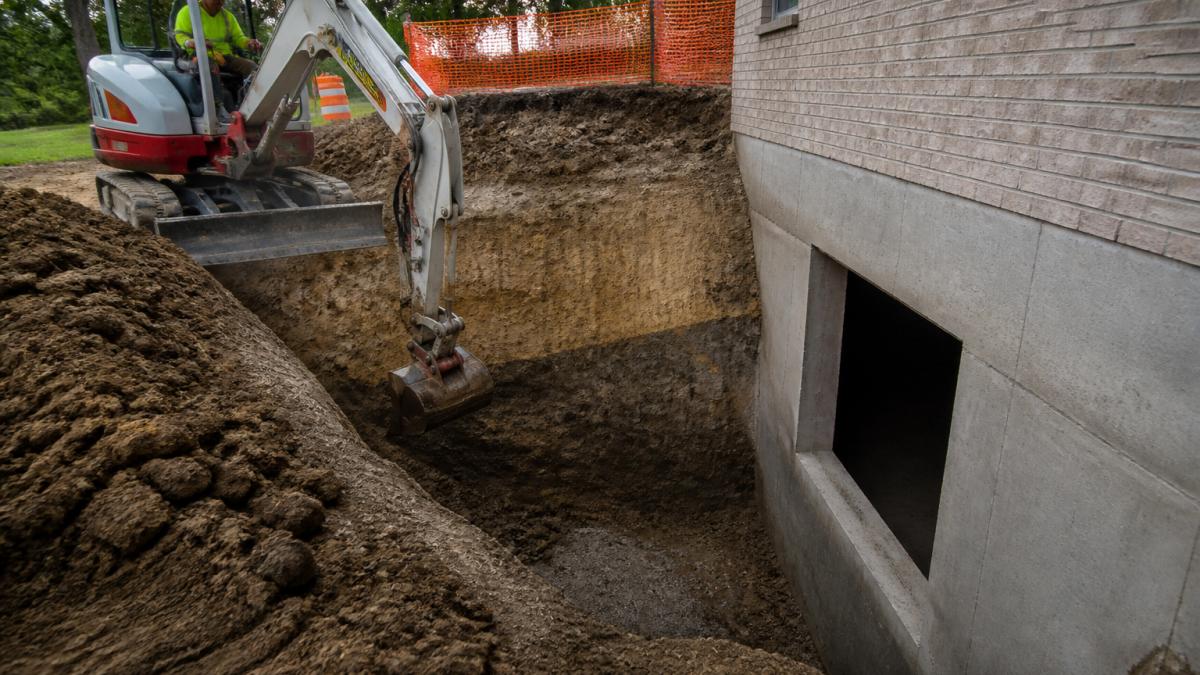
Site access affects equipment and labor efficiency.
Foundation type influences excavation difficulty. Poured concrete is straightforward to cut; stone is slower and messier; brick requires careful handling.
Existing utilities can complicate or stop work entirely. Call before you dig to locate gas, electric, water, and sewer lines, hitting one creates emergency costs and delays.
Ask your contractor to do a site visit and soil assessment before quoting. They should explain what they expect to find and how it affects the timeline and cost. This transparency helps you avoid surprises.
Basement Window Well Drainage: Protecting Your Investment
The basement window well drainage system separates a successful installation from a wet basement disaster.
Proper drainage starts with grading. The well bottom should slope slightly away from the foundation wall.
Many installations include a drain tile, a perforated pipe along the well bottom, connected to daylight or tied into your foundation’s drain system.
Without drainage, water accumulates during rain, pushing against the foundation wall and seeping into your basement.
A light well without proper drainage is worse than no light well at all. Water pooling around your foundation accelerates deterioration and creates mold risk. Always invest in drainage, it’s not optional.
Basement Window Well Permit Requirements and Building Code
Permits are one of the smallest line items on a light-well estimate, often a few hundred dollars, but the one most likely to change the scope and cost of everything else. The key distinction: a light well for daylight and an egress well serving a bedroom are regulated differently, and pricing them as the same project is how budgets go sideways.
Daylight Light Well vs. Egress Well: Two Different Code Paths
A daylight-only well generally falls under general building and foundation provisions: grading and drainage away from the foundation, secure covers or grates where the well creates a fall hazard, and compliance with local foundation and soil standards. An egress well is a life-safety component with additional requirements, minimum clear opening dimensions, a maximum sill height above the basement floor, and a ladder or steps where depth exceeds code limits.
What a Permit Actually Costs
Permit fees are set locally, usually as a flat fee for minor foundation work, a fee scaled to project valuation, or a fee scaled to inspections. In most markets the permit lands in the low hundreds of dollars, with the inspection sequence, after excavation, after well and drainage installation, and after final backfill and grading, included. The real cost is schedule: plan one to two weeks for issuance, longer where plan review is required.
The Cost of Skipping the Permit
Unpermitted foundation work is cheap until it isn’t. Insurers can decline or limit claims tied to unpermitted structural work; many states’ resale disclosure rules force you to reveal unpermitted basement improvements; and a buyer’s inspector who finds an unpermitted well can turn a closing into a renegotiation. If a prior owner installed one without a permit, the remedy is usually a retroactive permit plus inspection, sometimes requiring exposed work, costing more than doing it right the first time.
Do not let a contractor talk you out of a permit to “save you money.” The permit fee is small relative to the excavation and foundation-cutting line items; the liability of unpermitted structural work is not.
How to Confirm What Applies to Your Project
Ask your local building department two questions before signing: (1) Does a daylight light well on an existing foundation require a permit here, and (2) does the well serve an egress opening? The answers determine whether you’re pricing a simple daylight well or a life-safety egress assembly, one of the largest swing factors in the total cost of adding light wells to basement foundations.
Factors That Drive Light Well Costs Higher
Most guides describe cost drivers in the abstract. What helps is a framework you can apply to your own foundation: separate the project into priced components, then adjust each for the variables that move it. The ranges below are planning ranges, not quotes, your site assessment sets the final number, but they show where the money goes.
Itemized Light Well Cost Framework
| Component | Low | Typical | High | What moves it |
|---|---|---|---|---|
| Excavation and soil removal | Low | Typical | High | Depth, soil type, access, haul-off distance |
| Foundation cutting | Low | Typical | High | Poured concrete vs. stone or brick; opening size |
| Well structure and materials | Low | Typical | High | Galvanized steel vs. plastic vs. masonry; dimensions |
| Drainage (gravel, drain tile, connection) | Low | Typical | High | Water table, existing foundation drain, tie-in distance |
| Labor and equipment | Low | Typical | High | Access, bracing/shoring, crew size, local rates |
| Permits and inspections | Low | Typical | High | Jurisdiction fee structure; egress vs. daylight |
| Backfill, grading, and restoration | Low | Typical | High | Hardscape removal, landscaping, sod, disposal |
Use the table as a checklist, not a quote. A contractor who itemizes these seven lines and states assumptions for each is giving you a real estimate; one who quotes a single lump sum is guessing.
Cost by Dimensions and Material
Well size and material are the two variables homeowners control most directly, and they interact. A small, shallow daylight well, roughly 3 feet wide by 4 feet deep, sits at the low end of excavation and material cost.
Material choice changes both upfront cost and service life:
- Galvanized steel wells are the common low-to-mid-cost option. They install quickly and are widely available in standard sizes, but they can corrode over decades in wet soil and are harder to modify once set.
- Plastic and composite wells are typically the lowest-cost manufactured option and resist corrosion, but they can deflect under heavy soil loads and are best suited to shallower wells and stable soils.
- Masonry and precast concrete wells sit at the high end. They are durable, hold their shape under load, and suit deep or egress wells, but they require more excavation, heavier equipment, and longer installation time.
The practical rule: match the material to the depth and soil load. A deep well in expansive clay is not the place to save money on a thin plastic shell.
Site-Specific Constraints and Access Costs
Two identical wells can price very differently because of what surrounds them. Variables that most often push a quote higher:
- Equipment access. A wide-open side yard lets an excavator work efficiently. A narrow passage between the house and the property line may force smaller equipment or hand digging, which slows the crew and raises labor.
- Hardscape and landscaping removal. Decks, patios, walkways, and established plantings in the work zone must be removed and restored, often a separate line item from excavation.
- Utilities. Underground gas, electric, water, and sewer lines in the excavation zone require locating before work starts and may require hand excavation near the line, adding time and cost.
Drainage Failures and Water-Intrusion Risk
Drainage is the cost driver with the longest tail. A well that pools water pushes hydrostatic pressure against the foundation wall and finds cracks, tie holes, and the wall-floor joint. The visible signs, dampness, efflorescence, active leaks, often appear within a season, and the repair cost (interior waterproofing, drain tile, sometimes excavation) can exceed the original installation.
The cheapest way to price a light well is to itemize it: seven components, each adjusted for dimensions, material, and site access. The most expensive way is to skip drainage or the permit and pay for the repair later.
Getting an Accurate Estimate for Your Project
A realistic estimate starts with a site visit. Any contractor quoting over the phone without seeing your property is guessing.
During a site visit, a professional should:
- Assess foundation type and condition
- Evaluate soil and drainage
- Discuss your goals (light only, or egress window?)
From that assessment, a detailed estimate should itemize:
- Excavation (cubic yards of soil removal)
- Foundation cutting (linear feet of opening)
- Well materials (type, size, cost per unit)
A good estimate also notes assumptions. “Assumes stable soil and no utilities encountered” tells you what could change the price.
At Berry Basements, we provide free estimates that break down every cost component and explain what we’re pricing and why, so you understand your investment before work starts.
The best estimate is one that’s detailed, site-specific, and transparent about assumptions. If a quote seems too low or too high, ask why. A contractor who can explain their pricing confidently is one you can trust.
Conclusion
Adding light wells to basement foundations is a significant investment, but it transforms how your home feels and functions. Understanding the cost of adding light wells to basement foundations means knowing what drives expenses: excavation difficulty, foundation type, soil conditions, drainage requirements, and labor complexity.
Most homeowners benefit from a professional site assessment before committing. At Berry Basements, we prioritize transparent pricing, proper drainage design, and expert foundation work so your new light well delivers natural light safely and stays dry for years. Contact us for a free estimate and let’s discuss your project.
Frequently Asked Questions
How much does it cost to install a basement light well?
The cost of adding a light well to a basement foundation depends on multiple factors including well size, excavation difficulty, foundation material, and local labor rates. A professional contractor can provide an accurate estimate after evaluating your specific site conditions, foundation type, and desired well dimensions. Contact a licensed contractor in your area for a detailed quote based on your basement’s unique requirements.
What factors affect the cost of adding a light well to a basement?
Key cost drivers include excavation depth and soil conditions, foundation wall thickness and material (concrete, stone, or block), well size and type, drainage system installation, waterproofing requirements, site access and space constraints, and local permit and inspection fees. Projects with difficult soil, deep excavation, or limited access typically cost more. Foundation cutting complexity also significantly impacts labor expenses.
Do basement light wells require permits?
Yes, adding a light well to your basement foundation typically requires a building permit and inspection. Permit requirements vary by location and depend on whether the light well serves as an egress window for a bedroom or sleeping area. Local building codes govern well dimensions, drainage standards, and waterproofing specifications. Contact your local building department or work with a licensed contractor who handles permitting as part of the project scope.
How do you drain a basement light well?
Proper drainage is critical to prevent water intrusion and foundation damage. A basement light well drainage system typically includes a drain tile or perforated pipe at the base of the well, gravel backfill to promote water flow, and connection to a sump pump or exterior drainage system. The well must be graded so water flows away from the foundation. Inadequate drainage causes pooling, water seepage, and waterproofing failures, making professional installation essential.