

Table of Contents
- Why Basements Feel Dark and How Light Changes Everything
- Basement Lighting Ideas for Dark Spaces: A Layered Approach
- Best Paint Colors for a Basement with No Natural Light
- Using Mirrors and Reflective Surfaces to Amplify Light
- Basement Lighting Layout: Planning Fixture Placement for Maximum Brightness
- Windowless Basement Decorating Ideas to Combat Gloom
- Budget, Safety, and Installation Considerations
- Your Brightening Plan: Next Steps
- Frequently Asked Questions
Last Updated: October 15, 2026
Why Basements Feel Dark and How Light Changes Everything
Basements sit below ground with few or no windows, so little natural light reaches them. Learning how to brighten a basement without natural light transforms a dim, unwelcoming space into a bright, usable living area, and the right lighting strategy makes it possible.
How to brighten a basement without natural light starts with why basements feel dark: most rely on a single overhead fixture, and one light source creates shadows that make spaces feel smaller and less inviting.
The solution is layered lighting plus reflective surfaces and light-colored finishes. This guide covers the best fixtures, how to arrange them, what colors amplify light, and how to plan your layout for maximum brightness.
Basement Lighting Ideas for Dark Spaces: A Layered Approach
Brightness comes from layers: multiple light sources at different heights create even illumination. Layered lighting combines ambient, task, and accent lighting to fill the room.
Ambient lighting provides general illumination, task lighting focuses on work areas, and accent lighting highlights features. Together they eliminate dark corners and make a space feel open and bright.
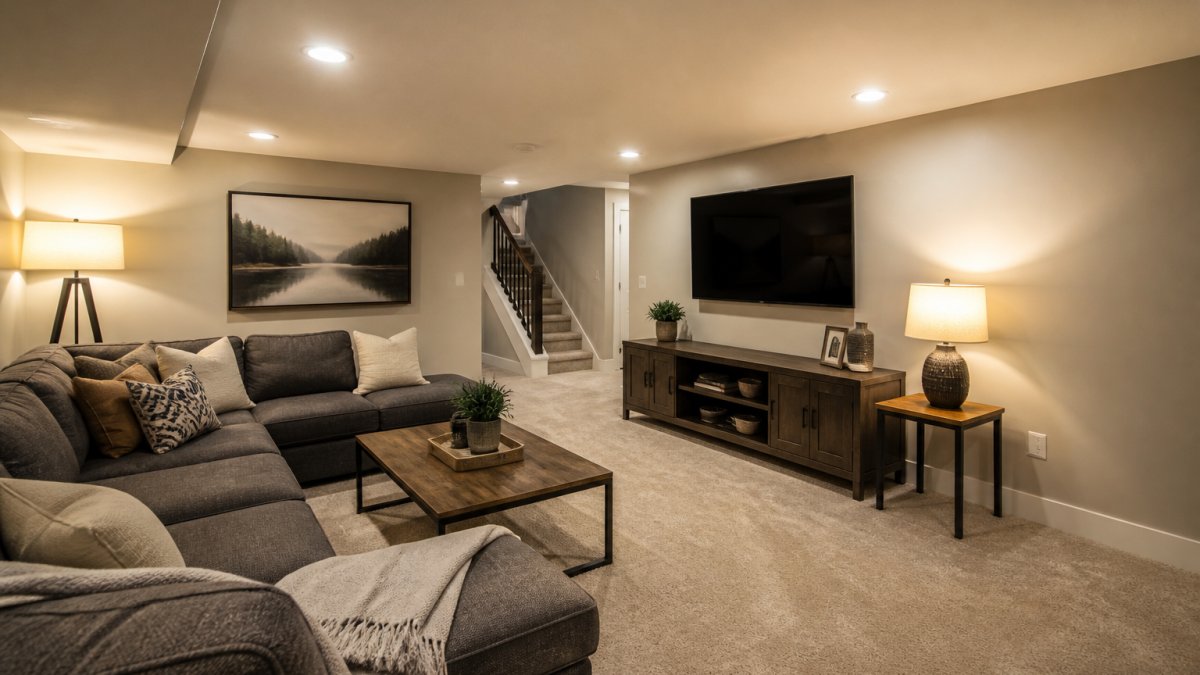
Ceiling fixtures and recessed lights
Recessed lights are your foundation for brightness. They mount flush with the ceiling, direct light downward, and distribute it evenly without taking up space.
Install them on a grid pattern, spaced about 4-6 feet apart to prevent dark spots.
Choose LED recessed lights: they run cooler, use less energy, and last longer. Look for damp-rated fixtures if your basement has any moisture history.
Floor and table lamps for task lighting
Recessed ceiling lights alone aren’t enough.
Floor lamps with multiple bulbs multiply brightness without taking up more floor space. Place them near seating areas, workspaces, or entertainment zones.
Table lamps work on shelves, side tables, or desks, and you can move them as your layout changes. Choose adjustable heads to direct light where you need it most.
LED panels and bright, clear light bulbs
LED panels are flat, modern fixtures that mount on ceilings or walls and emit soft, even light. A 2×2 foot panel can brighten an entire corner of a room.
The bulb matters as much as the fixture.
Color temperature affects how bright a space feels. Cool white light (5,000K-6,500K) feels brighter and more alert; warm white (2,700K-3,000K) feels cozy but dimmer.
Best Paint Colors for a Basement with No Natural Light
Paint color is one of the cheapest ways to brighten a basement: light colors reflect light, dark colors absorb it.
Walls should be light too, soft white, pale gray, or light beige all bounce light around the room.
The ceiling deserves special attention: paint it white or off-white, and ask your contractor about semi-gloss or satin finishes, which bounce light better than flat paint.
Avoid heavy wood paneling or dark wood trim.
Using Mirrors and Reflective Surfaces to Amplify Light
Mirrors are powerful tools for brightening dark basements.
Mirrors work best on walls without windows, in a basement, that’s most walls.
Other reflective surfaces help too: glossy tile reflects better than matte, polished concrete is brighter than sealed, and glass shelving reflects light through stored items. These surfaces add up.
Avoid heavy fabric window treatments or dark curtains.
Basement Lighting Layout: Planning Fixture Placement for Maximum Brightness
Most guides stop at “space your lights evenly,” which is useless without numbers. A layout that works is built from three measurable inputs: lumens per square foot, color temperature in Kelvin, and fixture spacing in feet. Get those right and the room reads as bright even with zero windows.
Start with a lumens target, not a fixture count
Lumens measure light output; watts measure power draw. For basements, aim for these ranges:
- General living or recreation space: 20-30 lumens per square foot
- Home office or craft area: 40-50 lumens per square foot at the task surface
- Home gym: 40-60 lumens per square foot
A 300-square-foot recreation room at 25 lumens per square foot needs roughly 7,500 total lumens, about nine 800-lumen cans, not the four to six generic advice suggests. Run the math before buying fixtures; it’s the biggest reason basements stay dim after a remodel.
Match color temperature to the room’s job
Color temperature (in Kelvin) changes how bright a room feels even at identical lumens:
- 2,700K-3,000K (warm white): cozy, but reads dim. Best for media rooms and bedrooms.
- 3,500K-4,000K (neutral white): the safest all-purpose choice for basements. Reads bright without feeling clinical.
- 5,000K-6,500K (cool/daylight): maximum perceived brightness. Good for gyms, workshops, and laundry areas; can feel harsh in living spaces.
A common mistake is mixing temperatures in one room. If ceiling cans are 4,000K and the floor lamp is 2,700K, the lamp looks yellow and the ceiling looks blue. Pick one temperature per room and stay within about 500K of it across every fixture.
Spacing formula for recessed cans
Use ceiling height to set spacing:
- 8-foot ceiling: space cans about 4 feet apart, 2 feet from walls
- 7-foot ceiling: space cans about 3.5 feet apart, 2 feet from walls
- 6.5-foot ceiling: space cans about 3 feet apart, 18 inches from walls
The rule of thumb: spacing equals roughly half the ceiling height. A 7-foot ceiling means cans every 3.5 feet, which prevents the scalloped “spotlight” look and dark gaps between fixtures.
Room-by-room layout notes
- Recreation room: perimeter cans plus one center row, all on a dimmer. Add two floor lamps at opposite corners for fill.
- Home office: one can directly above and slightly behind the chair, plus a task lamp on the desk. Aim for 40-50 lumens per square foot at the work surface.
- Home gym: grid of cans at 4,000K-5,000K, no dimmer needed. Mirrors on one wall double the perceived output.
Outlets, circuits, and dimmers
Plan outlets before lamps. A floor lamp needs a receptacle within about 6 feet; extension cords across a basement floor are a trip hazard and a code concern.
Before ordering fixtures, write the lumens target for each room on your sketch. If the total lumens you are buying is below the target, add fixtures now, retrofitting after drywall is far more expensive.
Windowless Basement Decorating Ideas to Combat Gloom
Lighting and paint are the foundation; decor reinforces that brightness.
Add greenery.
Artwork with bright colors lifts the mood. A vibrant abstract painting or colorful family photos add personality without darkening the space.
Incorporate light-colored textiles: light gray throw pillows, white area rugs, and cream curtains prevent the dark spots that make spaces feel smaller.
Keep the space uncluttered.
Budget, Safety, and Installation Considerations
Brightening a basement is a sequence, not a shopping list: fix moisture first, then electrical, then lighting, then finishes. Skip a step and you’ll spend twice.
Budget tiers
Costs vary by region, ceiling access, and whether new circuits are needed. Get local quotes before committing.
Tier 1, Cosmetic refresh (lowest cost)
- Ceiling and wall paint in light colors: materials for an average basement
- One or two plug-in floor or table lamps with LED bulbs
- Adhesive-backed mirror tiles or a single large mirror
Tier 2, Fixture and finish upgrades (mid-range)
- Recessed LED retrofit kits that install into existing cans: no new wiring if cans already exist
- Surface-mount LED panels or linear fixtures: no ceiling cutting
- Dimmer switches on existing circuits: plus electrician time
Tier 3, Electrical and structural work (highest cost)
- New dedicated lighting circuit run by a licensed electrician: depending on panel capacity and run length
- New recessed lighting throughout a finished ceiling: plus labor, and drywall repair if the ceiling is already finished
- Light well or window well enlargement: a structural project
A practical rule: spend on Tier 1 first, live with it for a week, then decide whether Tier 2 or Tier 3 is worth it. Many homeowners find paint, bulbs, and two well-placed lamps solve 70% of the problem.
Moisture and fixture ratings
Basements are damp more often than owners realize. The National Electrical Code uses specific location ratings, and choosing the wrong one is a safety and warranty issue:
- Damp location: areas subject to moderate moisture, such as a basement with occasional condensation. Most quality recessed cans and LED panels carry a damp rating.
- Wet location: areas where water can drip or splash, such as directly under a plumbing leak or in a laundry splash zone. Fixtures must be rated for wet locations.
If your basement has ever had standing water, seepage, or a musty smell, treat moisture as a prerequisite. Lighting in a chronically damp ceiling corrodes at the connections and fails early, and a compromised connection in a damp space is a shock and fire risk. Fix the water source (grading, sump, dehumidification, or a waterproofing contractor) before installing anything.
Never install a standard indoor fixture in a damp or wet location, and never run extension cords as permanent wiring in a basement. Both are common causes of failed inspections and insurance disputes.
Low ceilings and awkward layouts
Ceiling height drives fixture choice more than any other factor:
- 7 feet or higher: recessed cans, surface-mount panels, and most pendants are fine.
- 6.5 to 7 feet: recessed cans and flush-mount fixtures only. Skip pendants and anything that hangs more than a few inches.
- Under 6.5 feet: recessed cans, wall sconces, and cove lighting. Consider painting exposed joists white and running linear LED strips along them, this adds light without stealing headroom.
Exposed joists are an opportunity: paint them white and mount slim LED strips between them for an even, low-profile glow that reads as a bright ceiling. Narrow rooms benefit from wall-washing sconces on both long walls; wide rooms need a center row of cans plus perimeter fill.
When to hire a licensed electrician
Panel work, new circuit runs, and connections inside a ceiling cavity should be done by a licensed electrician; in most jurisdictions, adding a circuit or relocating a switch requires a permit and inspection. Plug-in lamps, bulb swaps, paint, and mirrors are DIY-friendly. Recessed lighting in a finished ceiling is a judgment call, doable if you’re comfortable cutting drywall and tying into an existing circuit, otherwise hire out.
A prioritized sequence
- Fix moisture. No lighting investment survives a wet basement.
- Audit and upgrade bulbs. Highest brightness gain per dollar.
- Paint ceiling and walls light. Second-highest gain per dollar.
- Add plug-in lamps and mirrors. Immediate, reversible, low cost.
- Add dimmers and separate switches. Improves usability of what you already have.
- Install recessed or panel lighting. The big step; do it once the layout is settled.
- Consider structural options (light wells, faux windows) only after the above.
Following this order keeps you from spending on decor before the room is actually lit, the most common and expensive mistake in basement makeovers.
Brightness is a system: moisture control, correct fixture ratings, adequate lumens, and a sensible install sequence. Skipping any one of them leaves the room dim no matter how much you spend on the others.
Your Brightening Plan: Next Steps
Start with a simple audit. Walk through your basement with a flashlight.
Prioritize your investments: paint and mirrors are quick, low-cost wins that deliver immediate results.
Test before committing. Buy one or two floor lamps and try different placements.
Consider professional guidance for complex work. Electrical installation, waterproofing, and structural changes require expertise.
Brightening a dark basement transforms how your family uses your home.
Berry Basements has helped homeowners across the region turn dim, unused basements into bright, functional living spaces. We work closely with you to ensure your basement reflects your vision. Contact Berry Basements for a free estimate and let’s discuss how we can brighten your basement.
Frequently Asked Questions
What type of lighting is best for a dark basement?
Layered lighting works best: combine ceiling fixtures or recessed lights for general illumination, task lighting from floor and table lamps for specific areas, and accent lighting to add visual interest. LED bulbs rated 5000K-6500K (daylight color temperature) mimic natural light and make basements feel brighter than warm bulbs. Avoid relying on a single overhead fixture, which creates harsh shadows and dead zones.
How can mirrors and reflective surfaces brighten a basement?
Mirrors reflect light throughout the room, multiplying the effect of your fixtures. Place mirrors opposite light sources or on walls perpendicular to windows if any exist. Glossy or semi-gloss finishes on trim, flooring, or furniture also bounce light around. Even a large mirror leaning against a wall can noticeably increase perceived brightness without installation costs.
What paint colors work best in a basement with little or no natural light?
Light, neutral colors like white, off-white, pale gray, or soft beige reflect light and make spaces feel larger and brighter. Avoid dark colors, which absorb light and deepen the cave-like feeling. Pair light walls with a white or very light ceiling to maximize reflection. Semi-gloss or satin finishes reflect more light than flat paint, though they show dust more easily.
How can you make a windowless basement feel less gloomy?
Combine bright lighting with light-colored walls, mirrors, and reflective finishes. Add greenery or house plants to create visual interest and break up monotony. Consider faux windows or simulated natural light fixtures (daylight-mimicking LED panels) to create the illusion of outdoor space. Declutter and organize to prevent the space from feeling cramped, which amplifies the basement feeling.