

Table of Contents
- Why Basement Home Office Layout Matters
- Layout 1: The Focused Corner Workspace
- Layout 2: The Open-Plan Shared Office
- Layout 3: The Divided Dual-Purpose Zone
- Layout 4: The Compact Single-Wall Setup
- Layout 5: The Premium Multi-Zone Office
- Small Basement Office Ideas That Maximize Square Footage
- Basement Office Ideas With No Windows: Lighting and Design Solutions
- Frequently Asked Questions
Last Updated: October 4, 2026
Why Basement Home Office Layout Matters
A basement home office layout transforms an underutilized lower level into a productive workspace while boosting home value. The challenge: making it feel inviting when basements lack natural light, proper ventilation, and clear boundaries from the rest of your home. The right layout maximizes square footage, creates distinct work zones, and addresses moisture, temperature, and acoustic challenges.
The five layouts below represent the most practical approaches for different basement dimensions, work styles, and family situations.
Layout 1: The Focused Corner Workspace
The corner workspace suits small basements. Place your desk perpendicular to the corner, using two walls as natural boundaries to create an enclosed feeling without building walls.
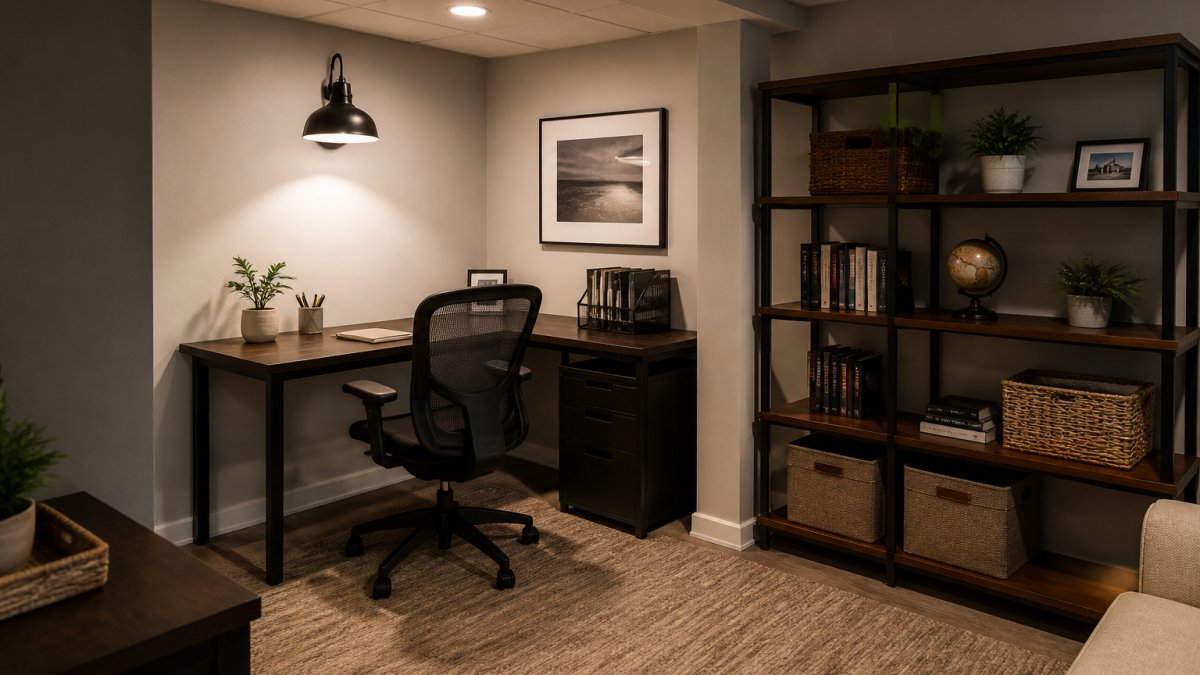
This basement home office layout works best for:
- Solo workers or freelancers
- Basements under 300 square feet
- Spaces where you need to preserve room for storage or other uses
- Budget-conscious renovations
Face your desk into the room to prevent a cramped feeling. Add shelving on one wall for files and supplies. Install layered lighting, overhead task lights plus a desk lamp, to reduce eye strain. The corner setup requires minimal electrical work and is one of the most affordable basement home office layout options.
Angle your desk 45 degrees into the corner rather than flush against the walls. This simple adjustment makes the space feel more open and improves sightlines.
Layout 2: The Open-Plan Shared Office
The open-plan shared office divides your basement into distinct areas without full walls. Use partial dividers like tall bookcases, fabric screens, or storage units to separate zones, maintaining sight lines and airflow while giving each person their own defined workspace.
This layout suits:
- Couples who both work from home
- Families needing flexible workspace
- Basements 400-600 square feet
- Homes where sound isolation matters less than visual privacy
Each desk needs its own task lighting and outlet access. Stagger desks to reduce the feeling of constant observation. Plan careful cable management and multiple Wi-Fi access points or ethernet lines to ensure reliable bandwidth for both workstations.
Shared basements can develop moisture issues if HVAC isn’t properly balanced. Uneven temperature and humidity between zones often indicates poor air circulation, fix this before it damages equipment or creates mold.
Layout 3: The Divided Dual-Purpose Zone
This basement home office layout splits your lower level into a dedicated work area and a separate multipurpose space, office on one side, gym or recreation area on the other.
A load-bearing wall, partial wall, or structural divider creates clear separation for 600-800 square-foot basements.
Best for:
- Larger basements with multiple needs
- Families wanting dedicated office + recreation space
- Homes where clients or colleagues visit your office
- Situations requiring acoustic isolation
Basement-Specific Constraints You Must Address Before Planning
Before committing to a divided layout, assess these non-negotiable factors:
Egress and Building Code Compliance
If your office occupies more than 50% of the basement, a second means of egress may be required. Check your local building department’s requirements.
Ceiling Height and Headroom
Building code may require a minimum finished ceiling height in habitable spaces (including offices). Measure your actual clearance before designing.
Moisture and Waterproofing
Before framing walls, have a moisture assessment done. Look for efflorescence, water stains, musty odors, and foundation cracks. If your basement has a history of dampness, install interior or exterior waterproofing before dividing the space.
HVAC Zoning and Capacity
A divided layout often requires a second zone damper and thermostat, extended ductwork, and possible furnace upgrade. Without proper zoning, one area will be too hot or cold, driving up energy costs and making the office unusable.
Electrical Capacity and Circuits
Basement offices with separate recreation areas can overload your electrical panel. Have a licensed electrician evaluate your service before planning. You may need a panel upgrade or dedicated circuits for high-draw equipment.
Phased Implementation and Budget Ranges
A divided dual-purpose layout is a multi-phase project:
Phase 1: Assessment and Code Compliance (Weeks 1-4, $2,000-$5,000)
- Moisture assessment, structural evaluation, building permit, egress window (if required)
Phase 2: Utilities and Infrastructure (Weeks 5-12, $5,000-$12,000)
- HVAC zoning, electrical upgrades, waterproofing, framing
Phase 3: Office Finish (Weeks 13-16, $3,000-$8,000)
- Drywall, flooring, paint, lighting, storage, furniture
Phase 4: Recreation Area Finish (Weeks 17-20, $2,000-$6,000)
- Flooring, equipment, lighting
Spreading across phases lets you complete the office first and fund the recreation area later.
Layout 4: The Compact Single-Wall Setup
The single-wall basement office layout runs your desk, shelving, and storage along one wall, ideal for narrow basements. Mount your desk to the wall or use a slim profile. Stack shelving above for files and supplies, maximizing storage without consuming floor space.
This layout is perfect for:
- Narrow or awkwardly shaped basements
- Spaces under 250 square feet
- Homeowners who want flexibility to repurpose the space later
- Minimal renovation budgets
The single-wall setup requires careful lighting planning. Task lighting must shine on your work surface without creating screen glare. Run cords through conduit or behind the desk to maintain a clean appearance.
Use the open floor space for a small area rug and comfortable chair. This creates a mental break zone separate from your work desk, improving focus and reducing burnout.
Layout 5: The Premium Multi-Zone Office
The premium multi-zone basement home office layout creates a complete professional environment with dedicated desk area, client meeting zone, file storage, and break lounge for 800+ square-foot basements. This approach requires significant planning and investment in HVAC zoning, electrical service, waterproofing, and moisture control.
Small Basement Office Ideas That Maximize Square Footage
Smart design choices make small basement office spaces feel larger and work harder.
Vertical storage keeps supplies accessible without consuming floor space. Floor-to-ceiling shelving, wall-mounted cabinets, and hanging organizers make a small basement office layout feel less cramped than one with bulky filing cabinets.
Multi-functional furniture serves double duty. A desk with built-in storage, a filing cabinet that doubles as a side table, or shelving that frames your workspace reduces clutter and maximizes utility.
Light colors and reflective surfaces expand visual space. Paint walls in soft neutrals, use light-colored desk surfaces, and add mirrors strategically to bounce light. These choices make a small basement office layout feel open rather than confined.
Defined zones create structure in tight spaces. Designate a work zone, storage zone, and break zone. Rugs, lighting, and partial dividers reinforce boundaries without requiring walls.
Minimal cable clutter keeps sightlines clean. Route wires behind desks, through conduit, or along baseboards. Visible cables make a space feel chaotic and smaller.
The most successful small basement office layout combines one or two of these strategies. Choose the two that address your biggest pain points.
Basement Office Ideas With No Windows: Lighting and Design Solutions
Windowless basements present a real challenge for home offices. Without natural light, the space can feel depressing and cause eye strain. Strategic lighting, color choices, and acoustic treatment overcome these limitations.
Layered Lighting With Measurable Brightness Targets
Layered lighting is essential in any basement home office layout. Combine three types of light to reach appropriate brightness levels:
-
Ambient lighting provides overall illumination. Ceiling-mounted fixtures or track lighting fill the space evenly. Target appropriate brightness levels for general office work. Use a light meter app or ask your electrician to verify brightness during installation.
-
Task lighting focuses bright light on your work surface. Position a desk lamp to avoid screen glare. Position it to the side or slightly forward of your desk, not directly behind your monitor.
-
Accent lighting adds visual interest and reduces the dungeon feeling. Wall sconces, LED strips behind shelving, or uplighting in corners create depth and warmth.
Color Choices and Reflective Surfaces
Color choices compensate for missing natural light. Warm neutrals (cream, soft gray, warm beige) feel more inviting than stark white or cool grays. Add pops of color through artwork, a desk chair, or accessories to make the basement office layout feel intentional.
Reflective surfaces amplify available light. Glossy paint finishes bounce light more than matte finishes. A mirror opposite your desk reflects light back into the space. Glass shelving allows light to pass through. Avoid dark wood furniture, dark carpeting, and dark wall colors, choose light finishes to maximize brightness.
Artificial Daylight Bulbs and Color Temperature
Artificial daylight bulbs mimic natural sunlight and reduce eye strain. These bulbs can boost alertness and mood. Use daylight bulbs in ambient and task lighting; accent lighting can remain warmer to prevent the space from feeling sterile.
Acoustic Treatment and Video-Call Readiness
Basements are notoriously echo-prone because concrete and hard flooring reflect sound. If you conduct video calls or record content, acoustic treatment is essential to avoid sounding hollow or distant.
Sound Absorption Strategies:
- Add soft furnishings: a rug (8×10 feet minimum), curtains, upholstered furniture, and wall-mounted fabric panels absorb sound and improve visual warmth.
- Install acoustic panels behind your desk or monitor. These panels absorb mid- and high-frequency sound. Position them at ear level.
- Use a microphone boom arm with a pop filter if you record audio or do frequent video calls to isolate your voice from room echo.
- Position your desk so the background shows soft furnishings, artwork, or plants, not bare concrete or metal shelving.
Privacy and Background Appearance
If clients or colleagues appear in video calls, your basement office background matters. Position your desk to face away from storage areas, utility equipment, or clutter. Install a backdrop or curtain if your office is in an open basement. Use task lighting strategically, position your key light to the side of your monitor to illuminate your face without harsh shadows. Add greenery or artwork to humanize the space and signal intentionality.
Lighting Plan Checklist for Windowless Basements
Before you install fixtures, verify:
-
Ambient lighting reaches appropriate brightness levels at desk height
-
Task lamp is positioned to avoid screen glare
-
Daylight bulbs are used in ambient and task fixtures
-
Acoustic panels or soft furnishings are in place to reduce echo
-
Video call background is professional
-
Backup lighting exists in case a fixture fails
Proper lighting, smart color choices, acoustic treatment, and intentional background design transform a basement office from a space you tolerate into one you enjoy using for professional meetings.
Frequently Asked Questions
How do you lay out a home office in a basement?
Start by assessing your basement’s dimensions and identifying the driest, most naturally lit area for your desk. Position your desk perpendicular to walls to create a defined workspace, then add storage behind or beside you. Incorporate layered lighting with task lights above your desk and ambient lighting to reduce shadows. Use rugs or partial dividers to establish a distinct zone separate from other basement functions. Consider utilities like outlets and internet lines when choosing desk placement to avoid cords running across walkways.
What should you consider before turning a basement into a home office?
Evaluate moisture levels first, basements prone to dampness need waterproofing before finishing. Check HVAC capacity to ensure adequate heating and cooling reach your office area. Verify that electrical outlets and internet lines can support your equipment, and plan for adequate ventilation to maintain air quality. Assess natural light availability and plan your lighting strategy accordingly. Finally, consider soundproofing if you’ll take video calls, and ensure the space has proper egress or feels comfortable for extended work hours.
How can you make a basement office feel less dark and unwelcoming?
Layer your lighting with task lights at desk level, ambient overhead fixtures, and accent lighting on walls. Choose light, neutral color palettes with whites, soft grays, or warm beiges to reflect light and create openness. Add reflective surfaces like mirrors or glossy finishes to bounce light around the room. Incorporate plants and artwork to add visual interest and warmth. Use light-colored rugs and furniture to brighten the space, and consider painting basement walls with semi-gloss or satin finishes that reflect light better than flat paint.
Where should a desk go in a basement office?
Position your desk in the brightest corner or area of the basement, ideally perpendicular to walls to create visual separation. If windows exist, place your desk to the side of natural light rather than directly facing it, which reduces glare on screens. Avoid placing desks directly under HVAC ducts or pipes. Ensure there’s space behind your desk for movement and that your chair can roll freely. Keep the desk away from high-traffic basement paths to minimize distractions and maintain focus on work.