

Table of Contents
- Why Basement Home Theaters Demand a Cable Plan Before Drywall
- How to Hide TV Wires in a Basement Media Wall
- Home Theater Conduit Installation: Sizing, Bends, and Pull Lines
- In-Wall Speaker Wire Installation for Surround Sound
- Hiding Cables on Concrete Walls Without Framing First
- Separating Power and Low-Voltage Runs: What the Code Requires
- Cable Management for the Media Unit, Rack, and Baseboards
- Conclusion
- Frequently Asked Questions
Last Updated: October 17, 2026
Why Basement Home Theaters Demand a Cable Plan Before Drywall
Hidden cable management for basement home theaters is the practice of planning and installing wire routes, conduit, and concealment before walls close up, so the finished room shows screens and speakers but no cords. At Berry Basements, we have finished lower levels since 2017, and the cable plan always comes before the drywall.
Here is the hard truth about basements: once drywall goes up, every cable decision gets expensive. A missed HDMI run means cutting a finished wall. A speaker wire in the wrong stud bay means patching and repainting.
Concrete walls, ceiling joists, and mechanical chases limit where wires can go. Plan the routes first, and the install gets simple.
The most common basement mistake is hanging the TV and running cables before deciding where the media rack sits. If the rack moves two feet, every cable is short. Mark rack, screen, and speaker locations on the floor plan before any wire goes in.
How to Hide TV Wires in a Basement Media Wall
How to hide TV wires comes down to one choice: cut the wall open or work on the surface. In a basement that is still unfinished, open-wall routing wins every time. It costs less and looks cleaner.
Step 1, Survey the wall. Note whether it is framed and open, framed and drywalled, or poured concrete or masonry. Note stud bay width (typically 16 inches on center, sometimes 24), whether there is a fireblock or horizontal brace in the bay, and where the nearest outlet and rack location sit.
Step 2, Pick the route.
- In-wall (open framed wall): cables run inside the stud bay behind drywall. Best appearance, lowest material cost, requires access before drywall.
- In-wall retrofit (finished framed wall): a recessed media box high and low, linked by short conduit fished through the bay. Works when the bay is clear; fails when fireblocking or a brace blocks the path.
- Surface raceway: paintable channel on the wall face. Fastest, renter-friendly, visible up close.
- Furniture route: cables tuck behind or inside the media unit and baseboard raceway. Good when the screen sits low or the rack is directly below.
Step 3, Size for the future. A single HDMI cable is not the goal; the goal is a path that accepts the next three cables. Run conduit sized for at least two future pulls (see the conduit section below) rather than stuffing a bare cable through a drilled hole.
Routing Behind a Wall-Mounted TV
A wall-mounted TV hides cables best when a short conduit links a high box to a low box. The screen covers the top box. The bottom box sits behind the console. Cut both boxes into the same stud bay. Keep the run vertical and short. Then pull power, HDMI, and network through the same path, but keep power in its own listed box and low-voltage in the conduit, per the code section below.
Two practical details separate a clean install from a callback. First, set the top box so its opening sits fully behind the screen’s mounting plate, not at the screen edge where a tilted mount can expose it. Second, leave 12-18 inches of service loop at each box so the screen can be lifted off the mount without unplugging anything.
Cord Hiders and Cable Covers for Surface Runs
Surface raceway is the fix when the wall is already finished. A cord hider is a paintable plastic channel that sticks to the wall and holds cords out of sight. Use it for short drops below a mounted screen or along a baseboard. Match the paint and the channel disappears. It is not as clean as in-wall work, but it takes an afternoon, not a remodel.
Choose by three specs, not by looks:
- Channel depth and width. A 0.5-inch-deep channel holds one or two cords; a 1-inch-deep channel handles a power cord plus HDMI plus a network cable. Measure the bundle before buying.
- Adhesive vs. anchored. Adhesive-backed channels hold on smooth drywall and painted concrete; rougher block or masonry needs screws and anchors, and adhesive alone will fail over time.
- Paintability and bend fittings. Look for channels sold with inside and outside elbows and couplers so corners do not become kinked pinch points. A channel that cannot turn a corner cleanly will be abandoned halfway.
A common pattern is to run the drop in a straight vertical line from the screen to the baseboard, then continue horizontally in a slimmer baseboard raceway to the rack. Keep the two runs in the same product family so the profile matches at the corner.
Buy one extra length of raceway and a spare elbow before you start. Cutting a channel short by an inch is the most common reason a surface run gets abandoned mid-project.
Home Theater Conduit Installation: Sizing, Bends, and Pull Lines
Home theater conduit installation is the step that makes future upgrades cheap. A two-inch conduit handles almost any cable bundle you will ever need. Run it before drywall, and every future upgrade becomes a pull, not a patch job.
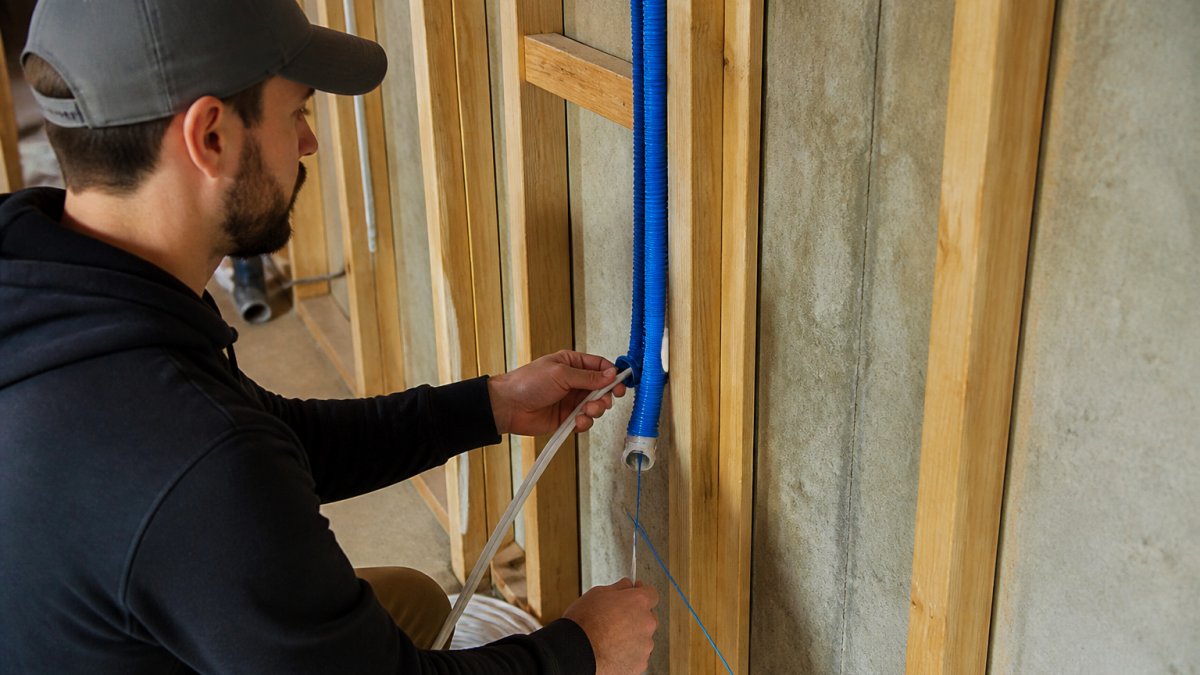
Follow these steps:
- Choose two-inch ENT or PVC for main runs between the rack and the screen
- Keep bends wide, using sweep elbows instead of tight 90s
- Leave a pull string in every conduit
- Cap both ends with stub-outs until trim time
- Label each conduit at the rack end
Tight bends jam cables. Wide sweeps let a fish tape slide through years later.
Leave a spare pull string in every conduit, even empty ones. The next owner of that theater will thank you, and so will your future self when HDMI standards change again.
In-Wall Speaker Wire Installation for Surround Sound
In-wall speaker wire installation follows the same rule as everything else here: run it before drywall. Speaker placement decides the wire path, so map the surround layout first.
Most surround setups need wire to four to seven locations. Pull 14-gauge or 16-gauge speaker cable to each spot and leave a few extra feet of slack at both ends.
Keep speaker wire away from electrical lines where you can. When runs must cross, cross at a right angle to limit interference.
Label every wire at the rack end. A bundle of identical speaker cables is a puzzle without labels.
Hiding Cables on Concrete Walls Without Framing First
Hiding cables on concrete walls is the tightest constraint in a basement. You cannot fish wire through poured concrete, and you cannot staple to it.
Option 1, Surface raceway rated for masonry. Adhesive-backed channels hold on smooth, sealed concrete; rougher block or unsealed walls need screws and anchors.
Option 2, Shallow furring wall. Framing out two inches gives you a cavity for conduit and a flat surface for drywall.
Option 3, Surface-mounted conduit. Where appearance matters more than speed, rigid or ENT conduit surface-mounted with straps and painted to match reads cleaner than adhesive channel on a long horizontal run, and it accepts future pulls.
We recommend the furring wall when the budget allows. It solves cable routing and gives you a place to mount the screen. Choose surface raceway when the wall will stay bare or the budget is tight.
Installation steps for a concrete wall
- Map the run from screen to rack and mark it with painter’s tape. Check for outlets, floor drains, and any wall penetrations before drilling.
- Test adhesion or anchoring on a hidden spot. If adhesive peels within an hour, switch to anchors.
- Mount the channel or conduit in one continuous line, using elbows at corners rather than bending the product.
- Pull cables with slack, 12-18 inches at each end, and keep power in a listed surface raceway or box, never loose in the channel.
- Seal and paint the channel to match the wall, and label both ends at the rack.
On bare concrete, surface raceway is the fast fix and a furring wall is the lasting one. Choose based on whether the wall will ever be finished, and check moisture first, because no channel holds on a wet wall.
Separating Power and Low-Voltage Runs: What the Code Requires
Power and low-voltage cables should not share the same conduit or box. The National Electrical Code treats line-voltage wiring and communications cable as separate systems with separate rules.
That means HDMI, speaker, and network cables get their own path. Power gets its own circuit and its own box.
Keep parallel runs a few inches apart where practical. Where they must cross, cross at 90 degrees.
For the exact requirements in your area, check with your local electrical inspector and review the National Electrical Code overview before you pull wire. Local amendments can add rules.
Cable Management for the Media Unit, Rack, and Baseboards
Cable management for the media unit is where a finished theater looks tidy or looks like a spider web. The rack is the heart of the system, so start there.
- Use a rack with a rear cable channel
- Bundle cables with hook-and-loop straps, not zip ties
- Label both ends of every cable
- Leave a service loop so gear can slide out
- Route baseboard runs in a slim raceway
Zip ties crush cables and make changes painful. Hook-and-loop straps cost a little more and save hours later.
Behind the media unit, a simple cable organizer tray keeps power bricks and slack off the floor.
Never bury a power cable inside a wall without a proper box or conduit. It fails inspection and creates a fire risk. Power belongs in a listed box, not loose behind drywall.
Conclusion
A basement theater only looks clean if the cable plan comes first. Once drywall is up, every hidden run gets harder and more expensive.
That is the work Berry Basements does every week. We plan routes, install conduit, and coordinate electrical and low-voltage work so the finished room shows a screen and speakers, nothing else. Our team has finished basements since 2017, and we manage the complex parts, from waterproofing to structural changes, without cutting corners.
Ready to build the theater you actually want? Get a free estimate from Berry Basements and start with a cable plan that holds up for the life of the room.
Frequently Asked Questions
Can you run home theater wires behind basement walls?
Yes, but the wall has to be open or you need a route that already exists. In a finished basement, plan on cutting small access holes and patching afterward, or running surface raceway instead. The cleaner option is to install conduit during the finishing stage so cable management is built in rather than retrofitted. Any cable passing through framing needs protection from nail damage, and power wiring must stay in its own box and circuit. Berry Basements plans these routes before drywall so you are not opening walls later.
Can HDMI and power cables run through the same wall cavity?
They can share a stud bay in most cases, but they should not share the same conduit or enter the same electrical box. Keep low-voltage cables separated from line-voltage wiring by a few inches where practical, and cross at right angles rather than running parallel for long stretches. This reduces interference and keeps the installation inspectable. Power for a wall-mounted TV should come from a dedicated receptacle, not an extension cord fished through the wall. Confirm specifics with your local electrical inspector before you close up the wall.
How do you hide cables when a basement wall is concrete?
You have three realistic options. Fur out the wall with framing and run cable management behind it, which gives the cleanest result and room for insulation. Chase the concrete for shallow surface raceway, which is faster but limits what you can run. Or use paintable cord covers and baseboard raceway that match the wall. Never bury cable directly in concrete or mortar. On poured walls, furring also solves moisture and insulation problems at the same time, so it usually wins on value.
Should you install conduit for home theater cables?
Yes, if the walls are open. A 2-inch conduit from the equipment rack to the TV location handles HDMI, optical, and future upgrades without reopening the wall. Add a pull string and keep bends gentle, no more than two 90-degree sweeps between pull points. Conduit costs little during a basement finish and saves a lot later. For speaker runs, 1-inch conduit per wall plate is usually enough. Cap and label every stub-out so the low-voltage installer knows what is behind the drywall.