

Last Updated: November 5, 2026
Quick Summary
Basement insulation improves a home energy rating by lowering the modeled U-factor of foundation walls, reducing air infiltration when paired with rim joist sealing, and cutting duct losses when ducts sit inside conditioned space. The rating is a system model, so the gain depends on your starting condition and other inputs.
- The HERS Index runs from 0 (net-zero) to 100 (reference home), and lower is better.
- Insulation without rim joist sealing may leave the modeled infiltration rate largely unchanged.
- Ask your rater for pre-project and post-project models using the same software version.
- Request blower-door tests before and after air sealing to verify the ACH50 change.
- Fix bulk water problems first, because insulation is not a waterproofing product.
Table of Contents
- How Basement Insulation Changes Your Home Energy Rating
- 7 Ways Basement Insulation Improves Home Energy Efficiency
- Basement Insulation Requirements You Need to Know
- Best Insulation for Basement 2×4 Walls
- Insulation for Basement Concrete Walls: What Works and What Fails
- Basement Insulation Energy Savings: What to Expect on Your Bills
- Moisture Control and Air Sealing Before You Insulate
- How Basement Insulation Changes Your Home Energy Rating
- Planning Your Basement Insulation Project with Berry Basements
- Frequently Asked Questions
How Basement Insulation Changes Your Home Energy Rating
Basement insulation changes a home energy rating by altering specific modeled inputs, not by adding a flat bonus.
Which rating inputs basement work actually touches
A residential energy rating (the HERS Index is the most common in the U.S., produced under RESNET standards and often required for ENERGY STAR Certified Homes and many utility rebate programs) is a modeled simulation. It compares your home to a reference home of the same size and shape. The index runs from 0 (net-zero) to 100 (reference home); lower is better. Basement insulation can move four inputs:
- Above-grade and below-grade wall assembly U-factor. Adding R-value to foundation walls lowers the U-factor the model uses for the below-grade surface.
- Infiltration (air leakage) rate. Air sealing at rim joists and sill plates reduces the modeled natural air changes per hour (ACH), which is often a larger driver than the added R-value alone.
- Duct location and losses. If ducts run through an unconditioned basement, moving the thermal boundary to the foundation walls brings those ducts inside conditioned space and cuts modeled duct losses.
Why insulation alone does not guarantee a specific score
The rating is a system model, not a checklist. Insulation added without rim joist sealing may leave the modeled infiltration rate largely unchanged, so the index improves less than expected.
Other reasons the score may not move as expected:
- The reference home in the model also has code-minimum basement insulation, so the delta is measured against that baseline, not against zero.
- Heating and cooling equipment efficiency, window performance, and duct sealing can dominate the index; basement work is one input among many.
- Modeling software versions and local amendments change assumptions, so two raters can produce different deltas for the same work.
Realistic magnitude and verification
The exact change in a HERS Index depends on how bad the starting condition was. To connect the work to a measurable result:
- Ask your rater for a pre-project model and a post-project model using the same software version.
- Request a blower-door test before and after air sealing; the ACH50 change is the most defensible evidence of infiltration improvement.
- Keep the insulation specification (R-value, product, installation method) so the rater can enter it accurately.
Watch out: a contractor who promises a specific point drop in your HERS Index before a model has been run is guessing, insist on the modeled inputs, not a number.
If your basement will become living space, the rating gain is larger because conditioned square footage grows while losses stay low. Homeowners weighing that step can read our comparison of finished basement versus unfinished storage space value. And if you are wondering whether the equipment side needs attention too, our article on signs your basement needs a separate HVAC system covers the trade-offs.
7 Ways Basement Insulation Improves Home Energy Efficiency
Here are the seven ways basement insulation improves overall home energy efficiency, in the order most homeowners notice them:
- Reduced heat loss in winter. Insulated walls stop the concrete from pulling warmth out of the house.
- Reduced heat gain in summer. The same barrier slows warm air moving inward during the cooling season.
- Lower heating and cooling costs. Less demand on the HVAC system means lower energy bills.
- Fewer drafts. Air sealing paired with insulation closes the paths cold air uses to enter.
- More consistent indoor temperature. Rooms above the basement stop feeling colder than the rest of the house.
- Lower peak HVAC loads. The equipment works less hard on the coldest and hottest days.
- Better whole-home insulation performance. A finished envelope performs as one system, not a patchwork.
Each item builds on the last. The comfort gains and the bill gains come from the same work.
Basement Insulation Requirements You Need to Know
Basement insulation requirements come down to R-value, moisture protection, and code compliance. The International Energy Conservation Code sets minimum R-values for basement walls by climate zone, and local inspectors enforce them.
A practical checklist before you buy materials:
- Confirm the R-value your climate zone requires for basement walls
- Check whether your area follows the state or a local amendment
- Plan a moisture barrier on the interior side where code calls for it
Watch out: skipping the permit step can force you to remove finished work later, which costs far more than doing it right the first time.
Best Insulation for Basement 2×4 Walls
The best insulation for basement 2×4 walls is usually rigid foam board or closed-cell spray foam, because both add R-value without trapping moisture against the concrete.
A 2×4 wall cavity is shallow. Fiberglass batts fit, but they leave less room for foam and can sag over time. Here is how the main options compare:
| Option | Fits 2×4 Cavity | Moisture Behavior | Best For |
|---|---|---|---|
| Rigid foam board | Yes, against wall | Resists absorption | Most basements |
| Closed-cell spray foam | Yes | Acts as barrier | Uneven walls |
| Fiberglass batts | Yes | Can trap moisture | Dry, above-grade walls |
| Mineral wool | Yes | Moisture resistant | Fire-sensitive areas |
Our pick for most basements is rigid foam board against the concrete, with framing in front of it.
Best for: homeowners who want a proven, inspectable assembly.
Skip if: your walls are badly uneven and need full cavity fill.
Insulation for Basement Concrete Walls: What Works and What Fails
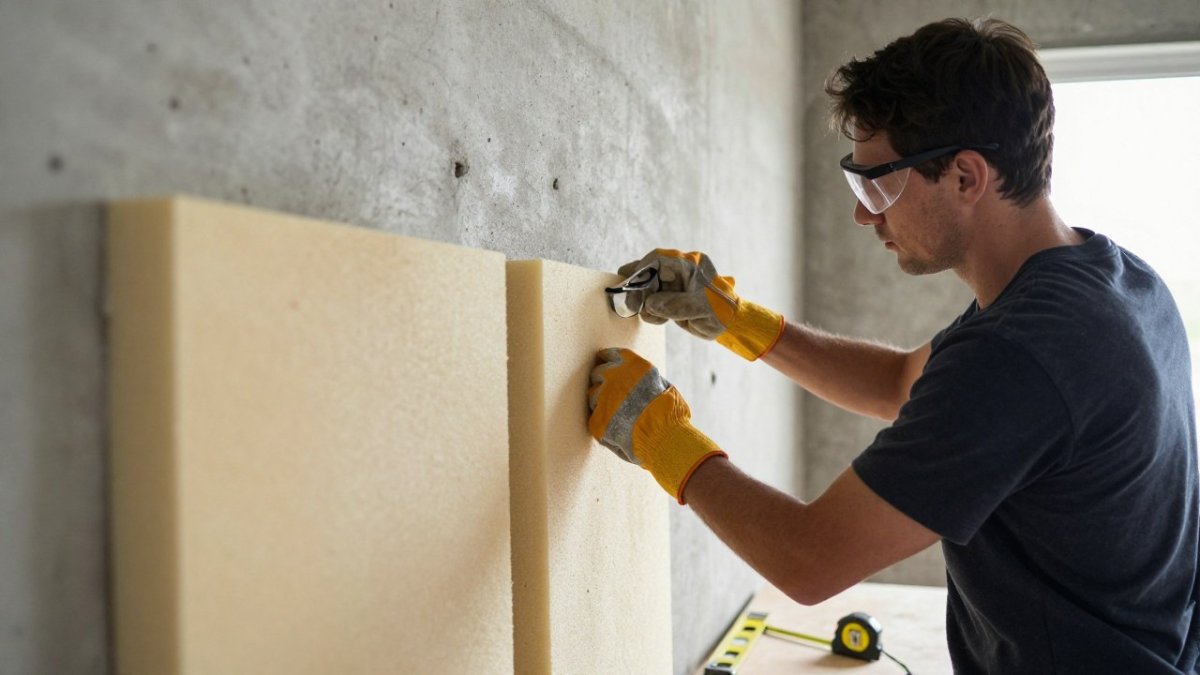
Insulation for basement concrete walls succeeds when the wall stays dry and the insulation does not trap moisture. It fails when foam goes directly onto a wet wall with no drainage plan.
What works:
- Rigid foam board sealed at the seams and edges
- Closed-cell spray foam on irregular surfaces
- A drainage layer before any finished wall goes up
What fails:
- Fiberglass batts pressed against damp concrete
- Foam installed over active seepage
- Missing rim joist insulation above the wall
A common mistake is treating insulation as a fix for a wet basement. It is not. Fix the water first, then insulate.
Basement Insulation Energy Savings: What to Expect on Your Bills
Basement insulation energy savings show up as lower heating costs in winter and lower cooling costs in summer, but the size depends on how much of your basement was uninsulated and how leaky your envelope is.
For a closer look at which methods deliver the most savings per dollar, see our guide to cost effective basement insulation methods.
Factors that move the number:
- How much of the basement wall was bare
- Whether air sealing was done at the same time
- Your climate and foundation type
Moisture Control and Air Sealing Before You Insulate
Moisture control and air sealing come before insulation, every time. Insulating over a wet wall traps the problem and hides it. The sequence below is the practical decision process most experienced installers follow.
Step 1: Diagnose the water before you buy anything
Separate bulk water from vapor and condensation, because they need different fixes:
- Bulk water (seepage, efflorescence, standing water): fix grading, gutters, downspouts, and foundation cracks first. Insulation is not a waterproofing product.
- Vapor drive (moisture moving through concrete from damp soil): manage with a vapor-retarder strategy appropriate to your assembly, not by sealing the wall face blindly.
- Condensation (wetness on cold surfaces, typically rim joists and the top of foundation walls in winter): a sign of air leakage and a cold surface, both of which air sealing and insulation address.
A simple field test: tape a 12-inch square of clear plastic to the concrete for 24-48 hours. Condensation on the room side suggests humid interior air hitting a cold wall; moisture behind the plastic suggests vapor drive from the soil. The fix differs.
Step 2: Decide walls vs. rim joists vs. ceiling
This is the decision most generic guides skip. Use the thermal boundary logic:
- Insulate the walls and rim joists when the basement is conditioned, semi-conditioned, or you plan to finish it. This moves the thermal boundary to the foundation and brings the space inside the envelope.
- Insulate the ceiling only when the basement stays unconditioned and you are not finishing it, and accept that the foundation walls remain a heat sink.
- Always include the rim joist in either approach. It is the single leakiest above-grade junction in most basements and is often skipped because it is awkward to reach.
Step 3: Air seal in the right order
Seal before you insulate, and seal the highest-leakage points first:
- Rim joists and sill plates (foam or sealant, then insulate)
- Penetrations for plumbing, wiring, and HVAC
- Top plates of any framed walls
- Window and door frames at the foundation
A blower-door test before and after gives you a number to verify the work; without it, air sealing is invisible and unverifiable.
Step 4: Choose a moisture-safe assembly
- Rigid foam board sealed at seams and edges against the concrete, with framing in front, is the most inspectable assembly for most basements.
- Closed-cell spray foam works on irregular surfaces but must be applied to a dry substrate.
- Fiberglass batts pressed against damp concrete are the classic failure, they trap moisture and sag.
Watch out: installing foam directly over active seepage or a wet wall traps water and can lead to concealed mold, fix the water source and confirm the wall is dry before any insulation goes up.
If your basement is used as a workspace, our guide to controlling moisture in a basement office covers the daily-use side of the same problem.
How Basement Insulation Changes Your Home Energy Rating
Basement insulation changes a home energy rating by shrinking the modeled envelope losses, which improves the score and the reported energy performance of the whole house.
The impact shows up in three places:
- Lower modeled heating and cooling demand
- Reduced air leakage when sealing is done properly
- Better performance of the HVAC system at peak loads
If your basement will become living space, the rating gain is larger, because the conditioned square footage grows while the losses stay low. Homeowners weighing that step can read our comparison of finished basement versus unfinished storage space value.
Planning Your Basement Insulation Project with Berry Basements
Planning starts with an assessment, not a shopping list. At Berry Basements, we have worked on lower levels in the Grand Rapids area since 2017.
Our process looks like this:
- Walkthrough and moisture check. We look for seepage, condensation, and leak points.
- Scope and materials. We match R-value and insulation type to your foundation and climate.
- Air sealing. Rim joists, sill plates, and penetrations get sealed before insulation.
- Installation. Foam or board goes in with seams and edges sealed.
- Verification. We confirm the assembly is dry, tight, and ready for finishing.
We are licensed basement contractors, and we manage complex tasks such as waterproofing and structural changes. If you are ready to move from reading to planning, request a free estimate and we will map out the scope for your home.
Frequently Asked Questions
What R-value should my basement walls be?
Most energy codes call for basement wall insulation in the R-10 to R-15 range for the wall assembly, though the right number depends on your climate zone and foundation type. In a cold-winter market, aim toward the higher end. Rigid foam boards typically hit R-10 at about 2 inches of thickness, while batt insulation needs a deeper stud cavity to reach the same value. Pair the R-value with air sealing and a moisture barrier, because R-value alone does not stop drafts or condensation.
Will basement insulation lower my electric bill?
It can, because an uninsulated basement is one of the largest heat loss paths in a home. Insulating and air sealing the rim joists and walls reduces heat loss in winter and heat gain in summer, which lowers peak HVAC loads. The exact basement insulation energy savings depend on your current setup, foundation type, and how well the rest of the house is sealed. A home energy assessment before and after the work gives you a real number instead of a guess.
Should I insulate the basement walls or the basement ceiling?
Insulate the walls when the basement is or will become conditioned space, such as a finished playroom, bedroom, or gym. Wall insulation brings the basement inside the thermal boundary and improves indoor temperature consistency across the whole house. Ceiling insulation only makes sense when the basement stays unconditioned and you want to slow heat transfer between floors. For a finished living space, walls plus rim joists is the standard approach.
What should homeowners check before insulating a basement?
Check for moisture first. Look for efflorescence, musty odors, damp drywall, and any active seepage after heavy rain. Fix grading, gutters, and any foundation cracks before insulation goes in, because trapping moisture behind foam or batts invites mold. Also confirm the foundation type and whether the walls are framed, since that decides which insulation materials fit. A licensed contractor can run this check and flag waterproofing work that should happen before the renovation starts.
Your basement is either helping your energy rating or quietly hurting it. The fix starts with one walkthrough and a clear scope, and it ends with a lower level that holds heat, resists moisture, and adds usable space. Get started with Berry Basements and turn your unfinished basement into a drier, warmer part of your home.
