

Last Updated: November 7, 2026
Quick Summary
To protect furniture from construction dust, cover each piece fully with a cover matched to its material, such as plastic sheeting for fine drywall dust or breathable cloth for leather and polished wood. Seal the room with a secured plastic doorway barrier, tape vents, and keep air moving toward a filter, since construction dust travels on air currents through the whole house.
- Plastic sheeting traps moisture against fabric and leather, so choose covers to match the surface.
- Fine drywall dust behaves more like smoke than sand, following air under doors and through vents.
- Mist drywall before cutting and use a HEPA vacuum instead of a dry broom to control dust at the source.
- Secure runners on every stair tread, since loose covers are a trip hazard.
- Remove covers slowly and bag them before carrying them out, then HEPA vacuum all surfaces.
Table of Contents
- Why Construction Dust Travels Further Than You Think
- What to Cover Furniture With During Construction
- How to Seal Off a Room from Dust
- How to Control Dust During Renovation at the Source
- Protecting Floors, Stairs, and Carpets
- Guarding Electronics, Vents, and Delicate Belongings
- Handling Dust from Bathroom Renovation
- A Room-by-Room Prep and Cleanup Checklist
- Frequently Asked Questions
Why Construction Dust Travels Further Than You Think
Construction dust is a mix of drywall powder, sawdust, silica, and insulation fibers that spreads through your whole home, not just the room being renovated. Knowing how to protect furniture from construction dust starts with one fact: the fine particles you can barely see travel the farthest.
A common mistake is covering only the room under construction. Dust rides on air currents, foot traffic, and HVAC return air. It slips under doors and settles on shelves two floors up. So the work area is never the only area that needs attention.
If you want to know what those particles do once they land where your family lives, read our breakdown of the health risks of breathing construction dust at home. Then plan your protection from room to room, not wall to wall.
What to Cover Furniture With During Construction
The best cover for furniture during construction depends on two things: what the furniture is made of and what kind of dust the job will produce. Plastic sheeting is useful for fine drywall dust and for sealing a whole room, but it is a poor choice directly against leather, polished wood, or anything that needs to breathe. Pick the cover to match the surface, not the other way around.
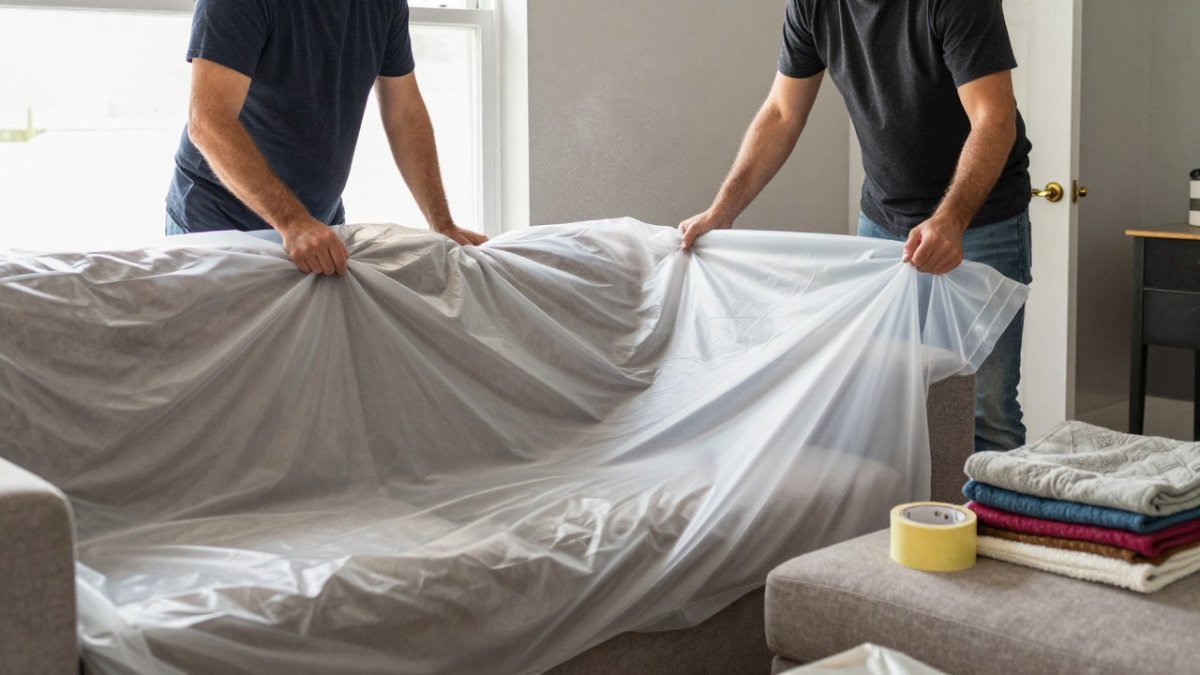
Here is how the common options compare:
| Cover Type | Best For | Watch Out For |
|---|---|---|
| Plastic sheeting (0.7-1 mil) | Fine drywall dust, sealing whole rooms, short jobs | Traps moisture against fabric and leather; tears on sharp corners; static attracts dust to the underside |
| Canvas drop cloths (8-12 oz) | Demolition debris, heavy foot traffic, reusable jobs | Fine dust passes through the weave; heavy when wet; can transfer dye to light upholstery |
| Old sheets and blankets | Quick jobs, light dust, a breathable first layer | Thin fabric, gaps at the edges, lint on dark surfaces |
| Painter’s tarps (plastic-backed) | Floors and large furniture | Slippery on hardwood; plastic side can trap moisture if faced inward |
| Heavy-duty paper (rosin or builder’s paper) | Floors, temporary walkways, wrapping wood | Not reusable; tears when wet; no protection from impact |
| Fitted furniture covers | Sofas and chairs that stay in place | Only as good as the seal at the base; seams leak fine dust |
Matching Covers to Furniture Materials
Fabric surfaces, sofas, mattresses, upholstered chairs, curtains that stay hung, need protection from dust during construction.
Solid wood and painted pieces need careful handling during cover removal, since grit caught in the fold can scratch a finish.
Leather and delicate finishes need protection that does not trap moisture against the surface.
Electronics and anything with vents should be moved to another room where possible, so heat does not build up under covers.
Cover furniture fully, not just the top, since dust settles on the sides and underneath as air moves.
Lift covers slowly, since static can pull fine dust to the underside of plastic sheeting.
How to Seal Off a Room from Dust
To seal off a room from dust, you need to close the gap between the door and the floor, manage the air pressure in the work zone, protect the HVAC returns, and hang a plastic barrier at the doorway. A closed door alone stops very little. Fine drywall dust behaves more like smoke than like sand, it follows air, and air moves under doors, through vents, and up stairwells.
Start with the doorway, where a plastic barrier can help limit dust from reaching other rooms.
Securing Plastic Barriers and Preventing Leaks
A loose barrier can let dust leak through when people pass, so the plastic should be secured firmly at the frame.
Keep a mat on the clean side of the barrier to catch dust from shoes, and ask workers to wipe footwear at the threshold.
Taping plastic over vents can strain an HVAC system, so ask your contractor how they plan to handle airflow.
Managing Airflow and Pressure
Dust moves from high pressure to low pressure, so keeping air moving toward a filter can help limit spread during dusty work.
Change or clean filters when they load up, since a clogged filter stops moving air.
Seal the other openings before you start: electrical outlets on shared walls, gaps around pipes and ducts, and the space under closet doors that open into the work zone. Painter’s tape and plastic film handle most of these in minutes.
Testing the Seal
Check the barrier for leaks before demolition starts, and recheck after the first day of work.
How to Control Dust During Renovation at the Source
Dust control during renovation works best when you stop particles at the point where they are made. Source control beats cleanup every time.
- Consider misting drywall before cutting or sanding to reduce airborne dust.
- Use a vacuum with a HEPA filter instead of a dry broom where possible.
- Keep debris in sealed bags rather than loose piles.
A common mistake is sweeping at the end of the day. Sweeping lifts fine dust back into the air, where it drifts through the house. Wet-wiping and HEPA vacuuming keep it on the ground.
Protecting Floors, Stairs, and Carpets
Floors take the heaviest beating during a remodel. Protect hardwood floors during long jobs with a suitable covering to avoid finish damage.
Stairs need special care, since loose covers are a trip hazard and every edge should be secured.
Carpets and rugs should be rolled back or protected before work begins. If you are planning new flooring after the dust settles, our guide to the best materials for basement flooring covers what holds up well down low.
Guarding Electronics, Vents, and Delicate Belongings
Electronics are an important item in renovation prep. Fine dust can clog vents and collect on equipment, so move what you can to another room.
Small and valuable items should be moved out of the work area where possible.
Vents and HVAC components need attention too, since dust can enter the system during work. If your project involves moving ductwork, our article on the cost of relocating basement HVAC vents explains what that work involves.
Handling Dust from Bathroom Renovation
Dust from bathroom renovation is finer and often wetter than drywall dust elsewhere. Tile cutting, grout removal, and demolition of old fixtures throw off grit that sticks to surfaces and hardens.
Seal the bathroom doorway and protect the vanity, mirror, and fixtures before demolition starts.
Old bathrooms can hide moisture damage behind tile. If demolition reveals soft wood or mold, have it assessed before covering anything back up.
A Room-by-Room Prep and Cleanup Checklist
Use this checklist before work starts and again when it ends. It covers the whole house, not just the work zone.
Before work begins:
- Move small and valuable items out of the work area
- Cover furniture with sheets, then plastic where needed
- Tape covers around legs and bases so dust cannot creep under
- Seal the doorway with a plastic barrier and secure the edges
- Tape supply vents in the work zone
- Roll back carpets or cover them with breathable cloth
- Protect stairs with secured runners on every tread
- Cover electronics with breathable cloths
After work ends:
- Remove covers slowly and bag them before carrying them out
- HEPA vacuum all surfaces, including walls and shelves
- Wet-wipe hard surfaces from top to bottom
- Change the furnace filter
- Wash fabric covers or throw away paper and plastic
- Check rooms far from the work area for settled dust
If the prep work feels like more than you want to take on, or the project involves structural changes, that is the point to bring in help. You can see our current projects to get a feel for the finished results, or read our guide on whether to hire a basement contractor or do it yourself before you decide.
Dust protection is one thing on a small repair and another on a full basement build. At Berry Basements, we have served homeowners since 2017 as licensed basement contractors. Our collaborative process works closely with clients from planning to execution, and we manage complex tasks like waterproofing and structural changes with a commitment to quality. Get started with Berry Basements and protect your home while we build the space you have been planning.
Frequently Asked Questions
What should you cover furniture with during construction?
Protect furniture by covering it before construction starts, choosing a cover that suits the surface and the type of dust the job will produce.
How do you seal off a room from construction dust?
Close off the work area with a plastic barrier at the doorway and seal gaps where dust could travel. Keeping air moving toward a filter can also help limit how far dust spreads.
Should you move furniture out of the room before construction starts?
Move anything small, valuable, or hard to clean: electronics, lamps, rugs, artwork, and delicate decor. Large pieces like sofas and dressers can stay if you wrap them properly, but clearing the work area entirely is safer when demolition is involved. Label boxes and store them in a closed room away from the dust path.
How do you control dust from a bathroom renovation?
Bathroom demolition creates heavy debris and fine dust, so seal the doorway and protect nearby furniture before tile or fixture removal. Bag debris as you go and wipe surfaces rather than dry sweeping.
