

Quick Summary
Basement insulation is a DIY project if the walls are dry, because insulating over moisture traps water against the concrete. Confirm dryness with a plastic test, then use rigid foam board, which resists moisture better than fiberglass. Match the thickness to your local code and climate zone.
- Check for water signs like efflorescence, staining, and musty odor before insulating anything.
- Tape clear plastic to the wall for 48 hours; moisture underneath means the wall isn’t ready.
- Rigid foam board is the safest DIY choice; avoid fiberglass batts against concrete.
- Find your climate zone on the DOE map, then confirm the required R-value with your building department.
- Buy about 10 percent extra material to cover cuts and mistakes.
Table of Contents
- Assess Moisture Before You Insulate Anything
- Choose the Best Insulation for Basement Walls
- Meet the Right R-Value for Your Climate Zone
- Gather Tools and Materials Before You Start
- Step-by-Step: Insulating Basement Walls Yourself
- Avoid These Common Basement Insulation Mistakes
- Booking a Basement Consultation With Berry Basements
- Frequently Asked Questions
Assess Moisture Before You Insulate Anything
Insulation will not fix a wet basement. Check for water first, because any basement insulation you install over a moisture problem can trap that moisture against the wall.
Signs of Active Water Intrusion
Look for these warning signs before you buy a single board:
- White, chalky deposits (efflorescence) on the concrete
- Dark staining or a musty smell near the floor or corners
- Water pooling after rain, or a damp line along the wall base
- Peeling paint or bubbling on the wall surface
If you see any of these, fix the water source first. Improve grading outside, clean gutters, and seal cracks. Then wait for the wall to dry completely.
Decision Tree for Damp, Dry, and Previously Finished Basements
Use this quick check to decide your next step:
- Dry basement, no odor: Test the walls with a tape-and-plastic test (tape clear plastic to the wall for 48 hours; moisture under the plastic means trouble). If it stays dry, you can insulate.
- Damp basement: Address drainage and seal the wall before insulating. Insulating now will likely cause mold. Before you plan the work, see whether egress and safety upgrades belong in the same project.
- Previously finished basement: Remove drywall and inspect the wall behind it. Old finishes often hide mold or rot. Check the framing and the wall cavity before you reinstall anything.
Choose the Best Insulation for Basement Walls
Basement walls are concrete or masonry, and they sit below grade. That makes material choice important. The best insulation for basement walls is usually rigid foam board, because it resists moisture and works well against concrete.
Rigid Foam Board, Spray Foam, and Fiberglass Compared
- Rigid foam board (XPS or polyiso): Resists moisture, adds good R-value per inch, and is a manageable DIY project. Cut it with a utility knife and seal the seams with tape.
- Spray foam: Excellent air sealing, but professional installation is usually needed. Canned spray foam works only for small gaps.
- Fiberglass batts: Cheap and easy to fit between studs, but they absorb moisture and lose performance when damp. Avoid them against concrete.
For most homeowners, rigid foam board is the safest DIY choice.
Meet the Right R-Value for Your Climate Zone
R-value measures how well insulation resists heat flow. Higher numbers mean better insulation. The right number depends on where you live, and for a basement wall the target is set by two things: the energy code your jurisdiction enforces and the climate zone your county falls into.
Find Your Climate Zone First
The U.S. Department of Energy maps the country into climate zones 1 through 8, with higher numbers in colder regions. Look up your county on the DOE climate zone map before you price materials, since the same wall assembly can require different thicknesses depending on where you live.
What the Energy Code Typically Requires
Energy codes set basement wall insulation targets by climate zone, and the specific edition and values depend on your jurisdiction. Check your local code rather than relying on general figures, because adoption varies and some jurisdictions amend the tables.
Confirm the rated R-value printed on the board you buy, because products vary. Avoid permit delays by checking your local requirements before you start.
Confirm With Your Local Building Department
Before you buy, call your local building department and ask three questions: which code edition is enforced, what R-value applies to basement walls in your zone, and whether a permit and inspection are required for a basement finish. Get the answer in writing if you can. Inspectors generally care about the installed assembly, not just the board’s label, so ask whether they want continuous insulation, a specific vapor control strategy, or fire-rated cover over foam.
Don’t Over- or Under-Insulate
Under-insulating a cold-climate basement wall leaves the interior surface cold enough to condense moisture, which defeats the point of the project. Over-insulating past code is rarely harmful, but it costs more and can complicate door and window reveals and framing depth. Match the board thickness to the code target for your zone, then add air sealing and rim-joist work, those usually deliver more comfort per dollar than extra inches of foam.
DOE climate zone map
IECC code adoption by state
Gather Tools and Materials Before You Start
Having everything ready prevents mid-job trips to the store. You will need:
- Rigid foam board, sized to your wall height
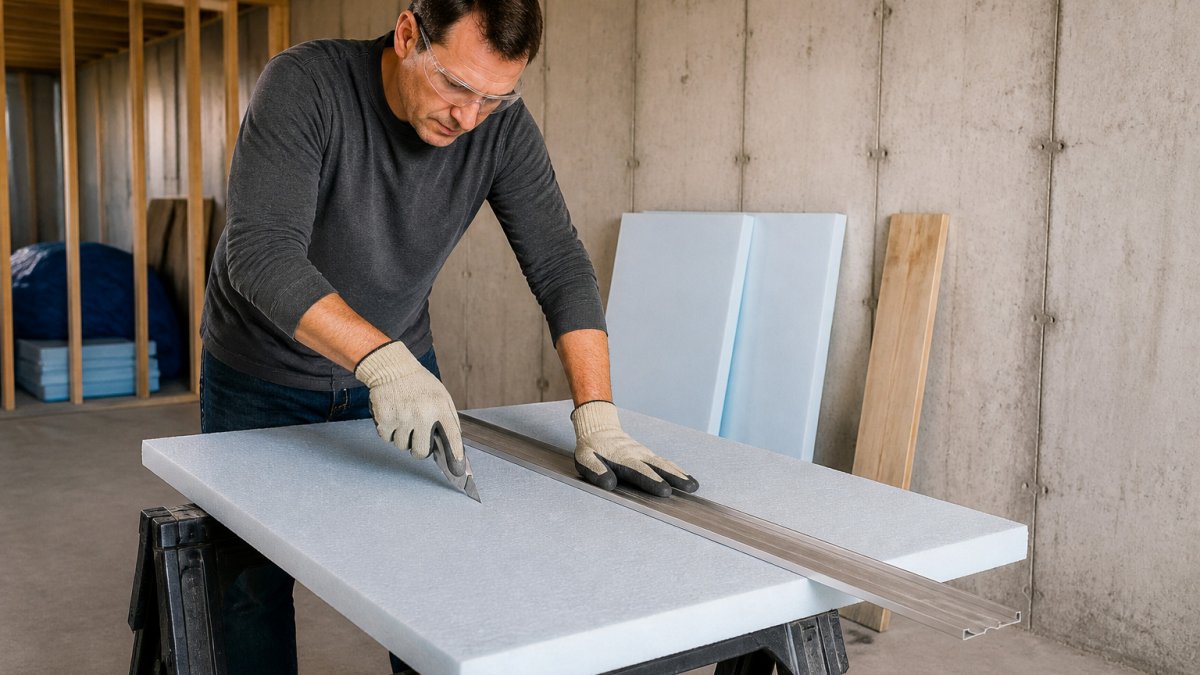
- Utility knife and a long straightedge
- Tape rated for foam board seams
- Construction adhesive and a caulk gun
- Canned spray foam for gaps and penetrations
- Tape measure, level, and pencil
- Dust mask, gloves, and eye protection
- Pressure-treated wood for furring strips, if you plan to frame
Buy about 10 percent extra material to cover cuts and mistakes. Pricing depends on quantity, dates, and delivery, so check current prices with your supplier.
Having these items ready before you begin keeps the job moving without mid-project trips to the store. If you’re unsure whether to tackle this yourself, weigh DIY against hiring a contractor to see which approach fits your project.
| Material or tool | Purpose | Note |
|---|---|---|
| Rigid foam board | Main insulation layer | Size it to your wall height |
| Foam board tape | Seal seams between boards | Must be rated for foam board |
| Construction adhesive | Attach boards to the wall | Apply in vertical beads |
| Canned spray foam | Fill gaps and penetrations | For small openings only |
| Pressure-treated wood | Furring strips, if framing | Only if you plan to frame |
| Extra material | Cover cuts and mistakes | Buy about 10 percent extra |
Step-by-Step: Insulating Basement Walls Yourself
Work in a clear, well-lit space and follow these steps in order.
- Confirm the wall is dry. Repeat the plastic test from the moisture section.
- Clean the wall. Remove dust, loose paint, and debris with a stiff brush.
- Measure and cut the foam board. Cut boards to fit each wall section, leaving no gaps.
- Apply adhesive. Run adhesive in vertical beads on the back of each board.
- Press boards into place. Hold each board firmly against the wall for a few seconds.
- Tape the seams. Seal every joint between boards with foam board tape.
- Check your work. Look for gaps and fill them before you move on.
Watch out: Never seal foam board completely against a wet wall. Trapped moisture is the most common reason DIY insulation fails.
Air-Seal Gaps, Rim Joists, and Penetrations
Air leaks often waste more energy than the insulation itself stops. Seal the rim joist (the wood band where the floor frame sits on the foundation) with spray foam. Then seal around pipes, wires, and vents where they pass through the wall. Use canned spray foam for small openings and caulk for tight seams.
Install Vapor Control and Framing
If you plan to frame a finished wall, add a vapor control layer on the warm side of the insulation, typically the interior side in a cold climate. Build a stud wall at least 1 inch from the foam so air can move. Keep the framing plumb and level, and leave room for wiring and plumbing. Install drywall only after the framing passes your own inspection.
Avoid These Common Basement Insulation Mistakes
- Insulating a damp wall. Fix the water first, every time.
- Using fiberglass against concrete. It holds moisture and loses effectiveness.
- Leaving gaps at the seams. Unsealed joints let warm, moist air reach the cold wall.
- Skipping the vapor plan. Decide where moisture control belongs before you close the wall.
- Ignoring the building code. Permit and inspection rules vary, so confirm them before you start.
Booking a Basement Consultation With Berry Basements
Some basement projects are bigger than a weekend job. If your basement has water problems, needs framing or plumbing changes, or you want a finished space, a professional can help you plan the work. book a basement consultation with Berry Basements to review your plans and get a free estimate. You can also see our current projects to judge the quality of our work before you decide.
Frequently Asked Questions
What is the best way to insulate basement walls?
For most DIY projects on concrete walls, rigid foam board is the most practical choice because it resists moisture, offers high R-value per inch, and can be installed without a deep stud cavity. Closed-cell spray foam performs well but usually requires professional application. Fiberglass batts are cheaper but absorb moisture and should only be used with a proper vapor control layer and a dry wall assembly. Confirm your moisture conditions first, since damp walls need to be fixed before any insulation goes in.
Can I insulate my basement myself?
Yes, many homeowners insulate basement walls themselves with rigid foam board and a framed wall. The work requires basic carpentry, careful air sealing, and attention to moisture. Start by confirming the basement is dry, since insulating a wet wall traps water against the concrete. Spray foam application is harder to do safely without equipment and training, so many homeowners hire out that part. Check local building requirements before starting, because permits may be needed for finished space.
Should I use foam board or fiberglass insulation in a basement?
Foam board is usually the better choice for basements because it does not absorb moisture the way fiberglass does and it provides more R-value in a thinner layer. Fiberglass can work in a dry basement when paired with a vapor barrier and a stud wall, and it is less expensive per board. If your basement has any history of seepage or condensation, rigid foam with taped seams is the safer option. Pricing varies by product and supplier, so check current quotes from your local retailer or contact Berry Basements for a project estimate.
How do I prevent moisture and mold behind basement insulation?
Control moisture before it reaches the insulation. Fix grading, gutters, and downspouts so water drains away from the foundation, and address any active leaks. Use rigid foam with sealed seams against the concrete, leave a small gap at the top and bottom if your method requires drying, and avoid trapping water with an impermeable layer on the wrong side of the assembly. Inspect the wall after the first heating season and look for condensation, staining, or musty odors, which are early warning signs.
