

Last Updated: October 24, 2026
Quick Summary
A basement contractor vs DIY decision comes down to upfront cost versus total cost, your time and skill level, and the risk of costly mistakes. Contractors bring licensed expertise and accountability, while DIY offers lower labor costs but risks code violations, moisture damage, and expensive rework that can exceed professional pricing.
- Professional contractors typically complete basement finishing in 6 to 12 weeks, while DIY projects on weekends stretch to 6 months or longer.
- Basement finishing almost always requires a building permit and inspections; unpermitted work can be excluded from homeowners insurance and must be disclosed when selling.
- Common DIY inspection failures include fire blocking, smoke alarms, ventilation, electrical clearances, and vapor barrier placement.
- Moisture damage is the biggest hidden cost in basements; skipping waterproofing to save money upfront costs far more when water destroys finished space.
- A detailed contract should include written scope, milestone-based payment schedule, change-order process, warranty terms, and lien waiver provisions.
Table of Contents
- The Core Trade-Off: Basement Contractor vs DIY
- DIY Basement Finishing Cost and What It Really Includes
- Basement Finishing Timeline: Professional vs Self-Managed
- Permits, Codes, and Inspection Requirements
- Using a Basement Contractor Checklist to Vet Professionals
- Hidden Costs, Waterproofing, and Why Mistakes Get Expensive
- Getting Your Free Estimate and Next Steps
- Frequently Asked Questions
The Core Trade-Off: Basement Contractor vs DIY
The basement contractor vs DIY decision comes down to three trade-offs: upfront cost versus total cost, your time and skill level, and the risk of costly mistakes. Most homeowners assume DIY saves money; the reality is more complicated.
A basement contractor brings licensed expertise, project management, and accountability. You bring sweat equity and lower labor costs, but also the risk of code violations, moisture damage, and rework that can exceed what you’d have paid upfront.
The decision isn’t about which option is universally “better.” It’s about matching your situation to the right choice. Learn about the key advantages of hiring a professional to help inform your decision.
| Factor | DIY Basement Finishing | Professional Contractor |
|---|---|---|
| Upfront labor cost | You provide it | Paid to contractor |
| Timeline | Flexible, often extended | Fixed schedule |
| Code compliance risk | High without expertise | Licensed contractor ensures compliance |
| Waterproofing expertise | Requires learning curve | Built-in experience |
| Rework costs | Can escalate quickly | Covered by warranty |
| Project management | Falls on you | Contractor handles coordination |
DIY Basement Finishing Cost and What It Really Includes
DIY basement finishing costs less upfront because you’re not paying for labor. You’re paying for materials: framing lumber, drywall, flooring, electrical supplies, and finishing materials.
A common mistake is underestimating specialized work. Electrical rough-in, plumbing, HVAC modifications, and waterproofing aren’t simple tasks.
Material quality also matters more than most DIY planners expect.
Get detailed cost breakdown information to accurately compare DIY vs professional pricing so you know what to expect.
Basement Finishing Timeline: Professional vs Self-Managed
DIY timelines are almost always longer than homeowners expect. A professional contractor working full-time might complete your basement in 6 to 12 weeks, depending on scope.
Professional contractors manage dependencies that DIY timelines often miss: electrical rough-in before drywall, drywall curing before finishing, HVAC coordination with your main system.
The timeline also affects disruption. A 12-week professional project is concentrated chaos; a 6-month DIY project means your basement is a work zone for half a year.
Permits, Codes, and Inspection Requirements
This is where the real risk lives, and where most DIY-versus-contractor comparisons stay vague. Basement finishing almost always requires a building permit, which triggers a sequence of inspections. Treat code compliance as a checklist you verify before work starts, not a risk you hope to avoid.
Verify your local requirements before you buy a single stud
Building codes are adopted and amended at the state and local level, so the same plan can be compliant in one jurisdiction and fail in the next. Before you frame, call your building department and ask five questions:
- What permits does this scope require? A finished basement typically needs a building permit, and often separate electrical, plumbing, and mechanical permits. Some jurisdictions allow a single combined permit; others require each trade to be pulled by a licensed professional.
- Who can pull the permit? Many jurisdictions let a homeowner pull a permit for work on their own primary residence, but not all do, and homeowner permits usually still require licensed trades for electrical, plumbing, and gas.
- What inspections are required, and in what order? The common sequence is foundation/framing, electrical rough-in, plumbing rough-in, mechanical, insulation, and final. Each inspection has to pass before the next stage is covered up.
- What are the egress requirements? If the finished space includes a sleeping room, most codes require an emergency escape and rescue opening, typically a window or door with a clear opening of at least 5.7 square feet, a minimum width of 20 inches, a minimum height of 24 inches, and a sill no more than 44 inches above the floor. A basement bedroom without compliant egress generally cannot be legally counted or marketed as a bedroom.
- What are the ceiling height and stair requirements? Habitable basement rooms generally need a minimum ceiling height (commonly 7 feet, with allowances for beams and ducts in some codes), and stairs have their own headroom, width, and handrail rules.
The code items that most often fail inspection
Failed basement inspections usually stem from ordinary items installed without checking the local amendment, not exotic structural work:
- Fire separation and blocking. Framing, draft stopping, and fireblocking at penetrations are frequently missed by first-time builders.
- Smoke and carbon monoxide alarms. Interconnected alarms are required in most finished basements, and the rules on where they go and how they interconnect vary.
- Ventilation and combustion air. Sealing a basement tightly without addressing fresh air and combustion air for furnaces and water heaters creates both code and safety problems.
- Electrical clearances and protection. Outlet spacing, GFCI protection in unfinished and wet areas, AFCI protection, and physical protection of wiring are routine inspection items.
- Insulation and vapor barriers. The required R-value and the placement of the vapor retarder depend on your climate zone and wall assembly, and getting the order wrong traps moisture.
Skipping a permit to save a few hundred dollars is a false economy. Unpermitted work can be excluded from homeowners insurance coverage, must typically be disclosed in most states when you sell, and can force you to open finished walls so an inspector can see the work. The cost to correct is almost always higher than the permit fee.
What a licensed contractor actually does here
A licensed contractor pulls the permits, schedules each inspection in sequence, and corrects failed items before the next trade covers the work. That coordination is part of what you pay for, and the part DIY homeowners most often underestimate, a failed inspection can stall a project for weeks waiting on a re-inspection slot.
Discover how to navigate permit delays that commonly derail DIY and contractor projects so you understand what to expect.
Before you decide DIY versus contractor, call your building department and get the permit, inspection, egress, and ceiling-height answers in writing. If the scope includes a bedroom, a bathroom, or any new electrical circuits, assume licensed trades and a permit sequence are part of the real cost.
Using a Basement Contractor Checklist to Vet Professionals
Not all contractors are equal, and the difference shows up in paperwork long before workmanship. Use this as a verification checklist, not a vibe check.
License, insurance, and registration
- Verify the license. Look up the contractor’s license number with your state’s licensing board or contractor registration database. Ask for the license number in writing and confirm it matches the name on the contract.
- Confirm general liability insurance. Ask for a certificate of insurance showing current general liability coverage and the policy limits. Call the insurer to confirm the policy is active.
- Confirm workers’ compensation. If the contractor has employees, ask for proof of workers’ compensation coverage. If an uninsured worker is injured on your property, the liability can follow you.
- Check for a surety bond if your state requires one. Bonding requirements vary, and a bond is not the same thing as insurance.
References and track record
Ask for at least three recent references from projects similar in scope, and actually call them. Ask about moisture problems after completion, change-order handling, on-schedule completion, and whether they’d hire the contractor again.
The written contract: what it must contain
A detailed contract is your main protection. It should include:
- A written scope of work that lists what is included and, just as important, what is excluded. “Finish the basement” is not a scope.
- A payment schedule tied to milestones, not to the calendar. A common structure is a modest deposit, then payments at framing, rough-in inspections, drywall, and final. Be cautious of any contractor who wants a large payment upfront or payment in full before the final inspection.
- A change-order process in writing. Changes should be priced and signed before the work is done, not settled verbally at the end.
- A start date and a completion date, plus how weather or inspection delays are handled.
- Warranty terms covering workmanship and materials, with the length and what is excluded stated clearly.
- Lien waiver provisions. Ask the contractor to provide lien waivers from subcontractors and suppliers as payments are made, so you are not exposed to a mechanics lien from an unpaid supplier.
Before final payment, ask for a final lien waiver and a copy of the passed final inspection. Withholding a final payment until you have both is normal practice and protects you.
Red flags
Be cautious with contractors who want a large payment upfront, pressure you to skip permits, can’t explain their waterproofing approach in specific terms, won’t put the scope and payment schedule in writing, or can’t produce a certificate of insurance.
Learn red flags to avoid when evaluating and selecting a contractor so you hire someone who will deliver quality work without surprises.
Ask about basement-specific experience: moisture management, foundation cracks, egress installation, and existing HVAC or plumbing. A basement-finishing specialist understands these issues better than a general contractor who treats basements as one project type among many.
Vet the paperwork before you compare bids. A lower bid from an unlicensed, uninsured contractor with no written scope is not a lower price, it is a transfer of risk to you.
Hidden Costs, Waterproofing, and Why Mistakes Get Expensive
The biggest hidden cost in basement finishing is moisture damage. Basements are below grade. Water pressure, groundwater seepage, and condensation are constant threats.
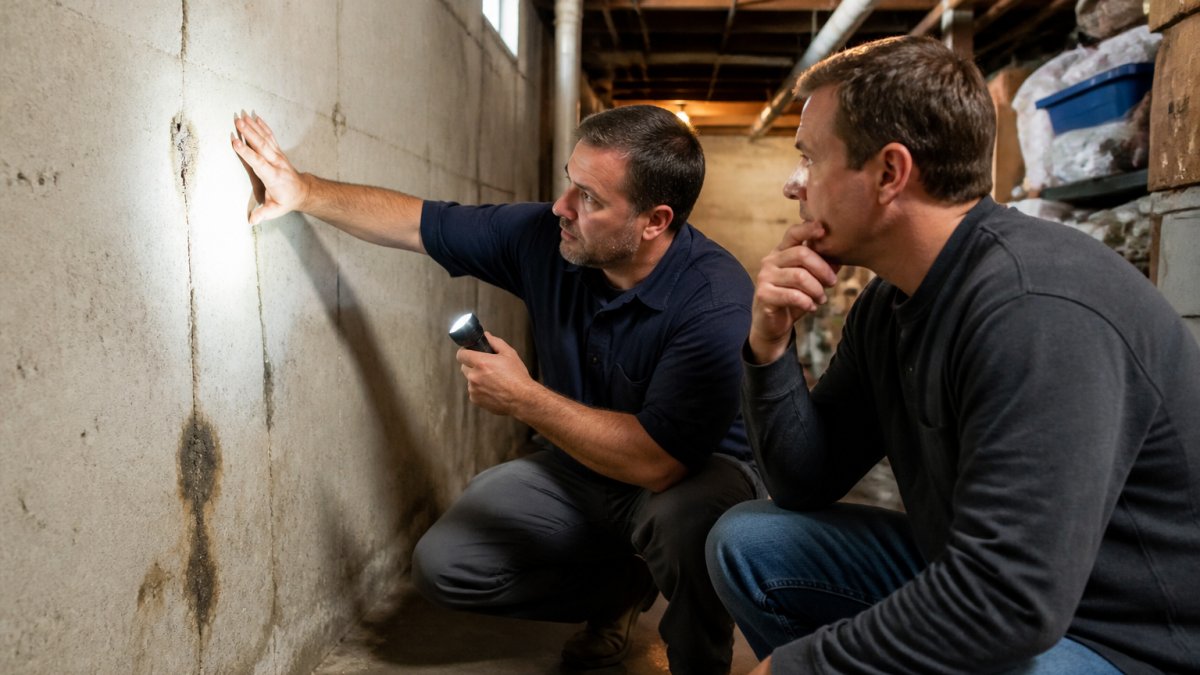
A common DIY mistake is finishing a basement without addressing its moisture history.
Electrical and plumbing mistakes also escalate costs: code violations mean rework, plumbing leaks behind walls mean opening walls, and electrical faults mean liability and potential injury.
Structural changes are another hidden cost area. Removing walls, modifying joists, or changing load paths may require an engineer’s approval.
Getting Your Free Estimate and Next Steps
If you’re ready to explore professional basement finishing, request a free estimate to see what a licensed contractor would charge for your specific project.
The estimate should break down labor, materials, permits, and timeline, and address your basement’s specific challenges: moisture history, existing systems, and desired finishes.
Use that estimate to make an informed decision. If DIY still makes sense, you’ll know the real cost comparison.
The basement contractor versus DIY decision hinges on your skill level, available time, and tolerance for risk.
Frequently Asked Questions
Should I hire a contractor or do a basement renovation myself?
Hire a contractor if your project involves plumbing, electrical work, structural changes, or waterproofing, these require permits and licensed expertise. DIY works for simpler finishing tasks like painting, basic framing, or flooring if you have experience and time. Most homeowners benefit from hiring professionals for the complex systems and letting themselves handle finish work, combining both approaches to control costs while ensuring code compliance and quality.
What is included in a DIY basement finishing cost?
DIY costs cover materials (drywall, framing lumber, flooring, paint, insulation) and tool rentals. You avoid labor costs but invest your own time. Hidden expenses include permits, inspections, tool purchases you’ll keep, and rework if mistakes happen. Many homeowners underestimate material costs and the time required, so budget extra for contingencies.
How long does basement finishing take, and does hiring a professional speed it up?
A DIY basement typically takes longer than expected, depending on complexity and your skill level. A professional contractor usually completes the same project more quickly. The timeline advantage of hiring professionals comes from their experience, dedicated crews, and ability to manage multiple trades simultaneously. If your basement has moisture issues or structural work needed, the pre-finishing assessment and waterproofing can add time regardless of your approach.
What permits and inspections do I need for a basement renovation?
Most jurisdictions require permits for electrical, plumbing, HVAC, structural changes, and egress windows. Inspections verify code compliance at framing, rough-in (plumbing and electrical), and final stages. Unpermitted work can create resale issues, void insurance coverage, and result in fines. Hiring a licensed contractor ensures they pull permits and coordinate inspections. DIYers must handle this themselves, which adds time and complexity. Check your local building department for specific requirements in your area.
