

Last Updated: October 22, 2026
Quick Summary
Choose window well covers by matching the type to your well shape, then measuring the outside rim rather than the inside opening. Pick polycarbonate for most homes, confirm at least 2 inches of rim overlap on every side, and choose a cover that opens from inside without tools over egress wells.
- Flat, slant, atrium, and domed covers each suit different well shapes and headroom needs.
- Polycarbonate flexes instead of cracking and handles UV and snow load well.
- A cover needs at least 2 inches of overlap on every side to sit stable.
- If the well diagonals differ by more than about 1/2 inch, treat it as custom.
- Egress covers must open or release from inside without tools or keys.
Table of Contents
- Why the Right Window Well Cover Matters for Your Basement
- Window Well Cover Types: Flat, Slant, Atrium, and Domed
- Cover Materials Compared: Polycarbonate, Acrylic, Plexiglass, and Metal
- How to Measure a Window Well Cover Without Getting It Wrong
- Custom Versus Standard Size: Choosing the Right Fit
- Egress Window Well Covers and Emergency Escape Requirements
- Window Well Cover Installation and Anchoring by Foundation Type
- Drainage, Ventilation, and Water Management Around Your Cover
- Frequently Asked Questions
Why the Right Window Well Cover Matters for Your Basement
A window well cover is a rigid or semi-rigid barrier over the opening of a basement window well, keeping rain, snow, and debris out while letting light in.
The cover is often the cheapest fix in the whole basement, and the one most homeowners postpone.
Most guides treat the cover as a cosmetic add-on. Below, we walk through the full selection process, from measuring the well to meeting egress code.
Window Well Cover Types: Flat, Slant, Atrium, and Domed
Four cover types cover almost every residential well. Match the type to your well shape and headroom needs.
- Flat covers sit level with the well rim. Best for shallow wells and tight clearance.
- Slant covers slope away from the house. Snow and rain slide off, and they shed debris well.
- Atrium covers are raised, greenhouse-style units. Best for deep wells that need light and headroom.
Matching Cover Shape to Well Shape
Well shape decides which covers fit. A rectangular well takes a flat or slant cover with straight edges; a curved or semicircular well needs a domed or custom-formed unit. Large window wells often need two or more panels joined. A cover that overlaps the rim by only an inch on one side will leak and flex in heavy winds.
Trace the well opening onto cardboard and cut it out. Take the template to the supplier. It settles fit arguments faster than any tape measurement.
Cover Materials Compared: Polycarbonate, Acrylic, Plexiglass, and Metal
Polycarbonate is the best all-around material for most homes: it flexes instead of cracking, handles UV well, and carries snow load without shattering. Acrylic and plexiglass look clearer but grow brittle with age and sun. Metal covers are toughest and block the most light.
| Material | Strength | Light | Weather and UV | Best For |
|---|---|---|---|---|
| Polycarbonate | High, flexes on impact | Good clarity | Strong UV and snow load | Most homes, egress wells |
| Acrylic | Moderate, can crack | Excellent clarity | Weakens with UV over time | Shaded, low-traffic wells |
| Plexiglass | Moderate, scratches easily | Excellent clarity | Poor long-term UV resistance | Budget, temporary use |
| Metal | Very high | Blocks most light | Excellent in wind and snow | Deep wells, heavy snow areas |
Weather, UV, and Load Performance
Weather resistance comes down to wind uplift and snow load. A flat cover catches wind like a sail; a slanted or domed cover sheds both. In snow country, check the rated load before you buy, a cover that sags under snow can crack and drop into the well.
UV exposure is the slow killer. Cheap acrylic yellows and turns brittle after a few summers. Polycarbonate with a UV coating holds up far longer.
How to Measure a Window Well Cover Without Getting It Wrong
Measure the outside edge of the well rim, not the inside opening. A cover needs to overlap the rim by at least 2 inches on every side to sit stable and shed water away from the foundation, the source of most undersized-cover complaints.
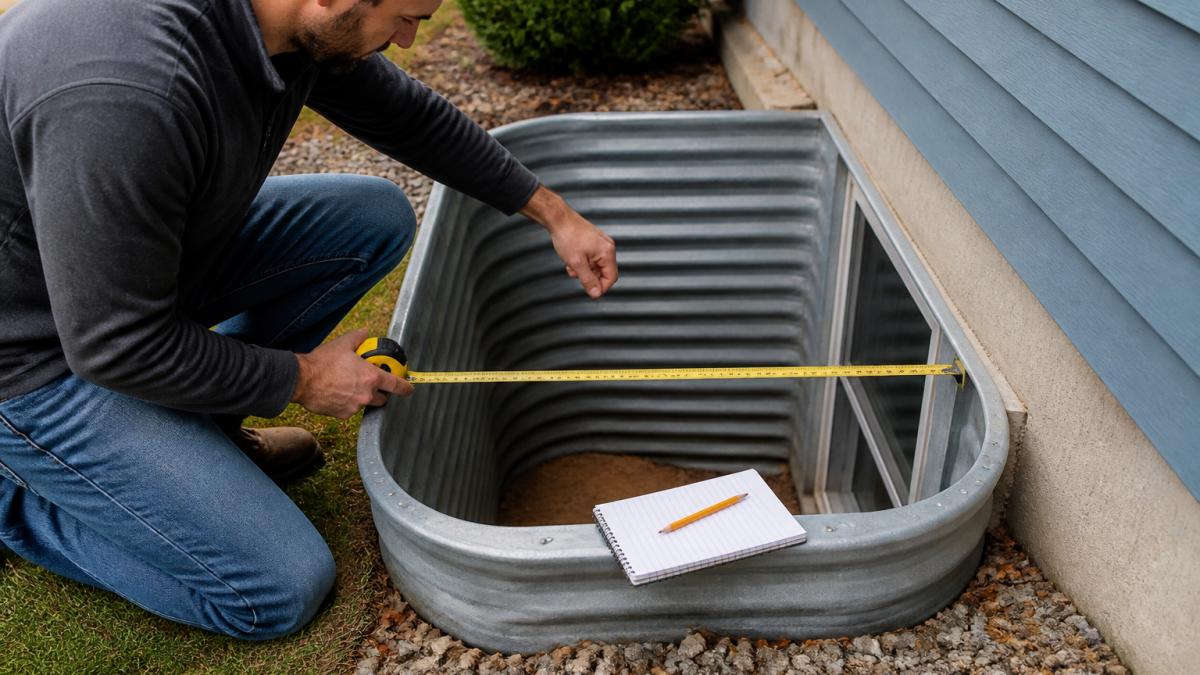
The Measurement Checklist
Work through this list in order and write every number down before you shop. A supplier will ask for all six.
- Width, measure rim to rim at the widest point, front and back. Record the larger reading.
- Projection, the distance the well extends out from the house wall, rim to rim.
- Depth, rim to the bottom of the well. Depth drives whether you need a domed or atrium cover for headroom and egress.
- Rim width, the flat surface available for the cover to rest on. If the rim is narrower than 2 inches, the cover cannot overlap properly and you need a different mounting approach.
- Shape, rectangular, curved/semicircular, or irregular. Note any rounded corners and their radius if you can.
- Clearance, measure up to any deck, fence, downspout, or hose bib above the well. A slant or domed cover needs vertical room to shed snow and open for egress.
Measure twice at each point. Wells are rarely perfectly square, so use the largest reading for width and projection and the smallest for clearance.
Handling Irregular, Out-of-Square, and Curved Wells
This is where most guides stop and most homeowners get burned: a well 1 inch out of square will not accept a stock rectangular cover without a gap on one corner.
- Out-of-square rectangles: measure both diagonals corner to corner. If they differ by more than about 1/2 inch, treat the well as custom. A stock cover will rock and leak at the short corner.
- Curved or semicircular wells: measure the straight chord across the opening and the depth of the curve at its deepest point. Suppliers of domed covers quote both.
- Irregular or stepped wells: trace the opening. Tape a sheet of cardboard or rosin paper over the rim, press it down to crease along the edges, and cut the outline. Mark the house side and the front so the template cannot be flipped.
Measuring the inside opening instead of the rim is the most common mistake. The cover arrives undersized, drops through the opening, and you are stuck paying for a custom replacement. The second most common mistake is ordering a stock cover for a well that is out of square by more than half an inch.
Turning Measurements Into a Cover Spec
Once you have the six numbers, the decision is mostly mechanical:
- If width and projection match a stock size within 1 inch and the diagonals agree within 1/2 inch and the rim is at least 2 inches wide, a standard cover will work.
- If any of those fail, or the well is curved or irregular, go custom.
- If depth is greater than about 44 inches, plan for a domed or atrium cover so the well still functions as an emergency escape with headroom.
Bring the checklist and template to the supplier and ask them to confirm the overlap on all four sides in writing, that step prevents most return and reorder costs.
Custom Versus Standard Size: Choosing the Right Fit
Standard-size covers are cheaper and ship fast, but only work if your well matches a stock dimension. Custom covers fit odd shapes, large window wells, and tight clearances, closing the gap that lets water in. Choose standard for a common rectangular well with a sound rim; choose custom when the well is curved, oversized, out of square, or under a deck.
Egress Window Well Covers and Emergency Escape Requirements
Egress window well covers must open or release from the inside without tools or keys, per the emergency escape and rescue opening requirements in the residential building code. A cover that is screwed down defeats the purpose.
Local rules vary by jurisdiction, and some areas also require a minimum clear opening and a ladder or steps in deep wells. Confirm specifics with your local building department before you buy, a non-compliant cover can fail inspection and put your family at risk.
Window Well Cover Installation and Anchoring by Foundation Type
Window well cover installation is straightforward on a sound rim and fussy on a damaged one. The anchor method depends on the well material and on wind: a cover is a flat plate catching wind, so the fastening plan must resist uplift, not just hold the cover down at rest.
Fastening by Well Material
- Concrete or masonry wells: drill and set masonry anchors into the rim. Use a hammer drill, blow the dust out of each hole, and set anchors at least 2 inches in from the rim edge so you do not spall the concrete. Space anchors roughly every 12 to 16 inches along each side and within 6 inches of every corner.
- Metal wells: use self-tapping screws into the well lip, with rubber washers or a bead of exterior sealant to stop leaks. Do not overdrive, a stripped screw in thin metal will not hold in a wind gust.
- Composite or plastic wells: use the manufacturer’s brackets. Screws can crack the rim, and a cracked rim is a leak path. If the manufacturer does not publish a bracket, through-bolt with a backing plate rather than screw into the plastic.
Wind Uplift: Why Anchor Count Alone Is Not Enough
A flat cover acts like a sail: wind moving over the top creates lift, and the failure mode is the cover peeling up at one corner and tearing out the remaining anchors. Three things reduce that risk:
- Slope the cover slightly away from the house so wind has less flat surface to press on and water runs off.
- Anchor the windward corners first and heaviest. Corners see the highest uplift.
- Use a continuous lip or channel where the cover meets the rim, if the cover design allows it, rather than relying on isolated fasteners.
After fastening, push down hard on each corner and along each edge. If the cover flexes or lifts, add anchors before you call it done.
Anchoring Without Defeating Egress
This is the part most installation guides skip. An egress well cover must open or release from the inside without tools or keys, so the anchoring plan must hold the cover against wind while still letting a person inside the well push it open.
- Hinged covers: anchor the hinge side solidly and use a latch on the opposite side that releases from below. Do not add screws on the latch side.
- Lift-off covers: the cover rests in a channel or on pins. Anchor the channel, not the cover, so the cover still lifts free.
- Screw-down covers: these are generally not acceptable over an egress well. If a cover must be secured for security, use a quick-release latch rated for escape rather than screws.
If you are unsure whether your well is an egress well, check whether the window meets the emergency escape and rescue opening requirements in the residential building code and confirm with your local building department.
The cover should shed water away from the foundation, not trap it against the wall. Slope and overlap matter more than anchor count, and on an egress well, the anchor plan must leave the cover openable from inside without tools.
Foundation-Specific Watch-Outs
- Poured concrete: anchors hold well, but avoid drilling into the cold joint between wall and footing.
- Block or brick: anchor into the solid block, not the mortar joint. Mortar anchors pull out.
- Precast or fiberglass well liners: follow the liner manufacturer’s bracket; drilling can void the liner warranty.
Drainage, Ventilation, and Water Management Around Your Cover
A sealed cover with no drainage turns the well into a bucket: water still gets in around the edges and, without a way out, pools against the basement window. Keep these points in mind:
- Leave a small gap or screened vent so the well can breathe and dry out.
- Make sure the well drain or gravel bed at the bottom is clear.
- Direct downspouts away from the well; a downspout dumping into the well defeats any cover.
If water still collects, the problem is usually drainage around the foundation, not the cover itself, where a professional look at your waterproofing pays off.
Frequently Asked Questions
Which window well cover material is best for snow and heavy winds?
Polycarbonate covers handle snow load and wind better than acrylic or plexiglass because the material flexes instead of cracking under weight. Metal covers are the strongest option for impact and debris, but they block light and can rust if the finish wears. For a basement window that needs daylight, a domed or slanted polycarbonate cover with a rated snow load and anchored frame is the practical pick in cold-weather areas.
Can a window well cover be used over an egress window?
Yes, but it has to meet egress requirements. The cover must open or release from the inside without tools and without a key, so anyone inside the basement can push it clear and climb out. A cover that screws down permanently or requires a ladder to lift from outside fails that test. Check your local building department’s egress rules before buying, and keep the well clear of furniture, grates, or planters that would block the escape path.
How do I measure a window well cover correctly?
Measure the outside of the well at its widest point for both width and projection from the foundation wall, then add the overhang your cover style needs. Measure depth from the rim to the bottom of the well as well. Do not measure the window itself. Trace the rim on cardboard if the well is curved or irregular, and note any obstructions like downspouts or hose bibs that the cover must clear.
Should a window well cover be flat or domed?
A flat cover sits closer to the rim and looks cleaner, but it collects water, leaves, and snow unless it has a slope. A domed or slanted cover sheds rain and snow and gives more headroom for egress, which matters if the well is an emergency exit. Flat covers work best on sheltered wells with good drainage; domed or slant covers are the safer choice where snow load, heavy rain, or egress clearance is a concern.
Choosing the right cover protects your basement, your window, and the people who live above it. If your well is out of square, sits under a deck, or needs an egress-compliant release, the measurements get tricky fast. Berry Basements handles basement waterproofing and structural work alongside our finishing projects, so we can check the well, the drainage, and the window together. Get a free estimate and we will help you pick a cover that fits the first time.