

Table of Contents
- Understanding Egress Window Requirements for Basements
- Checking Codes and Obtaining an Egress Window Installation Permit
- Planning Your Egress Window Location and Size
- Structural Assessment and Safe Foundation Cutting
- Installing the Window Well and Waterproofing
- Installing the Egress Window and Testing Emergency Access
- Basement Egress Window Cost and Budget Considerations
- Hiring a Basement Egress Window Contractor
- Frequently Asked Questions
Last Updated: October 13, 2026
Understanding Egress Window Requirements for Basements
Learning how to add egress windows to basement starts with understanding that an egress window is an emergency exit from your basement that meets specific building code requirements. It’s required by law in most jurisdictions if your basement is a bedroom or sleeping area.
Building codes set strict minimum dimensions so a person can fit through and exit safely.
Minimum Opening Dimensions and Clear Opening Area
The minimum width is 32 inches and the minimum height is 37 inches. When learning how to add egress windows to basement, measure carefully before cutting.
Some jurisdictions allow smaller openings (as little as 5 square feet) if you can demonstrate compliance with your local code.
Sill Height and Accessibility Standards
The sill (bottom edge of the window) cannot be more than 44 inches above the floor.
The window well must have a ladder or steps if it’s deeper than 44 inches, with rungs at least 3 inches wide and spaced no more than 12 inches apart.
Checking Codes and Obtaining an Egress Window Installation Permit
Before buying materials or hiring a contractor, understand your local building code, codes vary by county and municipality.
Your local building department has the specific requirements for your property, issues permits, and conducts inspections. Skipping this step can void your insurance, block a future sale, and result in fines.
Local Building Code Requirements and Inspection Process
Contact your local building department for basement egress window requirements, most have a code section specifying minimum dimensions, well depth, and drainage.
Ask about these specific items:
- Clear opening dimensions required in your jurisdiction
- Sill height limits
- Window well depth and ladder requirements
- Waterproofing and drainage standards
- Whether the opening can be on any wall or must face a yard
- Whether utility lines (gas, electric, water) affect placement
Inspection typically happens in three stages: before cutting (framing), after installation (rough-in), and after waterproofing and grading (final). Plan for each.
Permit Application and Timeline
Apply for your permit before work begins, with photos of the wall and a rough sketch of the window location.
Permit processing usually takes 1-2 weeks. Once approved, you have 6-12 months to finish; if work stalls longer, the permit expires and you must reapply.
Permit fees typically range from $50 to $300, money well spent to ensure the work meets code and protects your investment.
Planning Your Egress Window Location and Size
Your egress window’s location affects the project’s difficulty and cost.
If you’re adding a bedroom, the window belongs in that room; for a recreation area, choose a spot that doesn’t compromise usability.
Selecting the Best Wall and Avoiding Utilities
Avoid exterior walls with underground utilities. Call 811 before you dig or cut, this free service marks gas, electric, water, and sewer lines.
Corner walls are often easier to work with than walls in the middle of the foundation.
Check for HVAC ducts, plumbing, and wiring inside the wall before cutting; rerouting them adds cost, so consider a different wall.
Avoid walls where water naturally collects.
Measuring the Rough Opening and Marking the Foundation
The rough opening is the hole you cut in the foundation, sized larger than the window frame to allow for shimming and sealing.
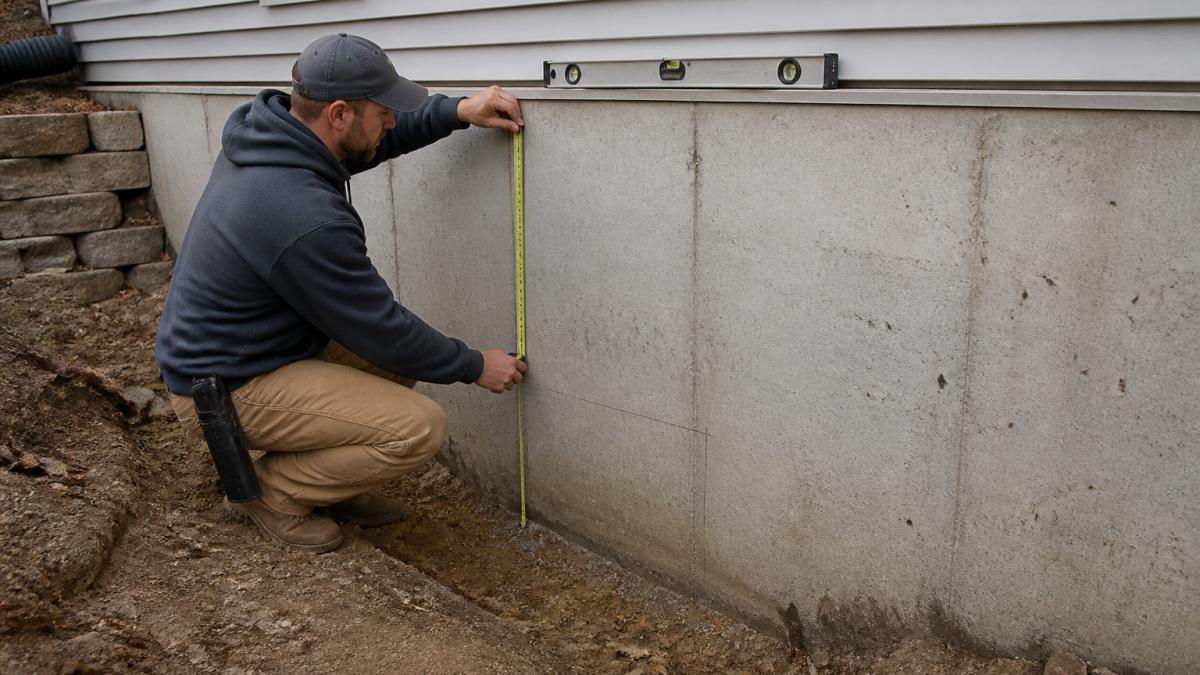
Measure twice, then mark the opening with chalk or spray paint on both sides of the wall.
The rough opening should be the window width plus 1 inch and the window height plus 1 inch, giving space to adjust the window until it’s level and plumb.
Structural Assessment and Safe Foundation Cutting
Cutting a hole in your foundation is the most critical step, a mistake can damage your home’s structural integrity.
Before cutting, assess whether the wall is load-bearing. Load-bearing walls support the house above them, so a large opening requires a structural header (a strong beam) to carry the load across it.
Evaluating Load-Bearing Walls and Header Requirements
Most basement walls are load-bearing. If the wall runs perpendicular to the floor joists above, it’s definitely load-bearing.
Openings under 3 feet wide may not need a header, depending on local code; larger openings do.
Many homeowners hire a structural engineer to evaluate the wall and specify the header size. This costs $300-$600 but prevents costly mistakes, and your building department may require it.
Concrete Cutting Techniques and Safety Considerations
Use a concrete saw with a diamond blade to cut the foundation.
Concrete cutting creates a lot of dust.
Make straight cuts along your marked lines. Cut slowly and let the saw do the work.
After cutting, you’ll need to remove the concrete, heavy, dusty work many homeowners hire a contractor for.
Installing the Window Well and Waterproofing
The window well is the structure outside your foundation that catches water and directs it away from the opening. Without one, water will seep into your basement every time it rains.
Excavate outside the foundation so the well sits below ground level, extending at least 8 inches below the sill height. Slope the ground away from the well so water drains toward it, not into it.
Excavating Outside the Foundation and Installing the Well
Dig a hole at least 3 feet wide and as deep as your local code requires (typically 3-4 feet).
Install a window well made of galvanized steel, plastic, or aluminum.
Backfill around the well with gravel or sand, not soil. Soil holds moisture and can cause water to pool against the foundation.
Drainage, Flashing, and Moisture Protection
Install flashing where the window frame meets the foundation. Flashing is metal or membrane material that directs water away from the opening.
Apply waterproofing sealant around the entire opening. Use a high-quality exterior caulk rated for foundation use.
Install a perforated drain pipe at the bottom of the well. This pipe collects water and directs it to a sump pump or daylight drain.
Installing the Egress Window and Testing Emergency Access
The window itself must be rated for basement use and meet your local code. Casement windows (side-hinged) and horizontal sliding windows both work well.
Install the window frame in the rough opening. Shim it level and plumb, then secure it with fasteners rated for foundation attachment. These fasteners are stronger than standard nails or screws.
Framing, Sealing, and Fastening the Window
Use exterior-grade fasteners (stainless steel or galvanized) to prevent rust. Space fasteners every 12-16 inches around the frame. Over-tightening can crack the frame or bow the foundation.
Seal all gaps between the frame and the foundation with caulk. This prevents air and water infiltration.
Frame the interior opening if you want to finish the wall. Install drywall or trim around the window to match your basement décor.
Well Cover, Ladder, and Emergency Operation Testing
Install a well cover or grate over the window well opening.
If the well is deeper than 44 inches, install a ladder inside the well. Test the ladder to ensure it’s secure and easy to climb.
Test the window operation regularly. Open and close it several times to ensure it moves smoothly. Make sure family members know how to open it quickly.
Basement Egress Window Cost and Budget Considerations
The total cost of adding an egress window varies widely based on your specific situation. Foundation condition, utility conflicts, soil type, and local labor rates all affect the price.
A simple project on an unfinished basement wall with no utilities nearby might cost less. A complex project involving utility relocation, structural work, or difficult soil conditions will cost more.
Labor, Materials, and Project Variables Affecting Price
Materials typically include the window, well, flashing, caulk, and fasteners. Quality matters, cheap windows leak. Budget for quality products that will last.
Labor is the largest cost for most projects. Concrete cutting, excavation, and waterproofing require skill and specialized equipment. Most homeowners hire professionals for these tasks rather than doing them themselves.
Project variables that increase cost:
- Utility lines that need relocation
- Load-bearing wall requiring a structural header
- Deep excavation due to high water table
- Poor soil conditions requiring additional drainage
- Finishing work (drywall, trim, paint)
- Removing and disposing of cut concrete
When to Hire a Basement Egress Window Contractor
If you’re comfortable with basic carpentry and have experience with concrete work, you might tackle parts of this project yourself. However, most homeowners benefit from hiring a professional for at least the concrete cutting and waterproofing.
At Berry Basements, we handle the structural assessment, foundation cutting, and waterproofing to ensure the job is done right. These are the steps where mistakes are most costly.
Consider hiring a professional if:
- The wall is load-bearing and requires a header
- Utility lines are near the opening location
- Your basement has a history of moisture problems
- You’re uncomfortable working at heights or with power tools
- The project timeline is tight
Hiring a Basement Egress Window Contractor
Choosing the right contractor makes the difference between a project that adds value and one that creates problems. A poor installation leads to water leaks, structural issues, and expensive repairs.
Look for a contractor with experience specifically with egress window installation. General contractors may not understand the code requirements or waterproofing details that make the difference.
Vetting Contractors and Verifying Licensing
Ask for proof of licensing and insurance. A licensed contractor has passed exams and understands local building codes.
Check references from past clients. Ask specifically about egress window projects. How did the contractor handle the permit process?
Ask about the contractor’s experience with your local building department.
Verify that the contractor pulls permits in their own name, not yours.
Getting Estimates and Understanding the Timeline
Get estimates from at least two contractors. Compare what’s included in each estimate, materials, labor, permits, inspections, and cleanup.
Ask how long the project typically takes.
Understand what happens if problems are discovered during the work.
At Berry Basements, we provide a detailed estimate that explains every cost.
Adding an egress window transforms your basement from a dark, emergency-only space into a functional living area.
Frequently Asked Questions
Do I need a permit to add an egress window to my basement?
Yes, a permit is required in most jurisdictions. Building codes mandate egress windows in basements used as bedrooms or living spaces for safety and emergency escape. Your local building department will inspect the installation to ensure it meets minimum opening dimensions, sill height, and structural requirements. Skipping the permit process can result in fines, failed home inspections, and insurance complications. Contact your local building department to confirm specific permit requirements before starting work.
What size does a basement egress window need to be according to code?
The International Building Code requires a minimum clear opening area of 5.7 square feet for emergency escape. The opening must be at least 24 inches wide and 36 inches tall. The sill height (the bottom of the window opening) cannot exceed 44 inches above the basement floor. These dimensions ensure a person can physically fit through the opening and exit quickly in an emergency. Local codes may have additional requirements, so verify with your building department before installation.
Can I install an egress window myself, or do I need to hire a basement egress window contractor?
DIY installation is possible if you have experience with concrete cutting, framing, and waterproofing. However, the project involves cutting through the foundation wall, which requires structural knowledge to avoid compromising the home’s integrity. Mistakes in drainage or waterproofing can lead to water damage and mold. Most homeowners benefit from hiring a licensed contractor, especially if utilities or load-bearing elements are near the installation site. A professional ensures code compliance, proper permits, and warranty protection.
How much does it cost to add an egress window to a basement?
Basement egress window cost varies based on foundation type (poured concrete vs. masonry), soil conditions, excavation depth, window type, and labor rates in your area. Factors like utility relocation, structural reinforcement, and drainage complexity also affect pricing. For a detailed estimate specific to your project, contact a licensed contractor who can assess your basement and provide transparent pricing. Many contractors offer free estimates to help you budget accurately for this investment.