

Last Updated: November 1, 2026
Quick Summary
Seal air gaps in a basement wall assembly by first finding leaks with a hand or incense test, then sealing cracks and gaps with polyurethane caulk or expanding foam matched to gap width. Prioritize the rim joist, sill plate, and utility penetrations, and never seal a wall that is actively wet.
- Mark every leak with painter’s tape as you find it during detection.
- Use polyurethane caulk for hairline cracks under 1/4 inch in concrete.
- Sealing rim joists is the highest-value step in the whole project.
- Rigid foam board goes up after air leaks are sealed, not before.
- Never seal a wall that is actively wet; fix the water source first.
Table of Contents
- Step 1: Run Basement Air Leak Detection Before You Touch a Caulk Tube
- Step 2: Seal Cracks and Gaps in Concrete and Masonry Foundation Walls
- Step 3: Pick the Best Caulk for Basement Walls by Gap Size and Substrate
- Step 4: Learn How to Seal Rim Joists and Sill Plates Correctly
- Step 5: Close Penetrations Around Pipes, Wires, and Utility Openings
- Step 6: Install Rigid Foam Board and Seal Its Seams and Perimeter
- Basement Moisture and Air Sealing: Managing Condensation and Drainage
- Book a Free Estimate with Berry Basements
- Frequently Asked Questions
Step 1: Run Basement Air Leak Detection Before You Touch a Caulk Tube
Air sealing a basement starts with finding the leaks, not buying supplies. Most homeowners guess wrong about where cold air enters, so they seal the wrong spots and miss the real ones.
On a cold, windy day, hold the back of your hand near likely leak points. Feel for a draft. For a more reliable read, light a stick of incense and watch the smoke.
Work through the basement in a set order:
- The rim joist, where the wood frame meets the concrete
- Foundation wall cracks and tie holes
- Around pipes, wires, and dryer vents
- Sill plates and the base of framed walls
- Window and door frames
Common Leak Locations to Check First
The rim joist sits at the top of the foundation wall and is a common source of air leakage. Cracks in poured concrete and mortar joints in block walls come next. Utility openings are third.
Mark every leak with painter’s tape as you find it.
Step 2: Seal Cracks and Gaps in Concrete and Masonry Foundation Walls
Concrete and masonry walls need a sealant that flexes with the wall. Rigid fillers crack and let air back in within a season.
For hairline cracks under 1/4 inch, use a polyurethane caulk. Clean the crack with a wire brush, then blow out the dust. Push the caulk deep into the crack and tool it smooth. For wider gaps up to 3 inches, use expanding foam made for masonry.
Watch out: sealing a wet crack traps moisture inside the wall. Fix the water source first, or the patch will fail.
Step 3: Pick the Best Caulk for Basement Walls by Gap Size and Substrate
The best caulk for basement walls depends on three things: gap width, what the sealant has to bond to, and whether the joint moves. There is no single product that handles every job, and picking by brand instead of by geometry is the most common reason a basement seal fails within a year.
Use this decision guide before you buy anything:
| Gap width | Substrate | Product | Why it works | Watch out for |
|---|---|---|---|---|
| Hairline to 1/4 inch | Poured concrete, block mortar joints | Polyurethane caulk | Flexes with the wall; bonds to dusty masonry | Will not bridge a gap wider than its joint-movement rating |
| 1/4 to 1/2 inch | Concrete, masonry, wood | Polyurethane caulk over closed-cell backer rod | Backer rod gives the caulk a bond breaker so it stretches instead of tearing | Foam backer rod absorbs water; use closed-cell only |
| 1/2 to 1 inch | Concrete, wood, rim joist | Low-expansion expanding foam | Fills uneven voids without bowing framing | Over-expansion can crack mortar or push drywall |
| 1 to 3 inches | Rim joist cavity, band board, block cores | Foam plus rigid board or masonry plug | Foam alone shrinks and pulls away from wide voids | Foam is not structural; do not use it to fill a missing block |
| Around pipes, wires, conduit | Any | Foam-compatible sealant or fire-rated sealant where required | Bonds to plastic and metal; stays flexible | Some caulks break down on contact with spray foam |
Match the sealant to the substrate
Concrete and masonry are alkaline and often dusty. A polyurethane or siliconized acrylic caulk labeled for masonry bonds better than a painter’s caulk, which is designed for trim and will fail on a foundation wall.
Wood, sill plates, rim joists, band boards, moves with seasonal moisture. Use a paintable polyurethane or a foam-compatible sealant that stays flexible.
Irregular joints, spalled block, chipped concrete, a gap that changes width along its length, are where backer rod earns its keep.
When caulk is the wrong tool
Caulk is not a masonry repair. If a block is cracked through, a mortar joint is missing, or a tie hole is wider than about 3 inches, the right fix is masonry patching or a plug, not a thicker bead of caulk. The same goes for a joint that is actively leaking water: sealant traps moisture and the patch fails.
Buy one tube of each product you plan to use and test it on a scrap of the actual substrate before you commit to the whole basement. A sealant that bonds to clean concrete can fail on a dusty block wall.
Read product labels for compatibility before pairing sealants and foams.
Step 4: Learn How to Seal Rim Joists and Sill Plates Correctly
Sealing rim joists is the highest-value step in the whole project. The rim joist forms the top edge of the foundation wall, and it leaks air year-round.
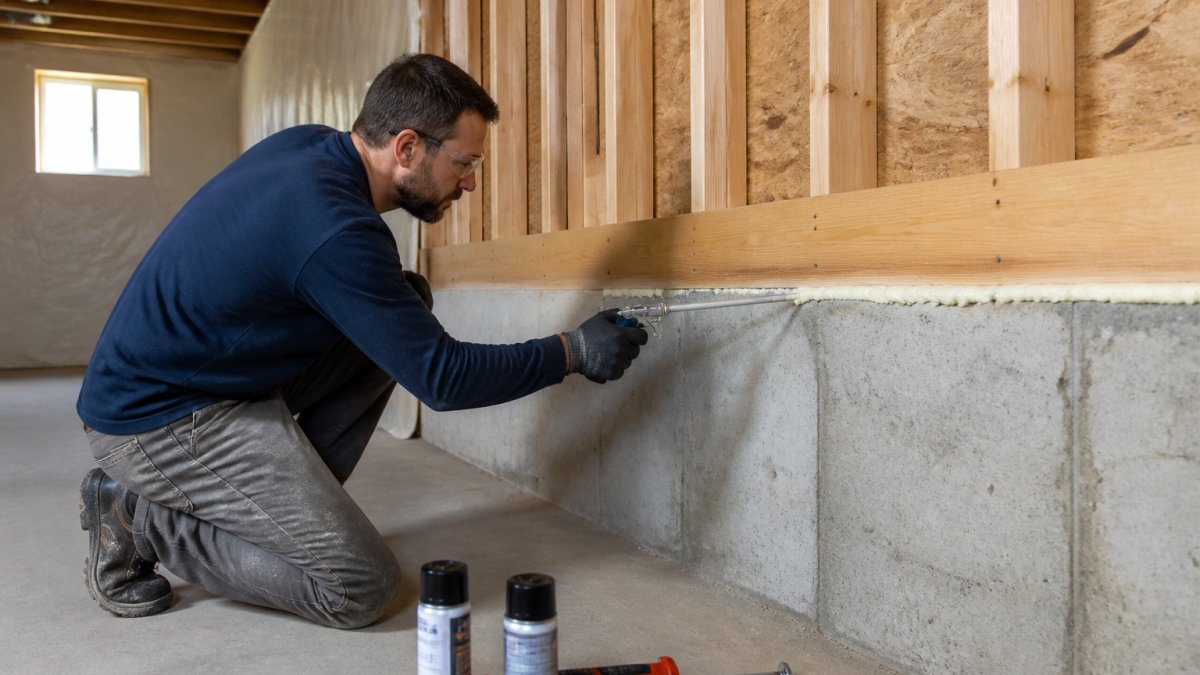
A typical sequence for sealing a rim joist is:
- Vacuum the rim joist cavity clean.
- Seal the seam between the sill plate and the foundation with caulk.
- Fill gaps around the rim joist with expanding foam.
- Cut rigid foam board to fit each cavity.
- Fasten the board and seal its edges with foam-compatible adhesive.
The sill plate is the wood board sitting directly on the concrete. Air can slip under that board in older homes.
Step 5: Close Penetrations Around Pipes, Wires, and Utility Openings
Utility openings are the leaks homeowners forget. Every pipe, wire, and vent that passes through a foundation wall or rim joist leaves a gap.
Fill small openings with caulk. For larger ones, use expanding foam in thin passes so it does not over-expand and bow the framing.
Check the utility openings from both sides. A gap that looks sealed from inside the basement may be wide open on the exterior.
Step 6: Install Rigid Foam Board and Seal Its Seams and Perimeter
Rigid foam board goes up after the air leaks are sealed, not before. Foam board insulates, but it does not stop air movement on its own.
Cut each board to fit snug against framing. Fasten it with foam-compatible adhesive and cap fasteners.
If you plan to install the foam yourself, our guide on how to insulate a basement yourself walks through the DIY steps in more detail.
Basement Moisture and Air Sealing: Managing Condensation and Drainage
Air sealing changes how moisture moves through a basement, and that can create condensation problems if you ignore it. Warm indoor air that used to leak out now stays in. If it meets a cold surface, bare concrete, a rim joist, the back of foam board, it condenses. Over a season, that moisture can wet framing, grow mold, and rot the very assembly you just sealed.
The fix is to treat air sealing, vapor control, and drainage as one sequence, not three separate projects. Here is the order that works:
- Resolve bulk water first. Fix grading, downspouts, and any active seepage before you seal a single gap. A wall that is wet behind a seal is a wall that will fail. Dampproofing or waterproofing belongs at this stage, not after the foam goes up.
- Seal air leaks next. Air movement carries far more moisture than vapor diffusion in most basements. Sealing the rim joist, sill plate, cracks, and penetrations is the highest-value moisture step you can take.
- Control vapor at the right layer. In most basement wall assemblies, the vapor retarder belongs on the warm-in-winter side of the insulation, not against the concrete. Putting a vapor barrier directly against a foundation wall traps moisture against the concrete and is a common cause of damp framing.
- Leave a drainage path. Keep foam board and framing off the floor by a small gap so any water that does get in can drain to the slab or a drain. Do not run a continuous bead of sealant along the floor line that dams water behind the wall.
- Insulate, then finish. Rigid foam board against the wall, sealed at seams and perimeter, is both insulation and a vapor-control layer when the joints are tight. Framing and drywall go up only after the assembly is dry and sealed.
Condensation: where it shows up and what it means
After the first cold snap, check the foam board, the rim joist, and the bottom plate for beads of water or dark staining. Condensation on the interior face of foam board usually means warm, humid indoor air is still reaching a cold surface, a sign of an unsealed gap, not a reason to remove the foam.
Running a dehumidifier during humid months can help limit condensation on cool surfaces.
Never seal a wall that is actively wet. Sealing traps moisture inside the assembly, and the repair will fail, often within one season. Fix the water source first, then seal.
Air sealing is not insulation
These are two different jobs. Air sealing stops the movement of air; insulation slows heat transfer. Foam board does some of both, but it does not replace sealing the gaps behind it, and sealing alone will not keep a basement warm.
For a workspace or office, our guide on controlling moisture in a basement office covers practical steps for keeping the space dry.
Book a Free Estimate with Berry Basements
Sealing air gaps is a job most homeowners can start, but the wall assembly has to be right before framing and finishes go up.
That is where we come in. Berry Basements has been serving the Grand Rapids area since 2017 as a licensed basement contractor, and we manage complex basement projects from planning through execution.
If you are ready to move, request a free estimate from Berry Basements.
Frequently Asked Questions
How do you find air leaks in basement walls?
Start with a visual inspection of the foundation wall for cracks, gaps at the sill plate, and openings around pipes and wires. On a cold or windy day, hold the back of your hand near suspected spots to feel drafts, or use a lit incense stick and watch the smoke drift. A blower door test run by a professional gives the most accurate picture of where basement air leaks are coming from before you seal anything.
Can you use spray foam to seal basement wall gaps?
Yes. Expanding spray foam works well for gaps wider than about 1/4 inch, around penetrations, and along rim joists. Use closed-cell foam in rim joist cavities because it resists moisture and adds a small amount of insulation. For hairline cracks in concrete or masonry, a polyurethane caulk is usually the better fit. Always check that the foam is compatible with the substrate and follow the can’s cure times before adding wall finishes.
Can air sealing a basement cause moisture problems?
It can if you seal the interior without addressing water coming in from outside. Trapped moisture against a foundation wall can lead to condensation, mold, and rot in the wall assembly. Fix grading, downspouts, and any active leaks first, then seal air gaps. In damp basements, pair air sealing with dampproofing and proper drainage so the wall can dry to the interior or exterior as designed.
Should basement walls be sealed before insulation is installed?
Yes. Seal cracks, penetrations, and rim joist gaps before adding rigid foam board or any other insulation. Sealing first stops warm interior air from reaching cold concrete, which is where condensation forms. It also keeps fiberglass and other porous insulation from being bypassed by air movement. Once the air barrier is continuous, install foam board against the foundation wall and seal its seams and perimeter edges.
Sealing air gaps in a basement wall assembly takes planning, the right materials, and a moisture plan before anything gets covered up. If you would rather hand off the technical work, Berry Basements brings licensed crews, a collaborative planning process, and experience managing waterproofing and structural changes. Get started with Berry Basements and turn your basement into a dry, comfortable living space.
