

Table of Contents
- Quick Comparison: 5 Best Materials for Basement Flooring
- 1. Luxury Vinyl Plank (LVP): The Waterproof All-Rounder
- 2. Porcelain Tile: Unbeatable Moisture Resistance
- 3. Epoxy Floor Coating: Seamless and Industrial-Strength
- 4. Carpet Tiles: Warmth and Comfort for Living Spaces
- 5. Engineered Hardwood: High-End Look With Moisture Limits
- Waterproof Basement Flooring Options: What Actually Works Below Grade
- How to Prepare Concrete for Basement Flooring
- Frequently Asked Questions
Last Updated: September 19, 2026
Quick Comparison: 5 Best Materials for Basement Flooring
Choosing basement flooring starts with one hard truth: below-grade concrete stays damp, and most flooring fails because of moisture, not foot traffic. Berry Basements ranks the five best materials for basement flooring in 2026 by moisture resistance, humidity tolerance, and warmth on cold slabs.
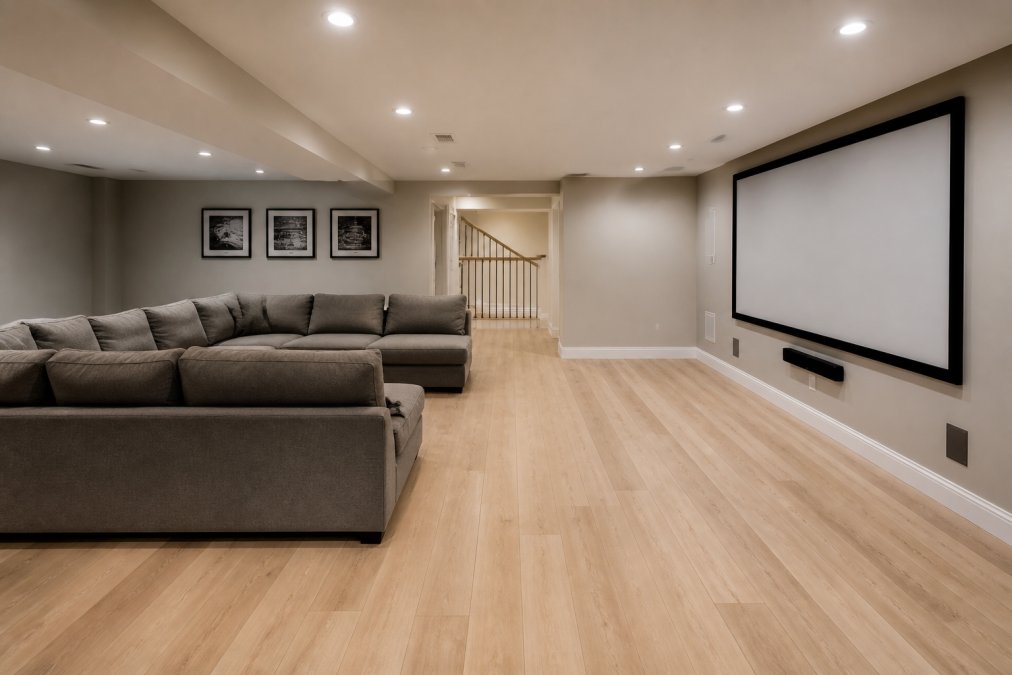
Here’s how the five options stack up.
| Material | Waterproof? | DIY-Friendly? | Best For |
|---|---|---|---|
| Luxury vinyl plank | Yes | Yes | All-around living spaces |
| Porcelain tile | Yes | No | Wet or humid basements |
| Epoxy coating | Yes | No | Gyms, workshops, utility rooms |
| Carpet tiles | No | Yes | Playrooms, cozy living areas |
| Engineered hardwood | No | Somewhat | Dry, climate-controlled basements |
1. Luxury Vinyl Plank (LVP): The Waterproof All-Rounder
Luxury vinyl plank is the safest bet for most basements. Its rigid core is 100% waterproof, so minor seepage won’t ruin the floor.
Pros and Cons of LVP
Pros:
- Fully waterproof core handles below-grade dampness
- Click-lock installation is simple for confident DIYers
- Warmer underfoot than tile or concrete
Cons:
- Feels cold without an added underlayment
- Cheap versions can dent under heavy furniture
Lay a 6-mil or thicker vapor retarder under floating LVP, even though the planks are waterproof. The barrier protects the planks from slab moisture and stops the floor from trapping damp air underneath.
2. Porcelain Tile: Unbeatable Moisture Resistance
Porcelain tile wins on moisture. Its dense clay body absorbs almost no water, so humidity and occasional seepage don’t bother it.
Pros and Cons of Porcelain Tile
Pros:
- Effectively impervious to water damage
- Lifespan measured in decades
- Works with radiant floor heating
Cons:
- Professional installation is essentially required
- Grout needs periodic cleaning and sealing
3. Epoxy Floor Coating: Seamless and Industrial-Strength
Epoxy bonds directly to concrete and cures into a seamless, waterproof shell with no joints for moisture to sneak through.
Pros and Cons of Epoxy
Pros:
- Completely waterproof, seamless surface
- Easy to sweep and mop
- Decorative flake and gloss finishes available
Cons:
- Demands serious concrete surface preparation
- Curing time keeps the space off-limits for days
4. Carpet Tiles: Warmth and Comfort for Living Spaces
Carpet tiles bring softness and warmth to a cold concrete slab. The modular squares let you replace one stained section instead of the whole floor.
Pros and Cons of Carpet Tiles
Pros:
- Soft and warm underfoot
- Individual tiles swap out easily
- Adds thermal insulation and impact sound insulation
Cons:
- Not built for wet basements
- Traps dust and allergens over time
5. Engineered Hardwood: High-End Look With Moisture Limits
Engineered hardwood delivers real wood at a fraction of the stability risk of solid planks. Its plywood core resists the swelling that ruins solid hardwood below grade.
Pros and Cons of Engineered Hardwood
Pros:
- Authentic wood appearance
- More dimensionally stable than solid wood
- Can boost home resale value
Cons:
- Sensitive to high humidity and moisture
- Most expensive option here
Waterproof Basement Flooring Options: What Actually Works Below Grade
“Waterproof” gets thrown around loosely in flooring marketing. Below grade, it should mean the material will not swell, warp, delaminate, or feed mold when it meets slab moisture. By that standard, only three of the five materials here qualify, luxury vinyl plank, porcelain tile, and epoxy coating. Water-resistant laminate and engineered hardwood tolerate humidity, but standing water or sustained vapor drive will still ruin them.
Why the slab, not the material, decides the outcome
Concrete is porous. Even a bone-dry-looking slab constantly passes water vapor from the soil beneath it, and rising groundwater, hydrostatic pressure, finds every seam, crack, and cold joint. A waterproof plank on a wet slab fails not because water gets through the plank, but because moisture collects underneath and mold colonizes the concrete and the floor’s underside.
The radon question most guides skip
If you live in an area with elevated radon, your flooring choice interacts directly with your mitigation system. Radon is a soil gas that enters through slab cracks, sump pits, and drain openings; a sub-slab depressurization system uses a pipe and fan to pull it from beneath the slab and vent it above the roofline. Sealing the slab with a coating or continuous membrane can improve system performance by reducing uncontrolled soil-gas entry points, but a floating floor over a poorly sealed slab can trap soil gas and mask the problem.
A few practical rules:
- If you have an active radon mitigation system, do not cover or block the suction point, the manometer, or any test ports with flooring.
- Test radon before and after a major flooring project. Short-term test kits are inexpensive and widely available; many state health departments distribute them at low or no cost.
- If you’re installing epoxy or a sealed membrane, coordinate with your radon contractor so the slab seal and the depressurization system work together rather than against each other.
- Never rely on flooring alone as radon mitigation. Only a properly designed and installed system, verified by testing, reduces radon levels.
Waterproof vs. water-resistant: a quick reality check
| Material | Waterproof? | Handles hydrostatic pressure? | Notes |
|---|---|---|---|
| Luxury vinyl plank | Yes (core) | Only with a vapor retarder beneath | Floating installs need a membrane |
| Porcelain tile | Yes | Yes, if the slab is sound | Grout is the weak point |
| Epoxy coating | Yes | Yes | Bonds directly to slab; needs dry, prepped concrete |
| Water-resistant laminate | No | No | Swells at seams under standing water |
| Engineered hardwood | No | No | Plywood core tolerates humidity, not seepage |
the EPA’s guide to moisture control and the EPA’s radon resources for homeowners are both worth reading before you commit to a material.
Never install carpet, laminate, or engineered hardwood directly on a slab with visible dampness, a musty smell, or a failed moisture test. Trapped moisture grows mold within weeks, and you’ll be ripping the floor back out, often along with the subfloor and part of your budget.
Waterproof flooring is only half the equation. The slab, the vapor retarder, and, where radon is a concern, your mitigation system do the rest of the work. Get the moisture and radon picture right before you buy a single box of planks.
How to Prepare Concrete for Basement Flooring
Subfloor prep is where basement flooring projects succeed or fail, and where budgets quietly blow up. These are the same steps a pro crew follows; only the equipment, time, and cost change between DIY and professional work.
Step 1: Test the slab for moisture
You cannot eyeball this. Two tests are common:
- Plastic sheet test (DIY-friendly). Tape a 2-foot-by-2-foot square of clear polyethylene to the slab, seal all four edges, and leave it for 24 to 72 hours. Condensation on the underside of the sheet, or a darkened slab beneath it, signals vapor drive.
- Calcium chloride test (ASTM F1869). A measured dish of calcium chloride is weighed before and after exposure. Results are reported in pounds of water vapor per 1,000 square feet per 24 hours. Most flooring manufacturers publish a maximum acceptable rate, often in the 3-to-5 lb range for moisture-sensitive materials.
- In-situ relative humidity probe (ASTM F2170). Holes are drilled into the slab and probes measure internal humidity. This is the most accurate method and the one most installers now prefer.
If the slab fails, do not install a moisture-sensitive floor. Address drainage, add a vapor retarder, or choose a material that tolerates the reading.
Step 2: Fix water before you fix the floor
No flooring system survives an active leak. Check gutters, downspout discharge, grading around the foundation, and any interior drain or sump. Efflorescence, the white, chalky mineral deposit on concrete, signals water moving through the slab. Fix the source first.
Step 3: Level, patch, and clean
- Fill cracks and control joints with a concrete patching compound rated for the application.
- Level low spots with a self-leveling compound. Most flooring manufacturers allow no more than about 1/8 inch of deviation over a 10-foot span for rigid materials like tile and LVP.
- Grind or etch the surface for epoxy and tile adhesion. Epoxy in particular needs a profile, a mechanically abraded, slightly rough surface, or it will peel.
- Vacuum thoroughly. Dust is the enemy of every adhesive and coating.
Step 4: Install the vapor retarder
For floating floors, roll out a 6-mil or thicker polyethylene sheet, lap seams by at least 6 inches, and tape them. Run the membrane up the wall a few inches before you trim it. For glue-down and tile installs, use the manufacturer’s specified membrane or adhesive system.
Step 5: Acclimate the materials
Bring flooring boxes into the basement and let them sit for the period the manufacturer specifies, often 48 to 72 hours, so the planks or tiles adjust to the room’s temperature and relative humidity. Skipping this step is a common cause of gapping and buckling.
DIY vs. professional: what the numbers actually look like
Labor is the single biggest variable in a basement flooring budget. These ranges reflect typical market pricing; your local market, slab condition, and project complexity will move them.
| Task | DIY cost (per sq ft) | Pro cost (per sq ft) | Notes |
|---|---|---|---|
| Moisture testing | $0-$1 | $1-$3 | Pro tests include written results for warranty |
| Crack repair and patching | $1-$3 | $2-$5 | Depends on crack count and width |
| Self-leveling compound | $2-$4 | $3-$6 | Material-heavy; pours add up fast |
| Vapor retarder install | $0.50-$1.50 | $1-$2 | Taping seams is the tedious part |
| LVP click-lock install | $0 (your labor) | $2-$5 | Most DIY-friendly of the five materials |
| Porcelain tile install | Not recommended | $8-$20 | Requires wet saw, leveling system, skill |
| Epoxy coating | Not recommended | $4-$12 | Surface prep and cure control are critical |
When to call a pro
DIY makes sense for floating LVP and carpet tiles over a slab that tests dry and level. Call a professional when:
- The slab fails a moisture test or shows efflorescence.
- You need self-leveling compound over a large area, mixing and pouring it correctly is a skill.
- You’re installing tile or epoxy. Both are unforgiving of prep mistakes.
- You have an active radon mitigation system that needs to be worked around.
- There’s any question about structural cracks, drainage, or waterproofing.
Budget 15 to 25 percent of your total project cost for subfloor prep. If your slab is in rough shape, that number can climb. Getting the prep right the first time is cheaper than redoing the floor in two years.
Test first, fix water second, prep third, install last. The order matters more than the material you pick. A cheap floor on a properly prepped slab will outlast an expensive floor on a wet one.
Frequently Asked Questions
What is the best flooring material for a basement?
Luxury vinyl plank (LVP) is the best all-around choice for most basements. It is 100% waterproof and handles below-grade moisture well. Porcelain tile and epoxy are also excellent if you want maximum water resistance. The right pick depends on how you use the space, your budget, and your basement’s moisture levels.
Is it better to have carpet or LVP in a basement?
LVP wins for moisture resistance and durability. It will not grow mold or mildew if minor seepage occurs. Carpet tiles offer warmth and comfort underfoot, which suits playrooms and living areas, but they are not suitable for basements with active flooding risks. If your basement stays dry, carpet tiles work well. If moisture is a concern, choose LVP.
What is the cheapest way to cover a concrete basement floor?
Polished concrete and waterproof laminate are often budget-friendly options. Polished concrete uses your existing slab, so you skip the cost of new material. Epoxy coating is another cost-effective choice. For a free estimate on your specific basement, contact Berry Basements.
Does basement flooring require a vapor barrier?
Yes, almost always. A vapor retarder or moisture barrier under your flooring prevents hydrostatic pressure and ground moisture from reaching the material. Without one, even waterproof flooring can trap moisture underneath, leading to mold and mildew. The barrier type depends on your subfloor and flooring choice. A contractor can test your basement’s moisture levels and recommend the right approach.
How much does basement flooring installation cost?
Material costs vary depending on what you choose. Professional installation adds labor, subfloor prep, and moisture mitigation. DIY saves on labor but requires proper tools and subfloor preparation. Berry Basements offers free estimates for a precise quote.