

Table of Contents
- Why Construction Dust Is a Bigger Problem Than It Looks
- How to Seal Off a Room for Construction the Right Way
- Best Air Scrubbers for Home Renovation: DIY vs. Professional Equipment
- Minimizing Construction Dust at the Source
- Daily Dust Control Habits That Keep the Job Site Manageable
- Cleaning Up Construction Dust After Remodeling
- Smart Home Integration and Air Quality Monitoring During Renovation
- Conclusion
Last Updated: August 13, 2026
Why Construction Dust Is a Bigger Problem Than It Looks
Construction dust doesn’t stay where you create it. Fine particulates become airborne and travel through gaps around doors, into HVAC ductwork, and across surfaces you never touched with a tool. A single day of drywall sanding can coat an entire floor of your home if you haven’t contained the work zone properly. At Berry Basements, we’ve managed dust control on dozens of finished basement projects, and the pattern is consistent: homeowners who plan for dust control from day one finish with cleaner homes, healthier families, and fewer post-project headaches.
Health Risks of Silica, Drywall, and Fine Particulate Dust
Not all construction dust carries the same risk. Silica dust is the most serious hazard in residential renovation work. It’s released when cutting, grinding, or drilling into concrete, brick, tile, or stone. Prolonged exposure to silica dust is linked to silicosis, a permanent and progressive lung disease. According to OSHA’s silica dust standards for construction, silica is classified as a serious occupational health hazard.
Drywall dust is less acutely dangerous but still problematic. It contains calcium sulfate and can irritate the respiratory tract. Fine particulates from drywall sanding can stay suspended in air for hours.
General demolition dust carries whatever the structure contains: old insulation fibers, paint particles, and decades of accumulated debris. Older homes may contain asbestos or lead paint, which require professional abatement before any renovation work begins. The EPA guidance on lead paint in older homes outlines when testing and professional removal are legally required.
Treat all construction dust as a respiratory hazard, regardless of the material. An N95 respirator is the minimum for anyone in or near the work zone.
How to Seal Off a Room for Construction the Right Way
Effective containment starts before the first tool comes out. The goal is to create a physical barrier between the work zone and the rest of your living space, preventing airborne particles from migrating.
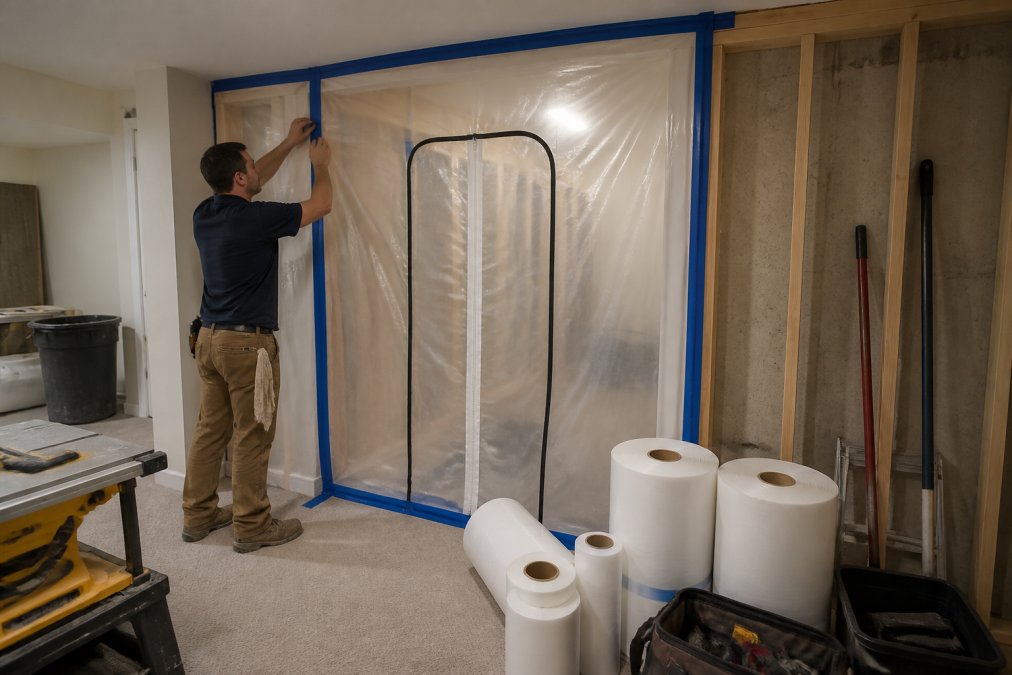
Here’s what a proper containment setup looks like:
- Clear the room of furniture, rugs, and anything porous before work begins
- Cover remaining fixed items with heavy plastic sheeting secured with painter’s tape
- Seal all doorways and openings with 6-mil poly sheeting, taped on all four sides
- Install a zippered containment door at the primary entry point so workers can pass through without breaking the seal
- Block all HVAC vents and cold air returns in the work zone with poly sheeting and tape
- Seal the gap under any doors that lead to occupied areas
The zippered containment door is critical. A simple plastic sheet that workers push through defeats the purpose: every entry creates a pressure differential that pulls dust into the adjacent space. A proper zippered panel maintains the containment zone’s integrity throughout the workday.
Building a Zippered Containment Door and Barrier System
A zippered containment door is a pre-made panel with a zipper running floor to ceiling that attaches to a doorframe with adhesive strips or tape. Many hardware stores and online suppliers carry them in standard door widths. For non-standard openings, you can build one using 6-mil poly sheeting and a zipper track system.
Every wall penetration, electrical outlet, and vent in the containment zone needs attention. Sealing seams where the poly sheeting meets the floor is especially important: dust migrates along floor surfaces even when the air appears still.
Protecting HVAC Vents and Ductwork from Dust Infiltration
HVAC protection is where many DIY containment setups fail. Covering the vents in the work zone isn’t enough. If your system is running, it creates airflow that can pull fine particulates from the containment zone into the return air stream, distributing dust throughout the house.
The safest approach during heavy demolition or drywall work is to shut the HVAC system off entirely and seal every supply and return register in the work zone with poly sheeting and tape. For longer projects, consider running the system only during off-hours when no dusty work is happening. After the project, replace your HVAC filter before restarting the system.
Best Air Scrubbers for Home Renovation: DIY vs. Professional Equipment
Air scrubbers are the most effective active tool for controlling airborne particles during renovation. The question most homeowners face is whether to rent professional-grade equipment or assemble a DIY setup.
| Option | Best For | Key Limitation |
|---|---|---|
| Rental air scrubber with HEPA filter | Projects over 3 days, large rooms | Rental cost, requires pickup/return |
| Consumer HEPA air purifier | Small rooms, short projects | Lower airflow volume |
| Box fan + HEPA filter (DIY) | Very small spaces, tight budgets | Not rated for construction use |
| Professional negative pressure unit | Full renovations, silica work | Requires contractor or rental |
HEPA Filtration, Negative Air Pressure, and Pre-Filter Systems
HEPA filtration is the standard for construction dust control. HEPA filters capture particles down to 0.3 microns, covering fine particulates released by drywall sanding, demolition, and cutting work. Any air scrubber you use should have a true HEPA filter, not a "HEPA-style" designation.
Negative air pressure is the professional approach. A negative air machine exhausts air from the containment zone to the outside, creating lower pressure inside than in the surrounding home. This means air flows into the containment zone rather than out of it, preventing dust migration. For basement renovations involving significant demolition or silica-generating work, negative air pressure is the right call.
Pre-filter systems extend the life of your HEPA filter by capturing larger particles before they reach the main filter. Most rental air scrubbers include a pre-filter stage.
Run your air scrubber continuously during work hours, not just when dust is visibly heavy. Fine silica dust and drywall particulates are often invisible to the naked eye and remain suspended in air long after the work stops.
Minimizing Construction Dust at the Source
The most overlooked dust control strategy is suppression at the point of generation. Every tool that cuts, sands, or grinds can be paired with equipment that captures dust before it becomes airborne.
Dust Extractors, Shrouds, and Wet Work Methods
A dust extractor is a purpose-built vacuum designed to capture fine construction dust at the tool. Unlike a standard shop vacuum, a dust extractor is rated for fine particulates and typically includes a HEPA filter. Most modern power tools accept a dust shroud that connects directly to a dust extractor hose.
The combination of a dust shroud and extractor captures the majority of dust at the source, dramatically reducing the load on your containment barriers and air scrubbers. For drywall sanding specifically, a pole sander with an integrated dust shroud connected to a HEPA extractor is the single most effective setup available.
Wet work methods suppress dust by binding particles before they can become airborne. This works well for tile, concrete, and masonry cutting.
Strategic Demolition Planning to Cut Airborne Particles
Demolition order matters significantly. Plan demolition in stages:
- Remove soft materials first (carpet, insulation, ceiling tiles) while the space is still intact
- Bag and remove soft debris before starting hard demolition
- Wet down surfaces before breaking up concrete, tile, or masonry
- Work in sections rather than opening up the entire space at once
This staged approach keeps dust generation localized and gives your extraction and filtration equipment a manageable volume to handle.
Never use a leaf blower or compressed air to clear construction dust. This launches settled fine particulates back into the air and can create silica dust concentrations that are genuinely dangerous.
Daily Dust Control Habits That Keep the Job Site Manageable
A containment zone that starts clean on Monday becomes unmanageable by Friday if no one maintains it. Daily habits are what separate a controlled job site from a dust disaster.
End-of-day protocol:
- Vacuum all horizontal surfaces in the work zone with a HEPA shop vacuum before leaving
- Check the containment barrier for tears, gaps, or lifted tape and repair immediately
- Empty the dust extractor and shop vacuum before the filter becomes overloaded
- Inspect the HVAC vent covers to confirm they’re still sealed
During the workday:
- Use damp mopping rather than dry sweeping to collect settled dust
- Keep a roll of tape and extra poly sheeting accessible for immediate repairs to the containment barrier
- Avoid running the HVAC system during peak dust-generating activities
Containment barriers degrade throughout the workday. Tape loses adhesion, poly sheeting gets punctured, and the gaps that result become dust pathways. Checking the barrier at midday catches problems before they compound.
Damp mopping beats dry sweeping every time. Dry sweeping sends settled fine particulates back into the air, undoing hours of filtration work. Use microfiber cloths and damp mopping exclusively for dust cleanup.
Cleaning Up Construction Dust After Remodeling
Post-remodel cleanup requires a systematic, room-by-room approach that goes beyond a standard cleaning session. Even with excellent containment, fine construction dust infiltrates the rest of the home to some degree.
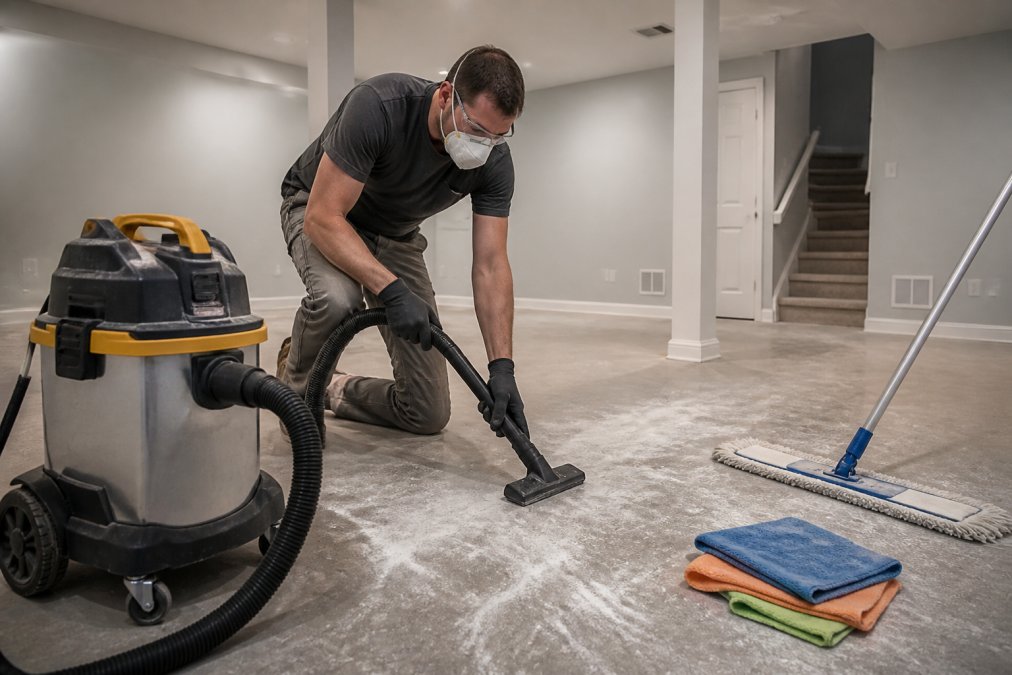
Always work top to bottom, and always use a HEPA vacuum before any wet cleaning. Vacuuming first captures the bulk of settled dust; wet cleaning afterward picks up the fine residue that vacuuming leaves behind.
Post-Remodel Deep Cleaning Protocols: Room by Room
In the renovation space itself:
- Vacuum all surfaces with a HEPA shop vacuum: walls, ceiling, window sills, and floors
- Wipe all hard surfaces with damp microfiber cloths, rinsing frequently
- Damp mop hard floors twice, using clean water for the second pass
- Replace any HVAC filters serving the space before turning the system back on
- Allow the space to air out with windows open for several hours before occupying
In adjacent rooms:
- Remove and wash or dry-clean any soft furnishings, curtains, or rugs that were in place during the renovation
- Vacuum upholstered furniture with a HEPA attachment
- Wipe hard surfaces and furniture with damp microfiber cloths
HVAC system post-cleanup:
Replace all filters in the system before restarting. If the renovation was extensive or involved silica-generating work, having the ductwork professionally inspected and cleaned is worth considering. According to EPA guidance on indoor air quality after renovation, dust infiltration into ductwork can continue to degrade indoor air quality for weeks after a renovation if not addressed.
Clean the inside of light fixtures, ceiling fan blades, and return air grilles. These surfaces collect fine dust that then redistributes every time the HVAC runs.
Smart Home Integration and Air Quality Monitoring During Renovation
Modern air quality monitors give you real-time data on what’s actually happening in your home during a renovation. A good air quality monitor measures fine particulate matter (PM2.5), which is the particle size range most associated with construction dust health risks.
Place one monitor inside the containment zone and one in the nearest occupied room. If the monitor in the occupied room shows rising PM2.5 readings during work hours, your containment is failing and needs immediate attention.
Several consumer-grade air quality monitors integrate with smart home platforms, allowing you to set alerts if particulate levels exceed a threshold while work is underway. This is especially useful for households with children, elderly residents, or anyone with respiratory sensitivities. For longer renovation projects, continuous air quality monitoring helps you evaluate which activities generate the most dust and schedule the most dust-intensive work for times when vulnerable family members are out of the house.
Managing construction dust during a basement renovation takes planning, the right equipment, and consistent daily habits. The health risks from silica dust and fine particulates are real, and containment failures are costly to clean up after the fact. Berry Basements has handled the full scope of dust management on basement finishing projects since 2017, from initial containment setup through post-remodel deep cleaning coordination. Our collaborative process means we plan for dust control before the first tool comes out, not as an afterthought. If you’re planning a basement renovation and want a contractor who manages every detail, contact Berry Basements for a free estimate.
Frequently Asked Questions
How do I keep construction dust from spreading to the rest of my house during remodeling?
Sealing the work area with plastic sheeting and a zippered containment door is the most effective first step. Cover HVAC vents in the work zone to stop construction dust from entering the duct system and recirculating through the house. Running an air scrubber with HEPA filtration inside the containment zone creates negative air pressure, pulling airborne particles toward the filter rather than letting them drift into living spaces.
How long does it take for dust to settle after renovation?
Fine particulates from drywall sanding or demolition can stay airborne for several hours in a room with no air movement. In a space with active ventilation but no filtration, some particles remain suspended for 24 hours or more. Running a HEPA air scrubber or air purifier significantly cuts that time. After work stops, give the containment zone at least a few hours with the scrubber running before beginning post-remodel cleanup.
Is silica dust from construction work actually dangerous in a home renovation?
Yes. Silica dust is released when cutting or grinding concrete, brick, or tile. Repeated exposure to fine silica particles is linked to silicosis, a serious and irreversible lung disease. OSHA's silica standard (29 CFR 1926.1153) covers construction work, and the agency sets a permissible exposure limit for respirable silica. Even for short DIY projects, wearing an N95 respirator or better and using wet cutting methods significantly reduces the risk.
What is the best way to contain construction dust in a single room?
Combine physical containment with active air management. Hang 6-mil plastic sheeting floor to ceiling across all openings and seal every seam with painter's tape. Install a zippered containment door for entry and exit. Cover HVAC registers with filter material and tape the edges. Place an air scrubber inside the zone and set it to create negative air pressure. This combination stops cross-contamination far more effectively than plastic sheeting alone.
This article was written using GrandRanker