

Table of Contents
- Why Fixing Basement Moisture Must Come First
- Step 1: Identify the Source of Moisture Intrusion
- Step 2: Test and Measure Moisture Levels
- How to Waterproof a Damp Basement Before Renovation
- Basement Humidity Control Methods for Long-Term Protection
- Cost of Basement Waterproofing and What to Budget
- Common Mistakes to Avoid Before You Remodel
- Conclusion
Last Updated: August 20, 2026
Why Fixing Basement Moisture Must Come First
Moisture problems in basements are deceptively simple to ignore, a musty odor, damp corners after rain, white mineral deposits on concrete. Most homeowners think they’ll deal with it later, after finishing the basement. This approach is backwards and expensive.
Finishing a damp basement is like painting over rust. Water continues moving through concrete via capillary action and hydrostatic pressure. Mold grows behind new walls. Your investment fails within years.
At Berry Basements, we’ve seen homeowners invest in basement renovations, only to discover within two years that moisture has compromised the entire project. The solution is to fix the moisture problem before you remodel.
This guide walks you through identifying water sources, measuring moisture levels accurately, waterproofing properly, and maintaining humidity long-term. If you’re planning to finish your basement, read this first. The work you do now determines whether your finished space lasts 20 years or becomes a costly mistake.
Step 1: Identify the Source of Moisture Intrusion
Before fixing basement moisture, you need to know where it’s coming from. Moisture arrives through three pathways: exterior water seeping through foundation walls, groundwater rising through the concrete floor via capillary action, or condensation forming on cold surfaces. Identifying which one changes your solution.
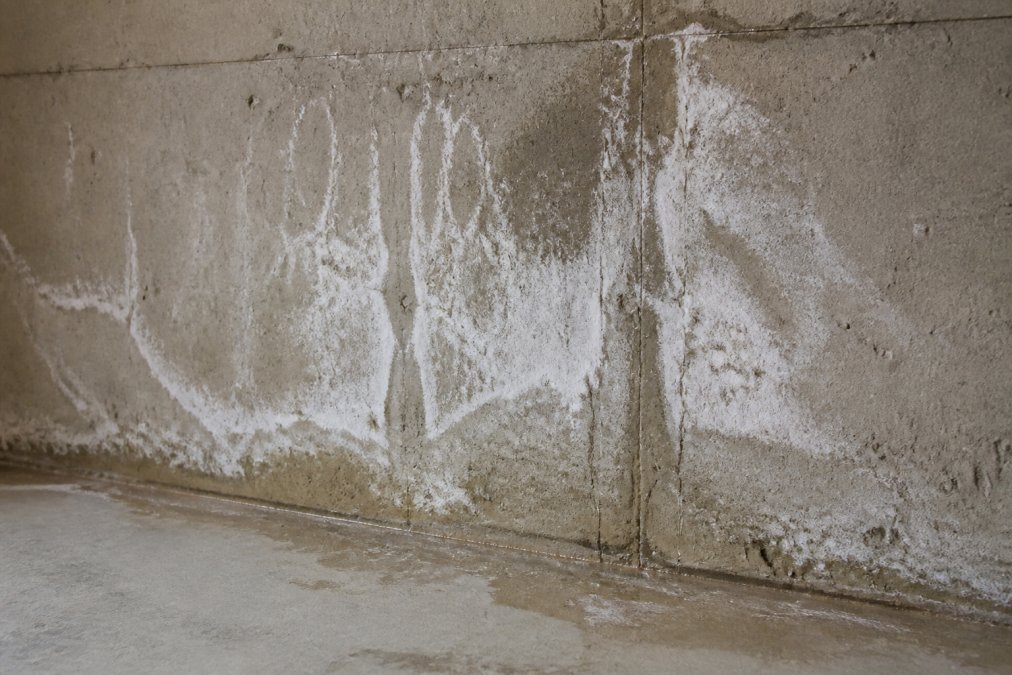
Interior signs: efflorescence, mold, and musty odors
White, chalky deposits on concrete are efflorescence, mineral residue left when water evaporates. It signals that water is moving through your foundation walls. Dark streaks or discoloration indicate seepage points where water enters consistently. Black or green mold, particularly in corners or along wall bases, means moisture levels are high enough to support biological growth. Musty odors without visible mold suggest elevated humidity and possible hidden mold.
Check exposed subfloors for soft spots, discoloration, or visible rot, indicating moisture wicking up through the concrete slab into wood framing. This is a structural concern demanding immediate attention before renovation.
Exterior clues: grading, downspout placement, and water table
Poor grading is one of the most common moisture sources. Soil should slope downward at least 6 inches over the first 10 feet away from the house. If it slopes toward your foundation, water naturally flows there.
Check downspouts. Many homes have gutters draining directly at the foundation base. Downspouts should extend at least 4 to 6 feet away, directing water away from the house. If your basement is below the natural water table or in an area with poor drainage, it’s inherently prone to moisture. If neighbors’ basements also have moisture issues, you’re dealing with a site-level water problem.
Step 2: Test and Measure Moisture Levels
Identifying sources is the first step. Quantifying moisture is the second. You can’t manage what you don’t measure.
Using a moisture meter on concrete and subfloor
A moisture meter reads moisture content of concrete and wood. For concrete, push the meter’s pins into the surface. Concrete is "dry" below 3 percent. Readings above 5 percent indicate problems; above 8 percent is severe.
Test multiple locations: along walls with visible seepage, in corners where moisture accumulates, and in the floor center. If readings spike near walls, water enters through foundation walls. If consistently high across the floor, sub-slab moisture is rising through capillary action.
For wood framing, readings above 16 percent indicate moisture absorption. Above 20 percent, wood deteriorates. These readings show whether moisture is already damaging structural elements.
Calcium chloride test for sub-slab moisture
The calcium chloride test measures moisture vapor emissions from concrete slabs, essential if you’re installing carpet or laminate, which trap moisture and fail quickly if the slab is too wet.
Place a calcium chloride test kit on your concrete floor in a sealed container for 24 to 72 hours. The kit absorbs moisture and changes weight, revealing the moisture vapor emission rate. If your slab exceeds flooring manufacturers’ limits, address sub-slab moisture before finishing.
How to Waterproof a Damp Basement Before Renovation
Waterproofing before remodeling is the foundation of a successful project. Three complementary approaches work together: interior waterproofing systems managing moisture inside, exterior drainage preventing water from reaching your foundation, and vapor barriers blocking moisture from entering finished spaces.
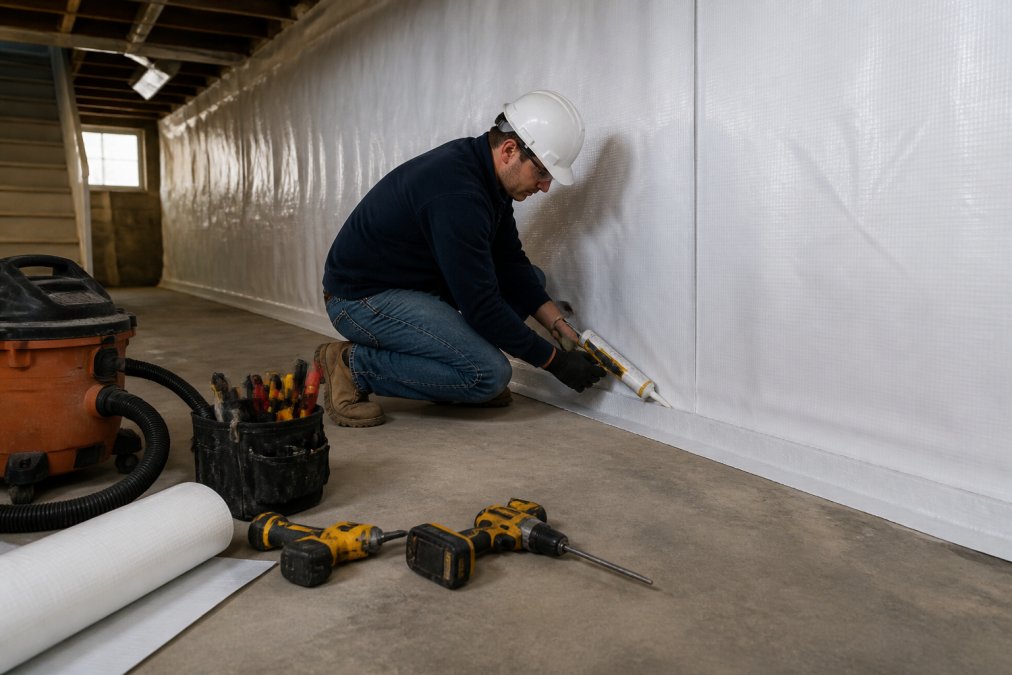
Interior waterproofing systems and sealants
Interior waterproofing seals the concrete surface and redirects water that enters. Concrete sealants fill surface pores and reduce water penetration rates. Waterproofing membranes create a continuous barrier on the interior foundation wall.
The process involves cleaning concrete thoroughly, patching cracks or damage, then applying sealant or membrane coating. For walls, this might be brush-applied or spray-applied membrane. For floors, sealants apply directly to concrete. These products work best for managing seeping water but don’t solve hydrostatic pressure problems where water is actively forced through concrete.
Interior waterproofing is faster and less disruptive than exterior solutions, no foundation excavation needed. The downside is water still enters your foundation; you’re managing it inside. For mild to moderate moisture problems, interior waterproofing combined with proper grading often solves the issue. Severe problems with active seepage or high water tables require exterior solutions.
Exterior drainage: foundation drainage, weeping tile, and sump pumps
Exterior solutions prevent water from reaching your foundation. Foundation drainage systems (French drains or weeping tile) installed around the exterior foundation perimeter below grade collect soil water and direct it away.
The system consists of perforated pipe surrounded by gravel, wrapped in landscape fabric to prevent soil clogging. The pipe slopes away from the foundation to daylight or to a sump pump. Sump pumps sit in a pit at the lowest basement point and automatically pump water out when levels rise.
Exterior drainage is the most effective long-term solution but requires foundation excavation. It’s more expensive and disruptive than interior waterproofing but actually solves the problem. Combining exterior drainage with interior waterproofing creates a comprehensive moisture control system.
Vapor barriers and moisture barriers for finished spaces
Vapor barriers prevent moisture vapor from entering finished spaces. Polyethylene sheeting is a common vapor barrier material with low permeability.
Vapor barriers install on the warm side of walls and floors, the interior side in your basement, between concrete and insulation or between subfloor and finished flooring. They stop moisture vapor from concrete migrating into walls and damaging insulation, drywall, or flooring.
Waterproofing prevents liquid water entry. Vapor barriers prevent moisture vapor passage. Both are necessary for a truly dry, finished basement. Without a vapor barrier, moisture vapor can condense inside walls, creating mold conditions even if you’ve sealed all liquid water entry points.
Basement Humidity Control Methods for Long-Term Protection
After addressing moisture intrusion and installing waterproofing, manage relative humidity. Even well-waterproofed basements have some moisture vapor. Controlling humidity keeps moisture levels low enough to prevent mold, musty odors, and material degradation.
Dehumidifiers and air exchange strategies
Dehumidifiers remove moisture from air. For a finished basement, a properly sized dehumidifier is often the simplest solution. It pulls moisture from air and drains water away through a drain line or collection bucket.
The challenge is continuous operation and electricity consumption. For a 1,000 square-foot basement, expect 8 to 12 hours daily operation during humid months. Air exchange, bringing in fresh, dry air and exhausting humid air, works well in dry climates but increases indoor humidity during humid summers when outside air is more humid than air-conditioned basement air. It’s most effective during dry seasons.
HVAC integration and relative humidity targets
The most effective long-term humidity control integrates your basement into your home’s HVAC system. Central air conditioning already dehumidifies as it cools. If your basement connects to your main HVAC system with proper return and supply ducts, air conditioning naturally manages basement humidity.
A properly designed HVAC system maintains relative humidity between 30 and 50 percent, preventing mold growth and keeping materials stable. Below 30 percent, air becomes uncomfortably dry. Above 50 percent, mold risk increases.
If your basement isn’t connected to HVAC, extending ductwork during remodeling is worthwhile. It’s far more effective long-term than standalone dehumidifiers and costs modestly when done during renovation.
Cost of Basement Waterproofing and What to Budget
Waterproofing costs vary based on problem extent and solutions chosen. Interior waterproofing typically costs less than exterior solutions. Exterior drainage systems with sump pumps are more expensive but comprehensive.
Costs depend on whether you’re addressing existing moisture or implementing preventive waterproofing during planned renovation. Adding waterproofing during remodeling is more efficient than separate projects.
For a detailed estimate, contact a local contractor to assess moisture sources and recommend solutions. Berry Basements offers a free estimate for waterproofing and basement remodeling. The team identifies moisture sources, recommends waterproofing approaches, and provides transparent cost breakdown.
| Waterproofing Solution | Scope | Typical Approach |
|---|---|---|
| Interior sealant only | Mild seepage | Concrete cleaner, sealant application |
| Interior membrane + grading fixes | Moderate moisture | Wall membrane, exterior grading repair |
| Exterior drainage + interior waterproofing | Severe moisture | Foundation drainage system, sump pump, interior sealing |
| Full system with HVAC integration | Comprehensive solution | All above plus ductwork extension and dehumidification |
Common Mistakes to Avoid Before You Remodel
The most expensive mistake is finishing a basement without addressing moisture first. Other pitfalls compound the problem.
One error is assuming a single solution solves all moisture issues. Homeowners think: "I’ll just install a sump pump" or "I’ll just seal the walls." Moisture problems are multi-faceted. A comprehensive approach addressing grading, drainage, wall waterproofing, and humidity control is far more effective than any single fix.
Another mistake is postponing moisture work while planning renovation. Moisture doesn’t improve with time; it worsens. Address moisture issues before framing, running electrical, or installing HVAC. Doing work in the wrong order wastes money and creates problems.
A third error is choosing materials without considering moisture. Some insulation, drywall, and flooring products are more moisture-resistant. Use materials rated for moisture-prone areas. Closed-cell spray foam is more moisture-resistant than fiberglass batts. Concrete or tile flooring is more moisture-resistant than carpet.
Finally, don’t skip testing. It’s tempting to assume moisture sources and skip directly to solutions. Testing with a moisture meter and understanding moisture vapor emission rates ensures you address the actual problem. This prevents wasted effort and ensures your waterproofing approach matches the issue’s severity.
Finishing a basement adds usable square footage, increases resale value, and creates family space. That investment only pays off if the basement stays dry. Moisture problems undermine everything. Address them first, thoroughly, with clear understanding of what you’re dealing with. Your finished basement will last decades instead of becoming a costly problem. If you’re ready to tackle basement moisture and plan renovation, Berry Basements can help. Our team manages complex waterproofing and remodeling projects across the Grand Rapids area, coordinating moisture solutions with structural work, HVAC integration, and custom finishing. Get a free estimate to see how we’d approach your specific basement.
Frequently Asked Questions
What are the signs of moisture issues in a basement before finishing?
Look for efflorescence (white chalky deposits on concrete), visible mold or mildew, musty odors, water stains, and peeling paint. Check for condensation on pipes and windows. These signs indicate active moisture intrusion or high relative humidity. A moisture meter reading above 16% on concrete or 12% on wood subfloor signals a problem that must be addressed before finishing, materials will fail and mold will develop in enclosed spaces.
How do I know if my basement moisture is fixable before remodeling?
Test with a calcium chloride moisture test and inspect your foundation for cracks, gaps, and water entry points. If moisture comes from surface water (poor grading or downspout placement), it's fixable with exterior drainage and grading corrections. If it's from hydrostatic pressure or a high water table, you may need a sump pump or sub-slab drainage system. A professional inspection identifies the source and determines the right waterproofing approach.
Can I finish a basement with minor dampness, or must I fix it completely first?
No, finishing over active moisture will cause material failure, mold growth, and structural damage. Even 'minor' dampness creates ideal conditions for mold remediation costs and health risks. Finished basements require moisture control below 50% relative humidity and concrete moisture readings below 3 lbs per 1,000 sq ft per 24 hours (measured by calcium chloride test). Fix the source first, then verify with testing before installing flooring, drywall, or insulation.
Will homeowner's insurance pay for basement waterproofing before remodeling?
Standard homeowner's insurance typically does not cover waterproofing as a preventive measure. However, if water damage has already occurred, some policies may cover remediation. Check your policy's water damage exclusions and talk to your insurer about coverage for foundation repairs. Many insurance companies require proof of waterproofing before covering finished basement improvements, so addressing moisture upfront can protect your investment and future claims.
This article was written using GrandRanker